Jasco Products Company
In-Wall Smart Dimmer
14321 (ZW3005)
Light Dimmer Switch
HW: 255
ZM5202
6.51.06
0x0063 (99)
0x4944 (18756)
0x3135 (12597)
ZC10-15030005
2015-03-18 06:04:32.46
N/A
Enhanced 232 Slave
Always On Slave
The Jasco Z-Wave Wireless Lighting Control Dimmer Switch enables wireless control of on/off and dim functions of hard-wired Dimmable LED/CFL and Incandescent lighting.
Transform any home into a smart home with the Jasco Z-Wave Wireless Lighting Control Dimmer Switch. The Jasco Z-Wave Wireless Lighting Control Dimmer Switch enables wireless control of on/off and dim functions of hard-wired dimmable LED/CFL and incandescent lighting. The dimmer switch replaces your current light switch, uses your existing wiring, and provides Z-Wave wireless and in-wall control of overhead lighting. Use the dimmer feature to customize the lighting output and create the perfect ambiance for any room. Providing ultimate flexibility, the Jasco Z-Wave Wireless Lighting Control Dimmer Switch allows you to operate the switch by itself or easily integrate the switch with two-way, three-way or four-way wiring configurations by adding the Jasco Auxiliary switch for Z-Wave. Two-way wiring configuration turns the light or appliance on/off from one location. Three-way wiring configuration turns the light or appliance on/off from two separate locations. Four-way wiring configuration turns the light or appliance on/off from three separate locations. The Jasco Auxiliary Switch for Z-Wave is required for three-way or four-way installations. The dimmer switch includes an LED indicator light to easily locate the switch in a dark room. Take control of your home lighting with Jasco Z-Wave Wireless Lighting Controls!
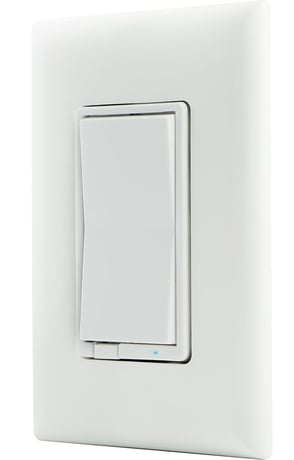
Product Picture


3 - LED
When shipped from the factory, the LED is set to turn ON when the connected light is turned OFF. This allows the LED to indicate the switch’s location in a dark room. To make the LED turn ON when the light is turned ON, change parameter 3’s value to 1, To turn the LED OFF at all times, change parameter 3’s value to 2.Size: 1 byte
Default: 0
Minimum: 0
Maximum: 0
Possible values
| From | To | Desription |
|---|---|---|
| 1 | 1 | To make the LED turn ON when the light is turned ON, change parameter 3’s value to 1 |
| 2 | 2 | To turn the LED OFF at all times, change parameter 3’s value to 2 |
4 - Invert Switch
If the switch is accidentally installed upside down with “On” at the bottom and “Off” at the top, the default On/Off rocker settings can be reversed by changing parameter 4’s value to “1”.Size: 1 byte
Default: 0
Minimum: 0
Maximum: 0
Possible values
| From | To | Desription |
|---|---|---|
| 1 | 1 | The default On/Off rocker orientation can be reversed by changing parameter 4’s value to “1”. |
7 - Dim Rate Adjustments When receiving a Z-Wave Dim Command
Both the number of steps (or levels) that the dimmer will change and the timing of the steps can be modified to suit personal preferences. The timing of the steps can be adjusted in 10 millisecond intervals. As an example, the default setting for parameter 8 is “3”. This means that the lighting level will change every 30 milliseconds when the Dim Command is received. A value of 255 would mean that the level would change every 2.55 seconds. Combined, the two parameters allow dim rate adjustments from 10 milliseconds to 4.2 minutes to go from maximum-to-minimum or minimum-to-maximum brightness levels.Size: 1 byte
Default: 1
Minimum: 0
Maximum: 0
Possible values
| From | To | Desription |
|---|---|---|
| 1 | 99 | number of steps or levels |
8 - Dim Rate Adjustments When receiving a Z-Wave Dim Command
Both the number of steps (or levels) that the dimmer will change and the timing of the steps can be modified to suit personal preferences. The timing of the steps can be adjusted in 10 millisecond intervals. As an example, the default setting for parameter 8 is “3”. This means that the lighting level will change every 30 milliseconds when the Dim Command is received. A value of 255 would mean that the level would change every 2.55 seconds. Combined, the two parameters allow dim rate adjustments from 10 milliseconds to 4.2 minutes to go from maximum-to-minimum or minimum-to-maximum brightness levels.Size: 2 bytes
Default: 3
Minimum: 0
Maximum: 0
Possible values
| From | To | Desription |
|---|---|---|
| 1 | 255 | timing of the steps |
9 - Dim Rate Adjustments When manually controlling dimming
Both the number of steps (or levels) that the dimmer will change and the timing of the steps can be modified to suit personal preferences. The timing of the steps can be adjusted in 10 millisecond intervals. As an example, the default setting for parameter 8 is “3”. This means that the lighting level will change every 30 milliseconds when the Dim Command is received. A value of 255 would mean that the level would change every 2.55 seconds. Combined, the two parameters allow dim rate adjustments from 10 milliseconds to 4.2 minutes to go from maximum-to-minimum or minimum-to-maximum brightness levels.Size: 1 byte
Default: 1
Minimum: 0
Maximum: 0
Possible values
| From | To | Desription |
|---|---|---|
| 1 | 99 | number of steps or levels |
10 - Dim Rate Adjustments When manually controlling dimming
Both the number of steps (or levels) that the dimmer will change and the timing of the steps can be modified to suit personal preferences. The timing of the steps can be adjusted in 10 millisecond intervals. As an example, the default setting for parameter 8 is “3”. This means that the lighting level will change every 30 milliseconds when the Dim Command is received. A value of 255 would mean that the level would change every 2.55 seconds. Combined, the two parameters allow dim rate adjustments from 10 milliseconds to 4.2 minutes to go from maximum-to-minimum or minimum-to-maximum brightness levels.Size: 2 bytes
Default: 3
Minimum: 0
Maximum: 0
Possible values
| From | To | Desription |
|---|---|---|
| 1 | 255 | timing of the steps |
11 - Dim Rate Adjustments When receiving an All-On or All-Off command
Both the number of steps (or levels) that the dimmer will change and the timing of the steps can be modified to suit personal preferences. The timing of the steps can be adjusted in 10 millisecond intervals. As an example, the default setting for parameter 8 is “3”. This means that the lighting level will change every 30 milliseconds when the Dim Command is received. A value of 255 would mean that the level would change every 2.55 seconds. Combined, the two parameters allow dim rate adjustments from 10 milliseconds to 4.2 minutes to go from maximum-to-minimum or minimum-to-maximum brightness levels.Size: 1 byte
Default: 1
Minimum: 0
Maximum: 0
Possible values
| From | To | Desription |
|---|---|---|
| 1 | 99 | number of steps or levels |
12 - Dim Rate Adjustments When receiving an All-On or All-Off command
Both the number of steps (or levels) that the dimmer will change and the timing of the steps can be modified to suit personal preferences. The timing of the steps can be adjusted in 10 millisecond intervals. As an example, the default setting for parameter 8 is “3”. This means that the lighting level will change every 30 milliseconds when the Dim Command is received. A value of 255 would mean that the level would change every 2.55 seconds. Combined, the two parameters allow dim rate adjustments from 10 milliseconds to 4.2 minutes to go from maximum-to-minimum or minimum-to-maximum brightness levels.Size: 2 bytes
Default: 3
Minimum: 0
Maximum: 0
Possible values
| From | To | Desription |
|---|---|---|
| 1 | 255 | timing of the steps |
1. Follow the instructions for your Z-wave certified controller to include a device to the Z-wave network. 2. Once the controller is ready to include your device, press and release the top or bottom of the wireless smart switch(rocker) to include it in the network. 3. Once your controller has confirmed that the device has been included, refresh the Z-wave network to optimize performance.
1. Follow the instructions for your Z-wave certified controller to exclude a device from the Z-wave network. 2. Once the controller is ready to Exclude your device, press and release the top or bottom of the wireless smart switch(rocker) to exclude it from the network.
1. Quickly press ON (Top) button three (3) times then immediately press the OFF (Bottom) button three (3) times. The LED will flash ON/OFF 5 times when completed successfully. Note: This should only be used in the event your networks primary controller is missing or otherwise inoperable.