Alarm.com
Alarm.com Hub
ADC-NK-100T
Central Controller
HW: 83 FW: 4.32:03.04
ZM5202
6.51.06
0x0094 (148)
0x0001 (1)
0x0102 (258)
ZC10-16065105
2016-06-09 16:06:31.3928
N/A
Static Controller
Central Static Controller
The Alarm.com Hub is a standalone home automation hub.
The Alarm.com Hub is a standalone home automation hub. It enables communication between home automation end-point devices and the Alarm.com cloud service via a cellular or Ethernet network. A user is able to remotely control functions on the Hub and its associated Alarm.com Interactive Services (including Z-Wave devices) via a web application or mobile app.
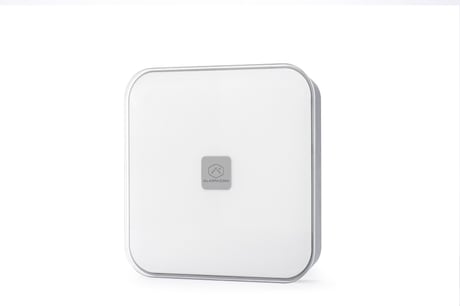
Product Picture
2.4 Learning the Alarm.com Hub into another Z-Wave network 1. Learning in the Alarm.com Hub using the Dealer Site a. Log in to the Alarm.com Dealer Site b. Select the customer whose node you wish to remove c. Navigate to the page to allow sending generic commands. This can be found in the AirFX Remote Toolkit. d. Place a controller on the existing network into add mode e. Send the specific generic command to the Hub, once received it will cause the Alarm.com Hub to learn into the existing Z-Wave network and will allow it to cause all relevant network information to be copied over from the controller that was put into add mode.
Support for the Wake Up command class is enabled using Alarm.com’s rules engine. This requires a series of rules pushed from the cloud when Alarm.com detects that a Wake Up device has been added to the Alarm.com Module. For this reason Wake Up notifications will only be handled properly by the Alarm.com module after any locally added Wake Up devices have been reported to the backend. This can take up to 15 minutes, but can be accelerated by using Remote Add or by requesting a Z-Wave Equipment List from the Alarm.com backend.
Use this procedure only in the event that the network primary controller is missing or otherwise inoperable. This resets the Hub to its factory settings. CAUTION: Factory Resetting erases all devices and settings. NOTE: The command to enable or disable Factory Resetting can be sent from the Alarm.com Dealer Website’s AirFX Toolkit. Factory Resetting is only available during the first 120 seconds after initially powering on the Hub. • After entering Advanced Mode, press and hold the Enrollment button ( ) for 10 seconds. When the reset process has begun, the Status Light will blink orange slowly and the Hub will beep five times. • To cancel Factory Resetting, you must immediately press and release the Enrollment button ( ). This feature is only available during the first five seconds after Factory Resetting has begun. • When Factory Resetting is complete, the Status Light will shine solid orange for 10 seconds. • Next, contact Alarm.com Customer Support to reinitialize the Hub.
If your Z-Wave devices have ever been used previously, first see the Removing Z-Wave Devices section on the next page. • For best results, bring the Hub into the room where your Z-Wave device is installed. The Hub does not have to be connected to Ethernet during this time. Plug in the device to power and wait until the Status Light stays solid white or continues to flash white before proceeding. • To put the Hub in Add Mode, press the Enrollment button once ( ). The Status Light will start flashing green slowly and the Hub will beep once. • To put your Z-Wave device into Add Mode, follow the instructions that came with the device. Most devices have a Z-Wave action button. • When the device and the Hub begin to communicate, the Hub’s Status Light will flash quickly. If adding is successful, the Hub will beep for one second, and the Status Light will stay solid green for 120 seconds. • After a device is added, the Hub automatically exits Add Mode. To add another device with the Hub, place the Hub in Add Mode again and follow the steps above. • If adding is unsuccessful, follow the steps on the next page to remove the device, and then try adding it again. • To exit Add Mode, press and quickly release the Enrollment button ( ). Alternatively, the Hub will exit automatically after 120 seconds of inactivity.
• To put the Hub in Remove Mode, press and hold the Enrollment button ( ) for five seconds until the Status Light flashes orange slowly and the Hub beeps twice. • To put your Z-Wave device into Remove Mode, follow the instructions that came with the device. For many Z-Wave devices the same button is used for adding and removing. • When successfully removing a device, the Hub will beep for one second, and the Hub’s Status Light will stay solid orange for 120 seconds. • After a device is removed, the Hub automatically exits Remove Mode. • To add the device to the Hub, return to the beginning of Step 2 above. • To exit Remove Mode, press and quickly release the Enrollment button ( ). Alternatively, the Hub will exit automatically after 120 seconds of inactivity.
| Type | Value(s) |
|---|