GoControl
WD500Z5-1
WD500Z5-1
Light Dimmer Switch
HW: 1 FW: 1.13
ZM5202
6.51.07
0x014F (335)
0x5744 (22340)
0x3530 (13616)
ZC10-16095223
2016-09-07 12:36:11.7818
N/A
Enhanced 232 Slave
Always On Slave
An in-wall lighting dimmer switch for LED, halogen and incandescent lights. Controls the connected load and can run up to 6 scenes using the Central Scene Command Class.
The WD500Z5-1 is an in-wall lighting dimmer switch designed to operate with LED, halogen and incandescent lights. Not only can this switch control the connected load, with Central Scene support it can run up to 6 scenes created by the Hub it is the most versatile Home Automation light switch available. With OTA upgrading supported, this light switch may be the last one ever installed in a home.
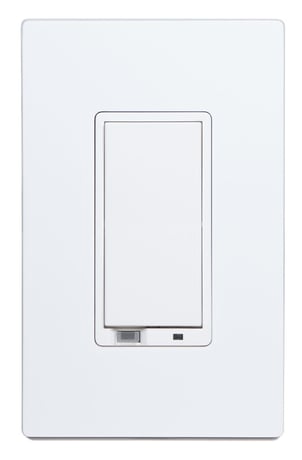
Product Picture


3 - Night Light
Control the operation of the LED function,Size: 1 byte
Default: 0
Minimum: 0
Maximum: 0
Possible values
| From | To | Desription |
|---|---|---|
| 0 | 4 | 0 - LED OFF when the load is on, and ON when the load is off. 1 - LED ON when the load is on, and OFF when the load is off. 2 - LED is always on. 3 - LED is always off. 4 - LED blinks during RF transmissions from or to the device. |
4 - Invert Switch
To change the top of the switch to OFF and the bottom of the switch ON.Size: 1 byte
Default: 0
Minimum: 0
Maximum: 0
Possible values
| From | To | Desription |
|---|---|---|
| 0 | 1 | 0 - Top of switch is ON, bottom of switch is OFF. 1 - Bottom of switch is ON, top of switch is OFF |
5 - Start Level Dim Command
The Start Level sent in a Dim command can be ignored or not. Typically the dim level should start from the current level and dim from there instead of suddenly changing to the Start Level and then dimming.Size: 1 byte
Default: 1
Minimum: 0
Maximum: 0
Possible values
| From | To | Desription |
|---|---|---|
| 0 | 1 | 0 - Use the Start Level in the Dim Command. 1 - Ignore the Start Level in the Dim Command |
7 - # - Dim Remote On/Off Steps
This value indicates how many levels the dimmer will change a remote dimmable device each time the Dim Timer expires.Size: 1 byte
Default: 3
Minimum: 0
Maximum: 0
Possible values
| From | To | Desription |
|---|---|---|
| 1 | 99 | Dim Remote On/Off Steps |
8 - Dim Remote On/Off Timer
The Dim Timer sets how fast the dim steps happen in a remote dimmable deviceSize: 1 byte
Default: 10
Minimum: 0
Maximum: 0
Possible values
| From | To | Desription |
|---|---|---|
| 1 | 255 | # - Dim Remote On/Off Time in mS |
9 - Dim Local On/Off Step
This value indicates how many levels the dimmer will change the local dimmable device each time the Dim Timer expires.Size: 1 byte
Default: 10
Minimum: 0
Maximum: 0
Possible values
| From | To | Desription |
|---|---|---|
| 1 | 255 | Dim Remote On/Off Steps |
10 - Dim Local On/Off Timer
The Dim Timer sets how fast the dim steps happen in a local dimmable deviceSize: 1 byte
Default: 10
Minimum: 0
Maximum: 0
Possible values
| From | To | Desription |
|---|---|---|
| 1 | 255 | # - Dim Remote On/Off Time in mS |
11 - Dim ALL On/Off Step
This value indicates how many levels the dimmer will change in all devices when an ALL ON or ALL OFF command is transmittedSize: 1 byte
Default: 10
Minimum: 0
Maximum: 0
Possible values
| From | To | Desription |
|---|---|---|
| 1 | 99 | Dim Remote On/Off Steps |
12 - Dim ALL On/Off Timer
The Dim ALL On/Off Timer sets how fast the dim steps happen in all devices when an ALL ON or ALL OFF command is transmittedSize: 1 byte
Default: 3
Minimum: 0
Maximum: 0
Possible values
| From | To | Desription |
|---|---|---|
| 1 | 255 | # - Dim Remote On/Off Time in mS |
Adding to a Network: 1. With your Controller in Discovery or Add Mode, tap the switch. The LED will blink slowly when in ADD Mode. 2. You should see an indication on your Controller that the “device was added” to the network and the LED will stop blinking. 3. The device will appear in the list of Switches. It should display as a switch.
Removing from a Network: 1. Set the Controller into Removal Mode and follow its instruction to delete the GoControl Dimmer from the Controller. 2. Remove the switch by tapping the paddle 2 times. The LED will begin blinking slowly for 10 seconds indicating that it has been removed. 3. You should see an indication on your Controller that the “device was removed” from the network.
To Reset Unit (If Required): Use only in the event that your primary Controller is lost or otherwise inoperable, to reset the GoControl Dimmer and clear all network information, follow these steps: 1. Tap the top of the switch five (5) times. 2. Press and hold the bottom of the switch for 15 seconds. The LED will increasingly blink faster to indicate that a Reset is taking place.
| Type | Value(s) |
|---|