Jasco Products Company
In-Wall Smart 1000W Dimmer
14326/ZW3006
Light Dimmer Switch
HW: 255 FW: 5.21
ZM5202
6.51.08
0x0063 (99)
0x4944 (18756)
0x3136 (12598)
ZC10-16105292
2016-10-27 17:19:17.743622
N/A
Enhanced 232 Slave
Always On Slave
Transform any home into a smart home with the Jasco Z-Wave Smart 1000W Dimmer.
Transform any home into a smart home with the Jasco Z-Wave Smart 1000W Dimmer. The In-Wall Smart 1000W Dimmer can easily replace any standard in-wall switch and remotely controls a light in your home. Your home will be equipped with ultimate flexibility with the Jasco Z-Wave Smart 1000W Dimmer, capable of being used by itself or with up to four add-on switches. Screw terminal installation provides improved space efficiency when replacing existing switches and the integrated LED indicator light allows you to easily locate the switch in a dark room. The Jasco Z-Wave In-Wall Smart 1000W Dimmer is compatible with any Z-Wave certified gateway, providing access to many popular home automation systems. Take control of your home lighting with Jasco Z-Wave Smart Lighting Controls! Z-Wave is the world’s largest ecosystem of inter operable smart home products. Z-Wave lighting controls provide an easy-to-install and affordable system to control lighting and small appliances in your home. Add Jasco Z-Wave lighting controls to a Z-Wave certified gateway to access and control your home from anywhere in the world using your smartphone, tablet or computer as a home automation command center. Never worry if you accidentally left the lights on because you can turn them off remotely or program your lights to go on/off at specific times. Create customized lighting scenes for any occasion such as a “go to sleep” scene or a “movie night” scene. Give the illusion that someone is home by programming the lights to turn on/off while you are away—perfect for deterring crime and adding additional security!"
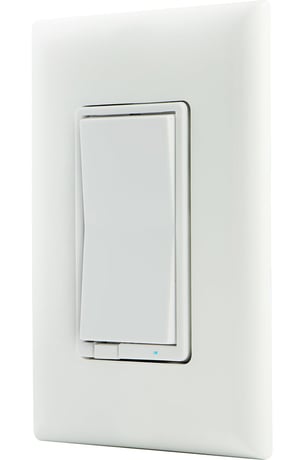
Product Picture


3 - LED Light
When shipped from the factory, the LED is set to turn ON when the connected light is turned OFF. This is the default setting and can be changed if your primary controller supports the node configuration function. To make the LED turn ON when the light is turned ON, change parameter 3’s value to “1”. To turn the LED OFF at all times, change parameter 3’s value to 2.Size: 1 byte
Default: 0
Minimum: 0
Maximum: 0
Possible values
| From | To | Desription |
|---|---|---|
| 0 | 0 | Default |
| 1 | 1 | LED ON when load is ON |
| 2 | 2 | LED always OFF |
4 - Invert Switch
If the switch is accidentally installed upside down with “On” at the bottom and “Off” at the top, the default On/Off rocker settings can be reversed by changing parameter 4’s value to “1”.Size: 1 byte
Default: 0
Minimum: 0
Maximum: 0
Possible values
| From | To | Desription |
|---|---|---|
| 0 | 0 | Default |
| 1 | 1 | Invert Switch |
7 - Dim Rate Adjustments
Dim Rate Adjustments when receiving Z-Wave dim commandSize: 1 byte
Default: 1
Minimum: 0
Maximum: 0
Possible values
| From | To | Desription |
|---|---|---|
| 1 | 99 | number of steps or levels |
8 - Dim Rate Adjustments
Dim Rate Adjustments when receiving a Z-Wave dim commandSize: 2 bytes
Default: 3
Minimum: 0
Maximum: 0
Possible values
| From | To | Desription |
|---|---|---|
| 1 | 255 | timing of steps |
9 - Dim Rate Adjustments
Dime Rate Adjustments when manually controlled dimmingSize: 1 byte
Default: 1
Minimum: 0
Maximum: 0
Possible values
| From | To | Desription |
|---|---|---|
| 1 | 99 | number of steps or levels |
10 - Dim Rate Adjustments
Dim Rate Adjustments when manually controlling dimmingSize: 2 bytes
Default: 3
Minimum: 0
Maximum: 0
Possible values
| From | To | Desription |
|---|---|---|
| 1 | 255 | timing of steps |
11 - Dim Rate Adjustments
Dim Rate Adjustments when receiving an All-On or All-Off commandSize: 1 byte
Default: 1
Minimum: 0
Maximum: 0
Possible values
| From | To | Desription |
|---|---|---|
| 1 | 99 | number of steps or levels |
| 0 | 0 |
12 - Dim Rate Adjustments
Dime Rate Adjustments when receiving an All-On or All-Off commandSize: 2 bytes
Default: 3
Minimum: 0
Maximum: 0
Possible values
| From | To | Desription |
|---|---|---|
| 1 | 255 | timing of steps |
1. Follow the instructions for your Z-Wave certified controller to include a device to the Z-Wave network. 2. Once the controller is ready to add your device, press and release the top or bottom of the wireless smart switch (rocker) to add it in the network. Please reference the controller’s manual for instructions.
1. Follow the instructions for your Z-Wave certified controller to remove a device from the Z-Wave network. 2. Once the controller is ready to Exclude your device, press and release the top or bottom of the wireless smart dimmer (rocker) to remove it from the network.
Quickly press ON (Top) button three (3) times then immediately press the OFF (Bottom) button three (3) times. The LED will flash ON/OFF 5 times when completed successfully. NOTE: This should only be used in the event your network’s primary controller is missing or otherwise inoperable.
| Type | Value(s) |
|---|