GE
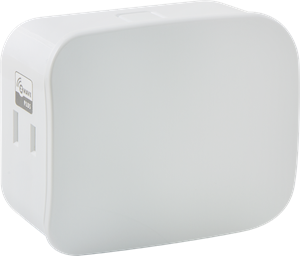
Plug-in Smart Dimmer, Single Plug
28167/ZW3104
Light Dimmer Switch
HW: 255 FW: 21.05
ZM5202
6.51.08
0x0063 (99)
0x5044 (20548)
0x3038 (12344)
ZC10-16125339
2016-12-10 18:45:47.354297
N/A
Enhanced 232 Slave
Always On Slave
Transform any home into a smart home with the GE Z-Wave Plug-In Smart Dimmer.
Transform any home into a smart home with the GE Z-Wave Plug-In Smart Dimmer. The Smart Dimmer enables wireless control of on/off and dim functions for standard incandescent table and floor lamps, as well as dimmable fluorescent, LED and CFL fixtures and more! Use the dimmer control to customize the lighting output and create the perfect ambiance for any room. The space-saving horizontal module plugs into a standard wall receptacle without blocking the second outlet or obstructing placement of furniture. The Dimmer provides one Z-Wave enabled outlet for the lamp you would like to control. Take control of your home lighting with GE Z-Wave Smart Lighting Controls!


3 - LED Light
When shipped from the factory, the LED is set to turn ON when the connected light is turned On. This is the default setting and can be changed if your primary controller supports the node configuration function or by a manual method. To make the LED turn ON when the light is turned ON, change parameter 3’s value to “1”. To turn the LED OFF at all times, change parameter 3’s value to 2.Size: 1 byte
Default: 0
Minimum: 0
Maximum: 0
Possible values
| From | To | Desription |
|---|---|---|
| 0 | 0 | default |
| 1 | 1 | LED On when light is turned On |
| 2 | 2 | LED always Off |
7 - Dim Rate Adjustments (From Z-Wave Controller)
Number of steps or levelsSize: 1 byte
Default: 1
Minimum: 0
Maximum: 0
Possible values
| From | To | Desription |
|---|---|---|
| 1 | 99 | Number of steps or levels |
8 - Dim Rate Adjustments (From Z-Wave Controller)
Timing of stepsSize: 2 bytes
Default: 3
Minimum: 0
Maximum: 0
Possible values
| From | To | Desription |
|---|---|---|
| 1 | 255 | Timing of steps |
9 - Dime Rate Adjustments (When Manually Controlled)
Number of steps or levelsSize: 1 byte
Default: 1
Minimum: 0
Maximum: 0
Possible values
| From | To | Desription |
|---|---|---|
| 1 | 99 | Number of steps or levels |
10 - Dim Rate Adjustments (When Manually Controlled)
Timing of stepsSize: 2 bytes
Default: 3
Minimum: 0
Maximum: 0
Possible values
| From | To | Desription |
|---|---|---|
| 1 | 255 | Timing of steps |
11 - Dim Rate Adjustments (When Receiving All-On/Off Commands)
Number of steps or levelsSize: 1 byte
Default: 1
Minimum: 0
Maximum: 0
Possible values
| From | To | Desription |
|---|---|---|
| 1 | 99 | Number of steps or levels |
12 - Dim Rate Adjustments (When Receiving All-On/Off Command
Timing of stepsSize: 2 bytes
Default: 3
Minimum: 0
Maximum: 0
Possible values
| From | To | Desription |
|---|---|---|
| 1 | 255 | Timing of steps |
1. Follow the instructions for your Z-Wave certified controller to add the smart dimmer to the Z-Wave network. 2. Once the controller is ready to add your smart dimmer, single press and release the manual/program button on the smart dimmer to add it in the network. Please reference the controller/gateway’s manual for instructions.
1. Follow the instructions for your Z-Wave certified controller to remove a device from the Z-Wave network. 2. Once the controller is ready to remove your device, press and release the manual/program button on the smart dimmer to remove it from the network.
To return your dimmer to factory defaults: 1. If plugged in, unplug the dimmer from the receptacle. 2. Press and hold the top button for at least 3 seconds while you plug the dimmer into a receptacle. Note: This should only be used in the event your networks’ primary controller is missing or otherwise inoperable.
| Type | Value(s) |
|---|