Jasco Products Company
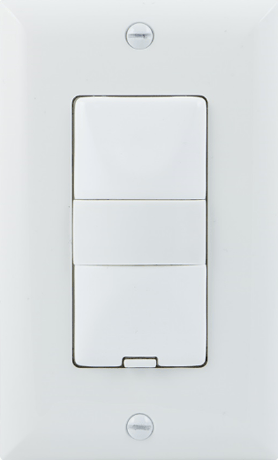
In-Wall Smart Motion Dimmer
26933.0
Light Dimmer Switch
HW: 255 FW: 5.50
ZM5101
6.51.08
0x0063 (99)
0x494D (18765)
0x3034 (12340)
ZC10-16125342
2016-12-12 07:35:06.475071
N/A
Enhanced 232 Slave
Always On Slave
Wirelessly schedule, control and motion activate lights and other devices.
Transform any home into a smart home with the GE In-Wall Smart Motion Dimmer. This Z-Wave device replaces you current light switch using your existing wiring and provides Z-Wave wireless control of overhead lighting. The dimmer enables wireless control of On/Off functions of incandescent, LED, xenon, halogen and fluorescent lighting. Not only does it act as a dimmer but the GE In-Wall Smart Motion Dimmer has a built in PIR sensor which can control the local load and be set in occupancy or vacancy mode.


1 - Timeout Duration
0=Test(5S) 1=1 minute 5=5 minutes 15=15 minutes 30=30 minutes 0xFF=Disable timeoutSize: 1 byte
Default: 5
Minimum: 0
Maximum: 0
Possible values
| From | To | Desription |
|---|---|---|
| 5 | 5 | 5 minutes |
| 15 | 15 | 15 minutes |
| 0 | 0 | Test(5S) |
| 1 | 1 | 1 minute |
| 30 | 30 | 30 minutes |
| 255 | 255 | Disable timeout |
2 - Change brightness of associated light bulb(s)
0xFF = last dimming levelSize: 1 byte
Default: 255
Minimum: 0
Maximum: 0
Possible values
| From | To | Desription |
|---|---|---|
| 0 | 99 | Brightness levels |
| 255 | 255 | Default |
3 - Operation Mode
1=Manual 2=Vacancy 3= OccupancySize: 1 byte
Default: 3
Minimum: 0
Maximum: 0
Possible values
| From | To | Desription |
|---|---|---|
| 1 | 1 | Manual |
| 2 | 2 | Vacancy |
| 3 | 3 | Occupancy |
5 - Invert Switch
In a 3-way configuration, invert the connected Add-On Switch buttons 0=Disabled 1=EnableSize: 1 byte
Default: 0
Minimum: 0
Maximum: 0
Possible values
| From | To | Desription |
|---|---|---|
| 0 | 0 | Disabled |
| 1 | 1 | Enabled |
6 - Enable/Disable Motion Sensor
0=Disabled 1=EnableSize: 1 byte
Default: 1
Minimum: 0
Maximum: 0
Possible values
| From | To | Desription |
|---|---|---|
| 0 | 0 | Disabled |
| 1 | 1 | Enable |
7 - Adjust steps/levels with Remote
Adjust steps/levels with RemoteSize: 1 byte
Default: 1
Minimum: 0
Maximum: 0
Possible values
| From | To | Desription |
|---|---|---|
| 1 | 1 | Default |
| 2 | 99 | Steps/Levels |
8 - Adjust timing of steps/levels with Remote
Adjust timing of steps/levels with RemoteSize: 2 bytes
Default: 3
Minimum: 0
Maximum: 0
Possible values
| From | To | Desription |
|---|---|---|
| 1 | 2 | Steps/Levels |
| 3 | 3 | Default |
| 4 | 255 | Steps/Levels |
9 - Adjust steps/levels
Adjust steps/levelsSize: 1 byte
Default: 1
Minimum: 0
Maximum: 0
Possible values
| From | To | Desription |
|---|---|---|
| 2 | 99 | Steps/Levels |
| 1 | 1 | Default |
10 - Adjust timing of steps/levels
Adjust timing of steps/levelsSize: 2 bytes
Default: 3
Minimum: 0
Maximum: 0
Possible values
| From | To | Desription |
|---|---|---|
| 4 | 255 | Steps/Levels |
| 1 | 2 | Steps/Levels |
| 3 | 3 | Default |
11 - Adjust Steps/levels with “ALL ON/OFF” command
Adjust Steps/levels with “ALL ON/OFF” commandSize: 1 byte
Default: 1
Minimum: 0
Maximum: 0
Possible values
| From | To | Desription |
|---|---|---|
| 1 | 1 | Default |
| 2 | 99 | Steps/Levels |
12 - Adjust timing of stepsALL ON/OFF” command/levels with “
Adjust timing of steps/levels with “ALL ON/OFF” commandSize: 2 bytes
Default: 3
Minimum: 0
Maximum: 0
Possible values
| From | To | Desription |
|---|---|---|
| 1 | 2 | Steps/Levels |
| 3 | 3 | Default |
| 4 | 255 | Steps/Levels |
13 - Motion sensing sensitivity
1=High sensitivity 2=Medium sensitivity 3=Low sensitivitySize: 1 byte
Default: 2
Minimum: 0
Maximum: 0
Possible values
| From | To | Desription |
|---|---|---|
| 1 | 1 | High Sensitivity |
| 2 | 2 | Medium Sensitivity (Default) |
| 3 | 3 | Low Sensitivity |
14 - Enable/Disable Light Sensing
0=Disabled 1=EnabledSize: 1 byte
Default: 0
Minimum: 0
Maximum: 0
Possible values
| From | To | Desription |
|---|---|---|
| 0 | 0 | Disabled (Default) |
| 1 | 1 | Enabled |
15 - Reset Cycle
0=Disable 1=10 seconds 2=20 seconds 3=30 seconds 4=45 seconds 110 =27 mins 15 secondsSize: 2 bytes
Default: 2
Minimum: 0
Maximum: 0
Possible values
| From | To | Desription |
|---|---|---|
| 0 | 0 | Disable |
| 1 | 1 | 10 seconds |
| 2 | 2 | 20 seconds (Default) |
| 3 | 3 | 30 seconds |
| 4 | 4 | 45 seconds |
| 5 | 109 | 15 second intervals, starting at 60 seconds |
| 110 | 110 | 27 minutes 15 seconds |
16 - Switch Mode
0=Disabled 1=EnabledSize: 1 byte
Default: 0
Minimum: 0
Maximum: 0
Possible values
| From | To | Desription |
|---|---|---|
| 0 | 0 | Disabled (Default) |
| 1 | 1 | Enabled |
17 - Switch Level
0=Disabled 1=Level 1 99=Level 99(full brightness)Size: 1 byte
Default: 0
Minimum: 0
Maximum: 0
Possible values
| From | To | Desription |
|---|---|---|
| 0 | 0 | Disabled (Default) |
| 1 | 99 | Brightness Level |
18 - Dim up rate
0 = Dim up the light to the default level quickly 1 = Dim up the light to the default level slowlySize: 1 byte
Default: 0
Minimum: 0
Maximum: 0
Possible values
| From | To | Desription |
|---|---|---|
| 0 | 0 | Dim up the light to the default level quickly (Default) |
| 1 | 1 | Dim up the light to the default level slowly |
19 - Exclusion mode
0 = Press any button on the switch 1 = press and release “ X” button, then press and release “ ON “ buttonSize: 1 byte
Default: 0
Minimum: 0
Maximum: 0
Possible values
| From | To | Desription |
|---|---|---|
| 0 | 0 | Press any button on the switch (Default) |
| 1 | 1 | Press and release “ X” button, then press and release “ ON “ button |
1. Follow the instructions for your Z-Wave certified controller to add the smart dimmer to the Z-Wave network. 2. Once the controller is ready to add your smart dimmer, press and release the top or bottom button on the smart dimmer to include it in the network.
1. Follow the instructions for your Z-Wave certified controller to remove a device from the Z-Wave network. 2. Once the controller is ready to remove your device, press and release the top button on the smart dimmer to remove it from the network.
Press and release the top button ten times within 5 seconds. The LED will flash 3 times quickly confirming change. Note: This should only be used in the event your network’s primary controller is missing or otherwise inoperable
| Type | Value(s) |
|---|
| Sensor type |
|---|
| General Purpose |