Dome
Dome Door/Window Sensor Pro
DMDP1
Notification Sensor
HW: 1 FW: 1.01
ZM5101
6.61.00
0x021F (543)
0x0003 (3)
0x0201 (513)
ZC10-17065635
2017-06-02 19:44:35.554329
N/A
Enhanced 232 Slave
Reporting Sleeping Slave
Yes
Dome S0 Encrypted Door/Window Sensor with Built-In Temperature Detection
The Dome Door/Window Sensor is a battery powered security-enabled* Z-Wave Plus magnetic reed switch that can monitor the status of doors, windows, and anything else that opens and closes. It can also report ambient temperature levels. The Door/Window Sensor consists of two parts - the “sensor,” and the “magnet.” The sensor has a “reed switch” inside, which is sensitive to the magnet’s presence when aligned properly and within the defined distance. When the sensor and magnet are brought together or pulled apart, the sensor will report its open/close status to its Z-Wave controller, and the encrypted wireless communication* ensures that user data remains secure. Because many manufacturers use Z-Wave to communicate, the Door/Window Sensor can interact with different products of different categories. • Z-Wave Plus Certified • S0 Security-Enabled* • Built-In Temperature Sensor • Up to 250’ range • Ten-Year Battery Life • LED Signal Strength Indication • 1.25” Max distance between sensor & magnet • Ultra-Narrow (1/4”) Magnet for Placement Between Door and Casing • Monitor doors, windows, medicine cabinets, drawers, garage doors, and many other openings
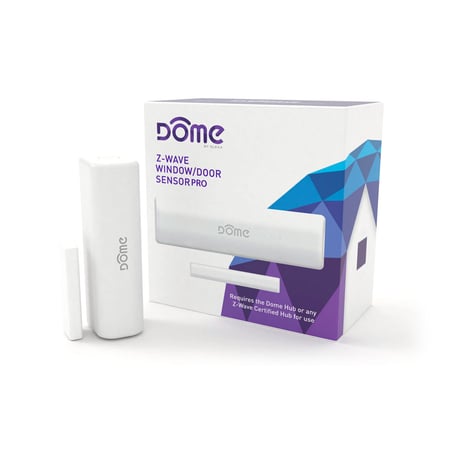
Product Picture


1 - Enable/Disable LED Indicator
This parameter enables or disables the LED Indicator flashing to indicate opening and closing events. The Door/Window Sensor will always flash the LED Indicator for inclusion, exclusion, tamper, and other system events.Size: 1 byte
Default: 1
Minimum: 0
Maximum: 0
Possible values
| From | To | Desription |
|---|---|---|
| 0 | 0 | Open/Close LED Indicator Disabled |
| 1 | 1 | Open/Close LED Indicator Enabled |
2 - Configure Open/Close Reports Sent
This parameter switches the Notification or Binary Sensor report sent when the door opens or closes. If this parameter is set to 01, the Door/Window Sensor will report “closed” instead of “open”when the Magnet and Sensor are pulled apart.Size: 1 byte
Default: 0
Minimum: 0
Maximum: 0
Possible values
| From | To | Desription |
|---|---|---|
| 0 | 0 | Reports Closed when Magnet is close |
| 1 | 1 | Reports Open when Magnet is close |
3 - Switch Between Notification and Binary Sensor Command Classes
By default, the Door/Window Sensor uses the Notification command class to communicate open/close and tamper events. If this Parameter is set to 1, the device will instead use the Binary Sensor command class. To apply this setting, the battery needs be removed and replaced! This is because the supported command classes will change according to this setting, so the device must restart to advertise its new command classes.Size: 1 byte
Default: 0
Minimum: 0
Maximum: 0
Possible values
| From | To | Desription |
|---|---|---|
| 1 | 1 | Notification Command Class is Used |
| 2 | 2 | Binary Sensor Command Class is Used |
| 0 | 0 | Both Command Classes are Used |
4 - Enable/Disable Temperature Sensor
The Door/Window Sensor can also monitor and report ambient temperature conditions. However, temperature sensing functionality is disabled by default to save battery life, and this configuration parameter is used to enable or disable this feature. To apply this setting, the battery needs be removed and replaced! This is because the supported command classes will change according to this setting, so the device must restart to advertise its new command classes.Size: 1 byte
Default: 0
Minimum: 0
Maximum: 0
Possible values
| From | To | Desription |
|---|---|---|
| 0 | 0 | Temperature Sensor Disabled |
| 1 | 1 | Temperature Sensor Enabled |
5 - Temperature Offset
This Configuration Parameter can offset the temperature value reported by ± 125 degrees to compensate for temperature variances in a room - for example, the temperature near the ceiling in a room is significantly higher than the average temperature of the same room. This Parameter accepts a signed 8-bit value with an absolute value of up to 125, and its units are Dependant on Configuration Parameter 07Size: 1 byte
Default: 0
Minimum: 0
Maximum: 0
Possible values
| From | To | Desription |
|---|---|---|
| 0 | 125 | 0 - 125 degrees offset |
| -125 | -1 | -125 to -1 degrees offset |
6 - Temperature Units
The Door/Window Sensor can report temperature values in either Celsius or Fahrenheit, and this parameter allows the user to decide which unit is used.Size: 1 byte
Default: 0
Minimum: 0
Maximum: 0
Possible values
| From | To | Desription |
|---|---|---|
| 0 | 0 | Temperature is Reported in Fahrenheit |
| 1 | 1 | emperature is Reported in Celsius |
7 - Group 2 Basic Set Value
This parameter sets the value sent by the Basic Set command to Association Group 2. The Door/Window Sensor sends a Basic Set command to Association Group 2 both when the tamper switch opens and closes (for more information, see “Group 2”.Size: 1 byte
Default: 255
Minimum: 0
Maximum: 0
Possible values
| From | To | Desription |
|---|---|---|
| 0 | 0 | Turn Off Device |
| 1 | 99 | Set Device to Value |
| 255 | 255 | Turn On Device |
8 - Basic Set Level (Group 4 Opening)
This parameter sets the value sent by the Basic Set command to Association Group 4. The Door/Window Sensor sends a Basic Set command to Association Group 4 when the door or window opens (for more information, see “Group 4” on page 14.)Size: 1 byte
Default: 255
Minimum: 0
Maximum: 0
Possible values
| From | To | Desription |
|---|---|---|
| 0 | 0 | Turn Off Device |
| 1 | 99 | Set Device to Value |
| 255 | 255 | Turn On Device |
9 - Basic Set Level (Group 4 Closing)
This parameter sets the value sent by the Basic Set command to Association Group 4. The Door/Window Sensor sends a Basic Set command to Association Group 4 when the door or window closes (for more information, see “Group 4” on page 14.)Size: 1 byte
Default: 0
Minimum: 0
Maximum: 0
Possible values
| From | To | Desription |
|---|---|---|
| 0 | 0 | Turn Off Device |
| 1 | 99 | Set Device to Value |
| 255 | 255 | Turn On Device |
New Installation 1. For proper inclusion, bring the Door/Window Sensor to the final location where it will be used*. 2. Follow the instructions for your Z-Wave controller to enter inclusion mode. 3. Remove the Battery Tab protruding from the Battery Tab Slit. 4. The device will automatically enter inclusion mode for two minutes and the LED Indicator will alternate between green and red. Upon successful inclusion the LED Indicator will flash green three times then stop blinking. Re-Installation 1. For proper inclusion, bring the Door/Window Sensorto the final location where it will be used*. 2. Follow the instructions for your Z-Wave controller to enter inclusion mode. 3. Remove the Sensor Cover and the LED Indicator will start blinking yellow. 4. Press the Button quickly 3 times in a row. 5. The device will enter inclusion mode for two minutes and the LED Indicator will alternate between green and red. After successful inclusion, the LED Indicator will flash green three times then blink red until the cover is replaced. *For non Z-Wave Plus networks, please consult the owner’s manual for your primary controller to determine the best method and location for adding the Door/Window Sensor to your Z-Wave network.
Follow the instructions for your Z-Wave Certified Controller to enter exclusion mode. When prompted by the controller: Remove the SENSOR COVER and the LED Indicator will start blinking red. Press the Button quickly 3 times in a row. The LED Indicator will flash green three times indicating exclusion/disconnection and will then continue flashing red (indicating tamper) until the cover is replaced.
Because the Door/Window Sensor is a battery powered device, it wakes up on regular intervals to give battery and other status updates to the controller, as well as to accept configuration settings from the controller. This helps to extend the battery life. The Sensor Cover holds down the Button when installed, and the device can be forced to wake up to submit reports or accept new settings immediately by simply removing the Sensor Cover and then replacing it after. If the device is already included in a system, the LED Indicator will flash Red until the cover is closed.
If needed, the Door/Window Sensor can be reset locally by following these steps. Only do this if your Z-Wave controller is missing or otherwise unreachable. Beware that resetting your device will disconnect it from the system: 1. Remove the Sensor Cover and confirm that your Door/Window Sensor is powered up. 2. Wait for 5 seconds. 3. Move the Magnet and Sensor Base in and out of the closed position 6 times. 4. The LED Indicator will light up red for five seconds when reset successfully. The Door/Window Sensor’s memory will be erased to factory settings.
| Type | Value(s) |
|---|
| Group | Type |
|---|---|
| Access Control | (Refer to parameters): State idle |
| Home Security | (Refer to parameters): State idle |
| Sensor type |
|---|
| Air Temperature |
| General Purpose |