Ring
Door/Window Contact Sensor w/ Smart Start
RING-DW-SS
Notification Sensor
HW: 1 FW: 11.01
ZM5202
6.80.00
0x0346 (838)
0x0201 (513)
0x0201 (513)
ZC10-18066144
2018-06-13 06:52:41.385757
N/A
Enhanced 232 Slave
Reporting Sleeping Slave
Ring Z-Wave door/window contact sensor is used as a primary intrusion detection unit in the system.
The Ring Protect security system is Ring’s entry into the DIY security solution space intended to provide customers with a Ring-branded, unique and simplified home security system. Ring Protect features a Z-Wave door/window contact sensor which will be used as a primary intrusion detection unit in the system. The door/window will be included in the professionally monitored alarm system. Additionally, the sensor’s functionality will be extended to the automation features of the Ring Protect solution.
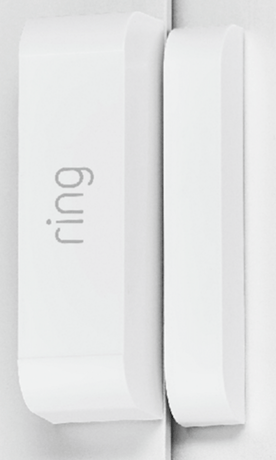
Product Picture


1 - wait time
Configuration Value: 255 to 4200 seconds in 255 second increments that the sensor should wait between sending unsolicited battery reports. The default configuration value for parameter 1 is defaulted to 4200 minutes on exclusion.Size: 2 bytes
Default: 4200
Minimum: 0
Maximum: 0
Possible values
| From | To | Desription |
|---|---|---|
| 255 | 4200 | minutes on exclusion |
Ring Contact Sensor can be added via SmartStart or via classic inclusion mode – SmartStart Inclusion Steps: 1. Initiate add sensor flow in the Ring Alarm mobile application – Follow the guided add flow instructions provided in the application 2. Scan the QR code found on the package of the sensor or the QR code found on the back of the sensor 3. Pull the battery tab on the sensor 4. When the inclusion process in complete, the LED on the sensor will be solid blue, then go out. 5. Test the sensor. Place the magnet next to the sensor to represent a closed position (see Installation video to see where to position the magnet). If the LED flashes ONE TIME, it is successfully communicating on your Zwave network. If the LED on the sensor flashes slow and steady for 5 seconds, you need to repeat the inclusion process. Classic Inclusion Steps: 1. Initiate add sensor flow in the Ring Alarm mobile application – Follow the guided add flow instructions provided in the application 2. Select add manually and enter the 5 digit DSK pin found on the package of the sensor or the QR code found on the back of the sensor 3. Pull the battery tab on the sensor 4. When the inclusion process in complete, the LED on the sensor will be solid blue, then go out. 5. Test the sensor. Place the magnet next to the sensor to represent a closed position (see Installation video to see where to position the magnet). If the LED flashes ONE TIME, it is successfully communicating on your Z-Wave network. If the LED on the sensor flashes slow and steady for 5 seconds, you need to repeat the inclusion process.
Exclusion Instructions: 1. Initiate remove sensor flow in the Ring Alarm mobile application – Select the setting icon from device details page and choose “Remove Device” 2. Open contact sensor’s cover 3. Remove and replace battery quickly
By open the top cover, the sensor will get to tamper state and stay awake.
Factory Default Instructions 1. Open contact sensor’s cover 2. Press and hold the reset button on sensor circuitry 3. Remove and replace battery quickly – Blue LED will start to blink rapidly 4. Wait for the blue LED to stop blinking Use this procedure only in the event that the network primary controller is missing or otherwise inoperable.
| Type | Value(s) |
|---|
| Group | Type |
|---|---|
| Home Security | (Refer to parameters): State idle |