DMP
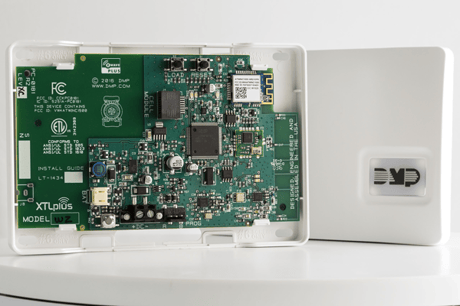
XTLplus
XTLplus
Central Controller
HW: 2 FW: 3.00:01.113
ZM5202
6.61.00
0x0127 (295)
0x0738 (1848)
0x0002 (2)
ZC10-17115850
2017-11-13 20:36:58.911355
N/A
Static Controller, No Repeater
Central Static Controller
This all-onboard compact panel is perfect for residential & light commercial installations.
The XTL+ Wireless Control Panel is packed with features, including Wi-Fi & Z-Wave on board. On board cellular communications can also be added with a 265C Cell Communicator. It also comes with all the features and benefits end users need in a residential or small commercial panel: 48 2-way, 900 mhz wireless zones, dual communication, supports up to 8 2-way wireless key fob s or outputs, 200-event memory, 99 user codes, 6 areas, all new XTLplus Fast Programming, and up to 140 Z-Wave devices.
To add the XTLplus to an existing network, use the LRN (Learn) function in the Z-Wave . 1. Press CMD until MENU? YES NO appears, then press YES. 2. After accessing the User Menu, press CMD until ZWAVE SETUP? appears. Press any select key/area. 3. Select LRNand press CMD.
Use the initialize defaults function to set a panel’s programmed memory back to the factory defaults and remove any existing Z-Wave programming. Follow these steps to initialize a panel’s defaults: 1. Reset the panel. 2. Enter 6653 (PROG) at a keypad and press CMD to enter the panel programming menu. 3. Press CMD until INITIALIZATION displays and press a top row select key or area. 4. Press CMD until DEFAULTS? NO YES displays. Press the select key or area under YES. 5. Press the select key or area under YES when SURE? YES NO displays. Please use this procedure only when the network primary controller is missing or otherwise inoperable.
ADD DEVICES Use a DMP keypad to program Z-Wave Plus devices into the panel through the User Menu Z-Wave Setup option. This allows users to add devices through the User Menu or the Virtual Keypad™ App after installation. When possible, have the Z-Wave device near the XTLplus during setup and programming. When programming Z-Wave devices into an XT30, XT50, or XTLplus panel with Version 171 or higher, you can add multiple devices at once. If you add multiple devices at once, then you will name each device after they have all been added. 1. Press CMD until MENU? YES NO appears, then press YES. 2. After accessing the User Menu, press CMD until ZWAVE SETUP? appears. Press any select key/area. 3. Select ADD. The screen displays PROCESSING. 4. When prompted, press the button (or series of buttons if adding a thermostat) on the device you are adding. 5. The keypad displays that the device has connected to your system.
REMOVE OR REPLACE DEVICES If a device fails, users can remove or replace the device through the User Menu. 1. Press CMD until MENU? YES NO appears, then press YES. 2. After accessing the User Menu, press CMD until ZWAVE SETUP? appears. Press any select key/area. 3. Select LIST and press CMD until the device you are removing or replacing displays. Then, press any select key/area to select the device. 4. Select STATUS. The status of the device displays as either OKAY or FAILED. If the device fails, REMOVE FAILED DEVICE displays. 5. Select YES to remove the device. Press the second select key/area to replace the device. 6. If you chose to replace the device, PROCESSING displays. 7. When prompted, press the button (or series of buttons if adding a thermostat) on the replacement device. 8. The keypad displays that the device has connected to your system. Note: The replacement device keeps the original device’s name.
| Type | Value(s) |
|---|
| Meter type |
|---|
| Electric Meter Consumption |