Hornbach Baumarkt AG
Smart Home Gateway
WSR 1706 V 1.0
Central Controller
HW: 1 FW: 5.34:02.61:01.00:01.00
ZM5304
6.71.01
0x0377 (887)
0x0001 (1)
0x0001 (1)
ZC10-18015968
2018-02-23 16:20:39.385588
N/A
Bridge Controller
Central Static Controller
Our Home Gateway is a Z-Wave Plus security-enabled device that can serve as a central hub for an entire network of home automation devices, including all non-battery powered devices that will act as repeaters on your network.
Smart Home by Hornbach is a simple and convenient solution to turn your home into a real Smart Home. With an entire set of smart sensors, lights, plugs, and other connected products you can take control and interact with your home from anywhere: - set up schedules to automatically operate lights and plugs - receive notifications from smart sensors in your home when e.g. doors are being opened or a water leak has been detected - create rules to automate the behavior of your smart devices - check the cameras in your home to see if your kids returned home safely - check the history to track all events that happened in your home - control several places (your home, office), all from one account You can do all of the above and more from anywhere in the world. Start building your smart home today.
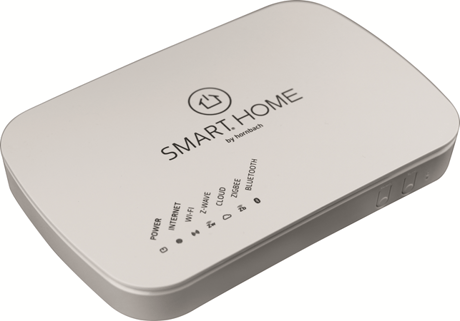
Product Picture
The Learn Mode is a Z-Wave functionality that will allow your controller to join another Z-Wave network. 1. Make sure, all Z-Wave devices are removed from the Gateway 2. Put the Primary controller of the desired Z-Wave network into Inclusion Mode (see manufacturer’s instructions for details) 3. Open gateway settings in your Web App and activate learn mode (Z-Wave Settings) 4. Once Learn Mode is activated, locate the DSK code in the right part of the title bar. 5. It can take some time to receive all the network information and load all the Z-Wave devices.
Factory resets the Z-Wave controller. 1. Open gateway settings in your Web App and press “Reset” (Z-Wave Settings) 2. Confirm the dialog. This will perform a factory reset and remove every Z-Wave device from your Gateway (you have to repair them again). Note: If this controller is the primary controller for your network, resetting it will result in the nodes in your network being orphaned and it will be necessary after the reset to exclude and re-include all of the nodes in the network. If this controller is being used as a secondary controller in the network, use this procedure to reset this controller only in the event that the network primary controller is missing or otherwise inoperable.
To add a device, login into our web UI using your account and follow these instructions: 1. Move the device close to your Gateway during the inclusion process 2. Follow the manufacturer's instructions to prepare the device to join the network (inclusion mode). Note: If the device has already joined a different network, follow the manufacturer’s instructions to reset it before you add it to your system. 3. From one of the main pages (QuickView, Devices, Rules, History) press the (+) icon in the upper right corner, choose “Device” and start inclusion mode 4. If needed, tap a device to show its instructions 5. Your Gateway will then automatically find and add prepared devices 6. Enter DSK code if necessary 7. Once the device is added, navigate to “Devices” to control it 8. Open device details by pressing the arrow in the upper right corner of a device. Device details allow you to rename your devices and send commands to the device.
Follow these steps to remove a Z-Wave device from your Z-Wave network. This will allow you to add the Z-Wave device to a different Z-Wave network. 1. Open gateway settings in your Web App and activate Device exclusion mode (Z-Wave Settings). 2. Follow the manufacturer’s instructions to remove the according Z-Wave device.
| Type | Value(s) |
|---|