Axis Communications
Door/Window Sensor
T8342-JP
Notification Sensor
HW: 1 FW: 1.01:00.01
SD3502
6.71.01
0x0364 (868)
0x0003 (3)
0x0001 (1)
ZC10-18015967
2018-01-19 19:00:46.061506
N/A
Enhanced 232 Slave
Reporting Sleeping Slave
Yes
AXIS T8342 Door/Window Sensor is an easy to install, wireless sensor which enables triggering of a series of events such as notification messages, illumination and much more.
AXIS T8342 Door/Window Sensor is an easy to install, wireless sensor which enables triggering of a series of events such as notification messages, illumination and much more. With its support for wireless input/output connectivity, the door/window sensor can communicate wirelessly with AXIS M5065 PTZ Network camera or other connected Z-Wave Plus® controllers, creating a small security solution with less cabling. Thanks to its integrated wireless I/O connectivity, AXIS T8342 enables flexible installation as the sensor can easily be mounted on a door, window, or cabinet according to your needs.
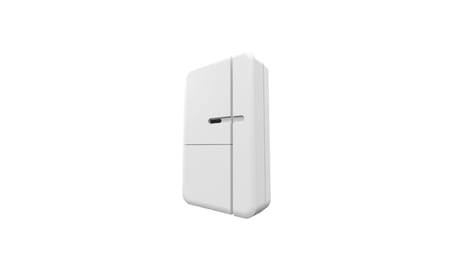
Product Picture
Auto inclusion The detector supports the auto inclusion feature where it will automatically enter Inclusion mode when first powered up. This will also apply when powered up after a factory reset. 1. Put a Z-Wave controller into inclusion mode. 2. Remove the strip of insulating film from the battery cover on the front of casing. The LED on the device should turn ON 3. The inclusion process should be completed when the LED stops blinking 4. Perform test before you refit the battery cover. Manual inclusion You can also choose to manually add the Z-Wave device to a control device. Please follow the steps described below. Note For best results, exclude the device before starting the inclusion process. For more details see the installation guide 1. Press the tamper switch 3 times within 1.5 seconds to put the unit into learning (inclusion/exclusion) mode. 2. The inclusion process should be completed when the LED stops blinking 3. Perform a test before you refit the cover.
Manual exclusion 1. Detach the battery cover. 2. Press the tamper switch 3 times within 1.5 seconds to put the unit into learning (inclusion/exclusion) mode. 3. The exclusion process should be completed when the LED stops blinking 4. Refit the battery cover.
Wakeup Command Class After it has been included into a Z-Wave network, the detector will go to sleep but will send a Wakeup Notification Command periodically at preset period to the controller. The detector will stay awake for 10 seconds at least and then go back to sleep to conserve battery life. The time interval between Wakeup Notification Commands can be set in the Wakeup Command Class based on the range values below: Minimum Wake Up Interval 600s (10 minutes) Maximum Wake Up Interval 86400s (1 day) Default Wake Up Interval 14400s (4 hours) Wake Up Interval Step Seconds 600s (10 minutes The time interval between Wakeup Notification Commands can be set in the Wakeup Command Class based on the range values below: Minimum Wake Up Interval 600s (10 minutes) Maximum Wake Up Interval 86400s (1 day) Default Wake Up Interval 14400s (4 hours) Wake Up Interval Step Seconds 600s (10 minutes)
Factory Reset (This procedure should only be used when the controller is inoperable.) 1. Press the tamper switch 3 times within 1.5 seconds to put the unit into exclusion mode. 2. Within 1 second of step 1, press the tamper switch again and hold until LED is off (about 5 seconds). 3. Node ID is excluded. The device reverts to 2-second on, 2-second off factory default state and will be in auto-inclusion mode for 4 minutes.
| Type | Value(s) |
|---|
| Group | Type |
|---|---|
| Access Control | (Refer to parameters): State idle |