TOSHIBA
Home IoT
TH-GW10
Gateway
HW: 1 FW: 5.10:02.25:01.00
ZM5304
6.61.00
0x0333 (819)
0x0001 (1)
0x0001 (1)
ZC10-18036061
2018-03-19 16:03:03.570952
N/A
Bridge Controller
Central Static Controller
Home IoT Terminal TH-GW10
This home gateway (HGW) works as a hub for IoT devices including sensors. Design: as the HGW will be used in a living room, it has a minimal cylindrical design conveying a sense of quality Wide-angle camera Voice control Bluetooth speaker
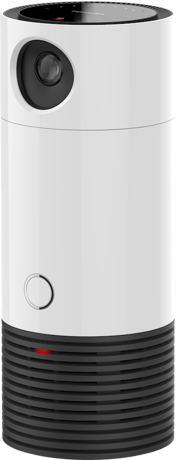
Product Picture
To enter Learn Mode, the operation is available only via Web UI. Please reboot the device; hold down the network button (backside) and Volume Down until you see the Top LED board blinking, then you can release the buttons. Next step, you can check the IP Address of the device from the APP. Open a web browser and enter the web URL, https://<machine IP address>, with the username and password, toshiba/homeiot. After you logged in, you can select Network Manager at the left side and click the button, ""Initiate."". Please note, if the device is already set as a controller, you need to click the Reset button first.
Described in Product manual “Parts Name” >Reset button Press and hold the button using a pen tip or like for 5 seconds or more. Pressing and holding the button makes the all Volume indicators and Microphone mute indicators starts blinking. After blinking stops, release button. After that, the settings have been reverted back to the default. If this controller is the primary controller of Z-Wave for your network, resetting it will result in the nodes in your network being orphaned and it will be necessary after the reset to exclude and re-include all of the nodes in the network. If this controller is being used as a secondary controller of Z-Wave in the network, use this procedure to reset this controller only in the event that the network primary controller is missing or otherwise inoperable.
Described in Product manual “Items on Home Screen” Adding a sensor Follow the steps below to add a sensor. 1. Tap Add Sensor. 2. Tap Add Sensor on the displayed screen. (The app starts searching a sensor and the screen below appears.) 3. Operate the sensor you are adding so that the app can find it. Refer to the instruction manual supplied for the sensor for details. When the app finds a sensor, the screen below appears. 4. Tap Done. The sensor has been added to the app.
Described in Product manual “Items on Home Screen” Removing a sensor Follow the steps below to remove a sensor. 1. Tap a sensor icon you want to remove on the Home screen. 2. Tap Remove Sensor on the displayed screen. The screen below appears and the app starts removing the sensor. 3. Tap OK on the displayed screen. The sensor has been removed.
| Type | Value(s) |
|---|