Axis Communications
M5065
M5065
Gateway
HW: 1 FW: 5.34:02.81:01.00:01.00
ZM5304
6.71.01
0x0364 (868)
0x0001 (1)
0x0001 (1)
ZC10-18106275
2018-08-17 18:32:18.986425
N/A
Bridge Controller
Central Static Controller
Ultra-discreet, palm-sized, pan-tilt-zoom camera with HDTV 1080p with wireless I/O connectivity using Z-Wave Plus® for communication with Z-Wave Plus compatible notification sensor devices (HC4) and ON/OFF power switch devices (HC8).
AXIS M5065 PTZ Network Camera is an ultra-discreet, palm-sized, pan-tilt-zoom camera for remote indoor monitoring. It supports wireless input/output connectivity for communication with Z-Wave Plus devices. The ceiling-mount camera enables flexible coverage over a 400 m² (4300 sq. ft) area with ±180° pan, 90° tilt and 5x optical zoom. It provides full frame rate video in HDTV 1080p resolution, and supports multiple H.264 and Motion JPEG video streams. The IP51 rating ensures protection against dust and dripping water, enabling AXIS M5065 to operate even when a sprinkler system is activated. > HDTV 1080p > Wireless input/output connectivity with Z-wave Plus® > IP51-rated > Power over Ethernet (IEEE 802.3af) > Built-in analytics
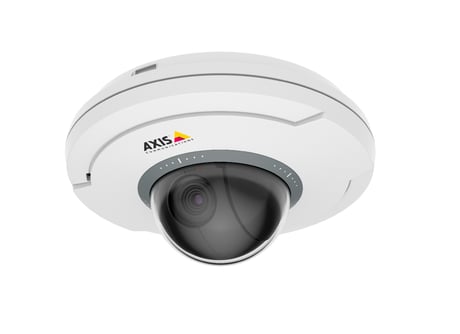
Product Picture
How to add a Z-Wave device You can only add a maximum of six Z-Wave devices to the product at any given time. If the maximum number is reached, you need to remove a Z-Wave device before you can add a new one. See How to remove a Z-Wave device on page 39. 1. Go to Setup > Wireless I/O. 2. Select Enable Z-Wave and click Save. You may need to wait for a few minutes for Z-Wave to become active. 3. Click Add. The product starts looking for Z-Wave devices in the Z-Wave network. 4. Set the Z-Wave device to be added into learning (inclusion/exclusion) mode as described in its User Manual. 5. If requested, enter the PIN delivered with the Z-Wave device, and click Enter. 6. Wait until the adding process is finalized as indicated by Status: Done on the web page. The device’s status information window opens. 7. Click Refresh to update the Z-Wave device info, e.g. battery status, and add a name for the device. Click Save.
How to remove a Z-Wave device Note This is the recommended removal procedure. 1. Go to Setup > Wireless I/O. 2. Click Remove. The product starts looking for Z-Wave devices in the Z-Wave network. 3. Set the Z-Wave device to be added into learning (inclusion/exclusion) mode as described in its User Manual. 4. Wait until the removal process is finalized as indicated by Status: Done on the web page. The Z-wave device is now removed from the Z-Wave Device List. Note All product-related information in the removed Z-Wave device is erased.
How to reset to factory default settings Important Reset to factory default should be used with caution. A reset to factory default resets all settings, including the IP address, to the factory default values. Please use this procedure only when the network primary controller is missing or otherwise inoperable To reset the product to the factory default settings: 1. Disconnect power from the product. 2. Press and hold the control button and reconnect power. 3. Keep the control button pressed for 15–30 seconds until the status LED indicator flashes amber. 4. Release the control button. The process is complete when the status LED indicator turns green. The product has been reset to the factory default settings. If no DHCP server is available on the network, the default IP address is 192.168.0.90 5. Using the installation and management software tools, assign an IP address, set the password, and access the video stream. The installation and management software tools are available from the support pages at axis.com/support It is also possible to reset parameters to factory default via the web interface. Go to Setup > System Options > Maintenance and click Default.
| Type | Value(s) |
|---|