Climax Technology
HSGW
HSGW
Gateway
HW: 1 FW: 6.01:02.81:01.00:01.00
ZM5202
6.81.01
0x018E (398)
0x0001 (1)
0x0001 (1)
ZC10-18106270
2018-10-15 22:35:18.480481
N/A
Bridge Controller
Central Static Controller
Yes
The HSGW is a RF, Z-Wave IP/4G smart home security gateway, providing home security, visual monitoring, home automation and emergency safety monitoring.
The HSGW is a multi-functional RF, and Z-Wave IP/4G smart home security gateway, providing comprehensive solutions of home security, live visual monitoring, home automation, energy management, emergency safety monitoring, senior care, and remote management, to bring all-around convenience, comfort and safety. The HSGW adopts Climax’s groundbreaking Security@2km Wireless Technology that delivers up to 2km (1.5 miles) long RF communication, fast signal transmission, and relentless reliability. The HSGW features a loud built-in siren to blare out immediate warning when emergencies occur, and also have a rechargeable battery backup, so the gateway will always keep working even when the power is out. When it comes to your security system, there is no room for error.
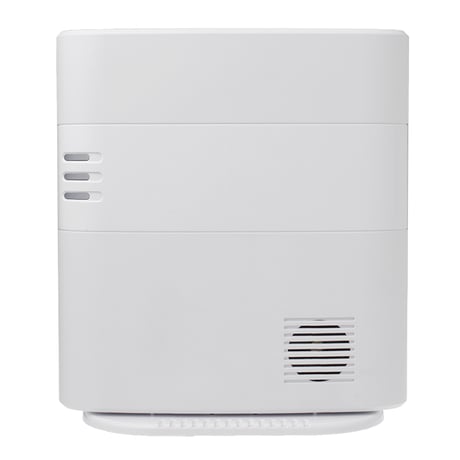
Product Picture
In Local Programming web page, click on the “Z-Wave” folder, and then the “Network Manager” section. Step 1: Place the HSGW within the direct range of your Z-Wave controller. Step 2: Identify the “Inclusion Mode” button on the web page. Step 3: Set the Z-Wave main controller in add mode (please refer to Z-Wave controller’s manual). Step 4: Click on the “Inclusion Mode” button on the web page. Step 5: Wait for the inclusion process to end. Step 6: Successful inclusion will be confirm by the Z-Wave controller’s message.
If this controller is the primary controller for your network, resetting it will result in the nodes in your network being orphaned and it will be necessary after the reset to exclude and re-include all of the nodes in the network. If this controller is being used as a secondary controller in the network, use this procedure to reset this controller only in the event that the network primary controller is missing or otherwise inoperable. In Local Programming web page, click on “System Setting,” and then “Factory Reset” Section. Step 1: Click on “Yes” to begin factory reset. Step 2: Successful factory reset will be confirm with message. Step 3: factory reset has been completed.
In Local Programming web page, go to ""Device Management"" Step 1: Click on ""Inclusion"" to enter inclusion page. Step 2: Click on ""Start"" to enter inclusion mode. Step 3: Press the test or inclusion button on the Z-Wave product/sensor. Step 4: When the controller received the signal transmitted from the Z-Wave product/sensor, the web page will display its information for selection. Step 5: Click ""Add"" to include selected Z-Wave product/sensor into controller. Step 6: If the Z-Wave product/sensor is successfully included into the controller, the Z-Wave product/sensor will be displayed in the ""Included Device"" section. Step 7: Click “Stop” to exit inclusion mode when complete.
In Local Programming web page, go to “Device Management” Step 1: Click on “Exclusion” and click on “Start” to start the procedure. Then the controller will enter the exclusion mode. Step 2: Refer to the Z-Wave product/sensor user manual to transmit signal. Step 3: Select the Z-Wave product/sensor and click “delete” to remove it from the Z-Wave list under “Device List” section in controller. The controller will then remove the Z-Wave product/sensor.
| Type | Value(s) |
|---|