Jasco Products Company
Slim Smart Door/Window Sensor
43973/ZW6305
Notification Sensor
HW: 255 FW: 5.55
ZM5202
6.81.01
0x0063 (99)
0x4953 (18771)
0x3235 (12853)
ZC10-19016363
2019-01-30 20:49:59.734616
N/A
Enhanced 232 Slave
Reporting Sleeping Slave
Yes
Whether you’re coming or going, your home is ready when you are with the Z-Wave Plus Slim Smart Door/Window Sensor.
By simply opening or closing your door or window, the sensor uses Z-Wave technology to wirelessly trigger scenes throughout your home. From your mobile device, you’re able to schedule lights to turn on as soon as you walk in and be notified of activity while you’re away. The sensor is discreetly designed to blend subtly into the frame of the door, adding the convenience of the Smart Door/Window Sensor to your home without distracting from your household decor.
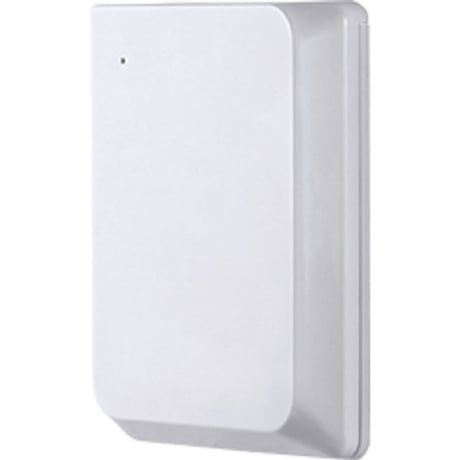
Product Picture


1 - Reverse open/close detection
This parameter allows you to reverse the detection values of the device.Size: 1 byte
Default: 0
Minimum: 0
Maximum: 1
Possible values
| From | To | Desription |
|---|---|---|
| 0 | 0 | (Default) Disabled |
| 1 | 1 | Reverse event (Open 16, Close 17) |
19 - Alternate exclusion
This parameter allows you to enable the alternate exclusion method that is available for this device.Size: 1 byte
Default: 0
Minimum: 0
Maximum: 1
Possible values
| From | To | Desription |
|---|---|---|
| 0 | 0 | (Default) Disabled |
| 1 | 1 | Enabled |
20 - Inclusion Configuration
This parameter allows you to change the inclusion configuration settings of this device.Size: 1 byte
Default: 1
Minimum: 1
Maximum: 2
Possible values
| From | To | Desription |
|---|---|---|
| 1 | 1 | (Default) - Notification Only |
| 2 | 2 | Notification and Basic Report |
21 - LED Control (Magnet triggers only)
This parameter gives you the option to turn the LED off on magnetic triggers.Size: 1 byte
Default: 0
Minimum: 0
Maximum: 1
Possible values
| From | To | Desription |
|---|---|---|
| 0 | 0 | (Default) - Enabled |
| 1 | 1 | Disabled |
23 - Battery Report Interval
This parameter allows you to choose how often the battery level is reported.Size: 2 bytes
Default: 1440
Minimum: 5
Maximum: 1440
Possible values
| From | To | Desription |
|---|---|---|
| 5 | 60 | 5-60 Minutes |
| 360 | 360 | 6 Hours |
| 720 | 720 | 12 Hours |
| 1440 | 1440 | (Default) Daily |
53 - Tamper LED Control
This parameter allows you to choose how often the LED will flash once the device/battery cover is tampered with.Size: 1 byte
Default: 1
Minimum: 1
Maximum: 2
Possible values
| From | To | Desription |
|---|---|---|
| 1 | 1 | (Default) Continuous Flash |
| 2 | 2 | Flashes once, on initial tamper only |
Automatic mode 1. Follow the instructions for your Z-Wave certified controller to add the sensor in the Z-Wave network. 2. Once the controller is ready to add your sensor, slide the battery door down and remove (if not mounted to door or window). 3. Remove the plastic battery tab. This activates the sensor and starts the auto-add process. The red LED will begin to flash quickly as it searches for a network. The sensor will attempt to search for a network for two minutes, after which, it will time out. 4. The red LED will continue to flash quickly after it locates a network – the controller’s app will indicate if it has discovered the sensor. If prompted by the controller to enter the S2 security code, refer to the QR code/security number on the back of the box, or the QR code label on the product. Enter the 5-digit code. 5. The red LED will activate for 3 seconds to confirm the sensor has been added in the network. Manual mode 1. Follow the instructions for your Z-Wave certified controller to add the sensor in the Z-Wave network. 2. Once the controller is ready to add your sensor, ensure battery is installed with the correct polarity in the sensor and the battery tab has been removed. 3. Press and release the programming button. This starts the manual add process. The red LED will begin to flash quickly as it begins the add process. 4. The red LED will activate for 3 seconds to confirm the sensor has been added in the network. 5. The controller’s app will indicate if it has discovered the sensor. If prompted by the controller to enter the S2 security code, refer to the QR code/security number on the back of the box, or the QR code label on the product. Enter the 5-digit code.
1. Follow the instructions for your Z-Wave certified controller to remove the sensor from the Z-Wave network. 2. Once the controller is ready to remove your sensor, press and release the programming button on the sensor 1 time to remove it from the network. 3. The red LED will blink 5 times to indicate it has been removed.
1. Press the programming button 10 times within 6 seconds (interval between presses of the button cannot be longer than 1 second). 2. The red LED will activate for 2 seconds, followed by 3 quick flashes. - Please use this procedure only when the network primary controller is missing or otherwise inoperable.
| Type | Value(s) |
|---|
| Group | Type |
|---|---|
| Home Security | (Refer to parameters): State idle |
| Sensor type |
|---|
| General Purpose |