Alarm.com
Alarm.com Smart Gateway
ADC-SG-100Z
Central Controller
HW: 88 FW: 6.01:03.17
SD3503
6.81.01
0x0094 (148)
0x000B (11)
0x010B (267)
ZC10-19026381
2019-02-21 23:41:19.363946
N/A
Static Controller
Central Static Controller
Alarm.com gateway to automate your home with a hub that costs a fraction of the price of current Z-Wave hubs on the market.
Alarm.com gateway to automate your home with a hub that costs a fraction of the price of current Z-Wave hubs on the market. The Alarm.com ADC-SG-100Z described in this product manual enables a host of remote controls and features leveraging the Alarm.com cloud and accessible via the Alarm.com Customer Website, the Alarm.com Customer App, the Alarm.com Dealer Website, and Alarm.com’s Mobiletech tool for dealers. Some features are only available through the Customer Website or through the Dealer Website. Mobiletech and the Alarm.com App both serve as more convenient ways for customers and dealers to access some more commonly used features. The Alarm.com ADC-SG-100Z is a Security Enabled Z-Wave Plus Product.
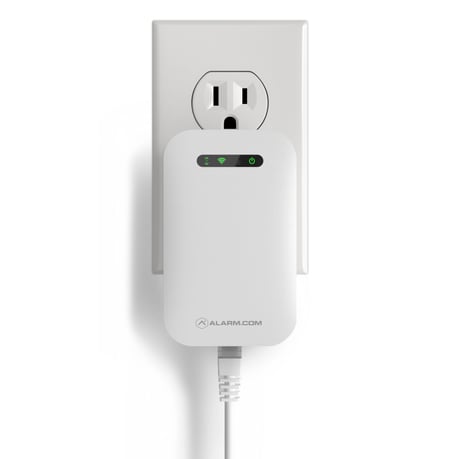
Product Picture
4 Learning the Alarm.com ADC-SG-100Z into another Z-Wave network 1. Learning in the Alarm.com ADC-SG-100Z using the Dealer Site a. Log in to the Alarm.com Dealer Site b. Select the customer whose node you wish to remove c. Navigate to the page to allow sending generic commands. This can be found in the AirFX Remote Toolkit or by navigating to https://alarmadmin.alarm.com/Support/Commands/GenericCommand.aspx d. Place a controller on the existing network into add mode e. Send the generic command 5B10030101 to the ADC-SG-100Z, once received it will cause the Alarm.com ADC-SG-100Z to learn into the existing Z-Wave network and will allow it to cause all relevant network information to be copied over from the controller that was put into add mode.
Support for the Wake Up command class is enabled using Alarm.com’s rules engine. This requires a series of rules pushed from the cloud when Alarm.com detects that a Wake Up device has been added to the Alarm.com Module. For this reason Wake Up notifications will only be handled properly by the Alarm.com module after any locally added Wake Up devices have been reported to the backend. This can take up to 15 minutes, but can be accelerated by using Remote Add or by requesting a Z-Wave Equipment List from the Alarm.com backend.
Use this procedure only in the event that the network primary controller is missing or otherwise inoperable. NOTE: This function will forcibly clear the Alarm.com ADC-SG-100Z’s Z-Wave node identification and will also remove all network information from the ADC-SG-100Z. Use this procedure only in the event that the network primary controller is missing or otherwise inoperable. If this controller is the primary controller for your network, resetting it will result in the nodes in your network being orphaned and it will be necessary after the reset to exclude and re-include all of the nodes in the network. If this controller is being used as a secondary controller in the network, use this procedure to reset this controller only in the event that the network primary controller is missing or otherwise inoperable. 1. A Z-Wave factory reset must be triggered from the Alarm.com dealer site 2. Navigate to the Equipment page. 3. Click the “emPower Devices” tab. 4. Open the “Advanced Z-Wave Commands” menu by clicking the button below the Equipment List. 5. Towards the bottom next to the “Equipment List Label” text click on the “Reset To Factory Default” button 6. Allow 3 minutes for the associated commands to go through and for the ADC-SG-100Z to act on them
1 Adding devices to the Alarm.com ADC-SG-100Z’s Z-Wave Network NOTE: This process leverages Network Wide Inclusion. In addition, any controllers added to the Alarm.com ADC-SG-100Z will have network information replicated over to them. 1. Using Mobiletech a. Install the MobileTech App (if not already done) and select the customer of interest. b. Move all Z-Wave devices to their final location on the property. c. Navigate to the Equipment List page. d. Select emPower Management. e. Select Add Z-Wave Devices f. Wait for the bolded message: Checking for new devices on the network g. Trigger a device to add it to the network. h. When a device is added successfully, it will show up on this screen following a 30 second delay. i. Continue triggering devices. You may add many devices to the network without reentering Add Mode. 2. Using the Dealer Website a. Navigate to the Equipment page. b. Click the emPower Devices tab. c. Open the Advanced Z-Wave Commands menu below the Equipment List. d. Click Add Z-Wave Devices. e. Wait for the bolded message: Checking for new devices on the network. f. Trigger a device to add it to the network. g. When a device is added successfully, it will show up on this screen following a 30 second delay. h. Continue triggering devices. You may add many devices to the network without reentering Add Mode. 3. Using the DSC Panel a. Press [*] [8], then the installer code, to enter Installer Programming. b. Enter 851 for Interactive Services. c. Use the arrow keys to scroll to and select Z-Wave Setup. d. Use the arrow keys to scroll to and select Add Z-Wave Device. e. Trigger a device to add it to the network. f. When a device is added successfully, the panel will beep. g. You will need to re-enter Add Mode before triggering the next device.
2 Removing devices from the Alarm.com ADC-SG-100Z’s Z-Wave network 1. Using Mobiletech a. Install the MobileTech App (if not already done) and select the customer of interest. b. Move all Z-Wave devices you plan to remove close to the Alarm.com ADC-SG-100Z. c. Navigate to the Equipment List page. d. Select emPower Management. e. Select remove Z-Wave Devices f. Wait for the bolded message: Checking for removed devices on the network g. Trigger a device to remove it from the network. h. When a device is removed successfully and its network information is erased, it will show up on this screen following a 30 second delay. i. Continue triggering devices. You may remove many devices to the network without reentering remove Mode. 2. Using the Dealer Website a. Move all Z-Wave devices you plan to remove close to the Alarm.com ADC-SG-100Z. b. Navigate to the Equipment page. c. Click the emPower Devices tab. d. Open the Advanced Z-Wave Commands menu below the Equipment List. e. Click remove Z-Wave Devices. f. Wait for the bolded message: Checking for removed devices on the network. g. Trigger a device to remove it from the network. h. When a device is removed successfully and its network information is erased, it will show up on this screen following a 30 second delay. i. Continue triggering devices. You may remove many devices to the network without reentering remove Mode. 3. Using the DSC Panel a. Press * then 8 to enter Installer Programming. b. Enter 851 for Interactive Services. c. Use the arrow keys to scroll to and select Z-Wave Setup. d. Use the arrow keys to scroll to and select Remove Z-Wave Device. e. Trigger a device to clear its network data and remove it from the existing Z-Wave network. f. The panel will beep when a device has been removed. g. You will need to re-enter remove Mode to remove more devices.
| Type | Value(s) |
|---|