Aeotec
Doorbell 6
ZW162-C
Sound Switch
HW: 162 FW: 1.04
ZM5101
6.71.03
0x0371 (881)
0x0003 (3)
0x00A2 (162)
ZC10-19046416
2019-04-03 20:02:41.025853
N/A
Enhanced 232 Slave
Always On Slave
Built-in multiple tones and light effects, Doorbell 6 is a smart doorbell based on Z-Wave and 433.92MHz/FSK.
- S2 Security. - Not only a doorbell, but also can be used as a siren via setting. - Can be wireless controlled by more Button, up to 3. - Longer Button control distance, up to 120m. - Built-in multiple tones, up to 30. - Built-in multiple adjustable Light Effect.
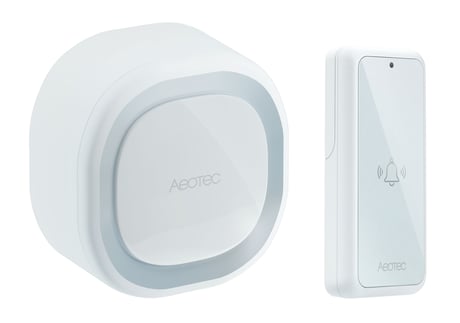
Product Picture


1 - Configure the Light Effect and Tone Play Mode for Endpoint 1(Browse).
Please refer to the Product Manual for more details.Size: 4 bytes
Default: 16777216
Minimum: 0
Maximum: 0
Possible values
| From | To | Desription |
|---|---|---|
| 16777216 | 2147418112 | Configure the Light Effect and Tone Play Mode for Endpoint 1(Browse). |
2 - Configure the Light Effect and Tone Effect for Endpoint 2(Tampering).
Please refer to the Product Manual for more details.Size: 4 bytes
Default: 16777217
Minimum: 0
Maximum: 0
Possible values
| From | To | Desription |
|---|---|---|
| 16777216 | 2147483647 | Configure the Light Effect and Tone Effect for Endpoint 2(Tampering). |
3 - Configure the Light Effect and Tone Effect for Endpoint 3(Doorbell 1).
Please refer to the Product Manual for more details.Size: 4 bytes
Default: 33554433
Minimum: 0
Maximum: 0
Possible values
| From | To | Desription |
|---|---|---|
| 16777216 | 2147483647 | Configure the Light Effect and Tone Effect for Endpoint 3(Doorbell 1). |
4 - Configure the Light Effect and Tone Effect for Endpoint 4(Doorbell 2).
Please refer to the Product Manual for more details.Size: 4 bytes
Default: 33554433
Minimum: 0
Maximum: 0
Possible values
| From | To | Desription |
|---|---|---|
| 16777216 | 2147483647 | Configure the Light Effect and Tone Effect for Endpoint 4(Doorbell 2). |
5 - Configure the Light Effect and Tone Effect for Endpoint 5(Doorbell 3).
Please refer to the Product Manual for more details.Size: 4 bytes
Default: 33554433
Minimum: 0
Maximum: 0
Possible values
| From | To | Desription |
|---|---|---|
| 16777216 | 2147483647 | Configure the Light Effect and Tone Effect for Endpoint 5(Doorbell 3). |
6 - Configure the Light Effect and Tone Effect for Endpoint 6(Environment).
Please refer to the Product Manual for more details.Size: 4 bytes
Default: 67108864
Minimum: 0
Maximum: 0
Possible values
| From | To | Desription |
|---|---|---|
| 16777216 | 2147483647 | Configure the Light Effect and Tone Effect for Endpoint 6(Environment). |
7 - Configure the Light Effect and Tone Effect for Endpoint 7(Security).
Please refer to the Product Manual for more details.Size: 4 bytes
Default: 67108864
Minimum: 0
Maximum: 0
Possible values
| From | To | Desription |
|---|---|---|
| 16777216 | 2147483647 | Configure the Light Effect and Tone Effect for Endpoint 7(Security). |
8 - Configure the Light Effect and Tone Effect for Endpoint 8(Emergency).
Please refer to the Product Manual for more details.Size: 4 bytes
Default: 67108864
Minimum: 0
Maximum: 0
Possible values
| From | To | Desription |
|---|---|---|
| 16777216 | 2147483647 | Configure the Light Effect and Tone Effect for Endpoint 8(Emergency). |
16 - Configure #1 Light Effect.
Please refer to the Product Manual for more details.Size: 4 bytes
Default: 1259934723
Minimum: 0
Maximum: 0
Possible values
| From | To | Desription |
|---|---|---|
| 0 | 2147483647 | The Light Effect is displayed cyclically, and the maximum display duration is equal to the total duration of the tone playback. In other words, the Light Effect will be displayed in a loop until stop playing tone. |
17 - Configure #2 Light Effect.
Please refer to the Product Manual for more details.Size: 4 bytes
Default: 842137603
Minimum: 0
Maximum: 0
Possible values
| From | To | Desription |
|---|---|---|
| 0 | 2147483647 | The Light Effect is displayed cyclically, and the maximum display duration is equal to the total duration of the tone playback. In other words, the Light Effect will be displayed in a loop until stop playing tone. |
18 - Configure #3 Light Effect.
Please refer to the Product Manual for more details.Size: 4 bytes
Default: 2162947
Minimum: 0
Maximum: 0
Possible values
| From | To | Desription |
|---|---|---|
| 0 | 2147483647 | The Light Effect is displayed cyclically, and the maximum display duration is equal to the total duration of the tone playback. In other words, the Light Effect will be displayed in a loop until stop playing tone. |
19 - Configure #4 Light Effect.
Please refer to the Product Manual for more details.Size: 4 bytes
Default: 553648131
Minimum: 0
Maximum: 0
Possible values
| From | To | Desription |
|---|---|---|
| 0 | 2147483647 | The Light Effect is displayed cyclically, and the maximum display duration is equal to the total duration of the tone playback. In other words, the Light Effect will be displayed in a loop until stop playing tone. |
20 - Configure #5 Light Effect.
Please refer to the Product Manual for more details.Size: 1 byte
Default: 10
Minimum: 0
Maximum: 0
Possible values
| From | To | Desription |
|---|---|---|
| 0 | 2147483647 | The Light Effect is displayed cyclically, and the maximum display duration is equal to the total duration of the tone playback. In other words, the Light Effect will be displayed in a loop until stop playing tone. |
21 - Configure #6 Light Effect.
Please refer to the Product Manual for more details.Size: 4 bytes
Default: 2560
Minimum: 0
Maximum: 0
Possible values
| From | To | Desription |
|---|---|---|
| 0 | 2147483647 | The Light Effect is displayed cyclically, and the maximum display duration is equal to the total duration of the tone playback. In other words, the Light Effect will be displayed in a loop until stop playing tone. |
22 - Configure #7 Light Effect.
Please refer to the Product Manual for more details.Size: 4 bytes
Default: 553648129
Minimum: 0
Maximum: 0
Possible values
| From | To | Desription |
|---|---|---|
| 0 | 2147483647 | The Light Effect is displayed cyclically, and the maximum display duration is equal to the total duration of the tone playback. In other words, the Light Effect will be displayed in a loop until stop playing tone. |
32 - Configure how to send Basic Set to nodes in Group 2.
Size: 1 byte
Default: 3
Minimum: 0
Maximum: 0
Possible values
| From | To | Desription |
|---|---|---|
| 0 | 0 | Don’t send Basic Set. |
| 1 | 1 | When Endpoint 1 starts playing tone, send Basic Set 0xFF. When Endpoint 1 stops playing tone, don’t send Basic Set. |
| 2 | 2 | When Endpoint 1 starts playing tone, send Basic Set 0x00. When Endpoint 1 stops playing tone, don’t send Basic Set. |
| 3 | 3 | When Endpoint 1 starts playing tone, send Basic Set 0xFF. When Endpoint 1 stops playing tone, send Basic Set 0x00. |
| 4 | 4 | When Endpoint 1 starts playing tone, send Basic Set 0x00. When Endpoint 1 stops playing tone, send Basic Set 0xFF. |
33 - Configure how to send Basic Set to nodes in Group 3.
Size: 1 byte
Default: 3
Minimum: 0
Maximum: 0
Possible values
| From | To | Desription |
|---|---|---|
| 0 | 0 | Don’t send Basic Set. |
| 1 | 1 | When Endpoint 2 starts playing tone, send Basic Set 0xFF. When Endpoint 2 stops playing tone, don’t send Basic Set. |
| 2 | 2 | When Endpoint 2 starts playing tone, send Basic Set 0x00. When Endpoint 2 stops playing tone, don’t send Basic Set. |
| 3 | 3 | When Endpoint 2 starts playing tone, send Basic Set 0xFF. When Endpoint 2 stops playing tone, send Basic Set 0x00. |
| 4 | 4 | When Endpoint 2 starts playing tone, send Basic Set 0x00. When Endpoint 2 stops playing tone, send Basic Set 0xFF. |
34 - Configure how to send Basic Set to nodes in Group 4.
Size: 1 byte
Default: 3
Minimum: 0
Maximum: 0
Possible values
| From | To | Desription |
|---|---|---|
| 0 | 0 | Don’t send Basic Set. |
| 1 | 1 | When Endpoint 3 starts playing tone, send Basic Set 0xFF. When Endpoint 3 stops playing tone, don’t send Basic Set. |
| 2 | 2 | When Endpoint 3 starts playing tone, send Basic Set 0x00. When Endpoint 3 stops playing tone, don’t send Basic Set. |
| 3 | 3 | When Endpoint 3 starts playing tone, send Basic Set 0xFF. When Endpoint 3 stops playing tone, send Basic Set 0x00. |
| 4 | 4 | When Endpoint 3 starts playing tone, send Basic Set 0x00. When Endpoint 3 stops playing tone, send Basic Set 0xFF. |
35 - Configure how to send Basic Set to nodes in Group 5.
Size: 1 byte
Default: 3
Minimum: 0
Maximum: 0
Possible values
| From | To | Desription |
|---|---|---|
| 0 | 0 | Don’t send Basic Set. |
| 1 | 1 | When Endpoint 4 starts playing tone, send Basic Set 0xFF. When Endpoint 4 stops playing tone, don’t send Basic Set. |
| 2 | 2 | When Endpoint 4 starts playing tone, send Basic Set 0x00. When Endpoint 4 stops playing tone, don’t send Basic Set. |
| 3 | 3 | When Endpoint 4 starts playing tone, send Basic Set 0xFF. When Endpoint 4 stops playing tone, send Basic Set 0x00. |
| 4 | 4 | When Endpoint 4 starts playing tone, send Basic Set 0x00. When Endpoint 4 stops playing tone, send Basic Set 0xFF. |
36 - Configure how to send Basic Set to nodes in Group 6.
Size: 1 byte
Default: 3
Minimum: 0
Maximum: 0
Possible values
| From | To | Desription |
|---|---|---|
| 0 | 0 | Don’t send Basic Set. |
| 1 | 1 | When Endpoint 5 starts playing tone, send Basic Set 0xFF. When Endpoint 5 stops playing tone, don’t send Basic Set. |
| 2 | 2 | When Endpoint 5 starts playing tone, send Basic Set 0x00. When Endpoint 5 stops playing tone, don’t send Basic Set. |
| 3 | 3 | When Endpoint 5 starts playing tone, send Basic Set 0xFF. When Endpoint 5 stops playing tone, send Basic Set 0x00. |
| 4 | 4 | When Endpoint 5 starts playing tone, send Basic Set 0x00. When Endpoint 5 stops playing tone, send Basic Set 0xFF. |
37 - Configure how to send Basic Set to nodes in Group 7.
Size: 1 byte
Default: 3
Minimum: 0
Maximum: 0
Possible values
| From | To | Desription |
|---|---|---|
| 0 | 0 | Don’t send Basic Set. |
| 1 | 1 | When Endpoint 6 starts playing tone, send Basic Set 0xFF. When Endpoint 6 stops playing tone, don’t send Basic Set. |
| 2 | 2 | When Endpoint 6 starts playing tone, send Basic Set 0x00. When Endpoint 6 stops playing tone, don’t send Basic Set. |
| 3 | 3 | When Endpoint 6 starts playing tone, send Basic Set 0xFF. When Endpoint 6 stops playing tone, send Basic Set 0x00. |
| 4 | 4 | When Endpoint 6 starts playing tone, send Basic Set 0x00. When Endpoint 6 stops playing tone, send Basic Set 0xFF. |
38 - Configure how to send Basic Set to nodes in Group 8.
Size: 1 byte
Default: 3
Minimum: 0
Maximum: 0
Possible values
| From | To | Desription |
|---|---|---|
| 0 | 0 | Don’t send Basic Set. |
| 1 | 1 | When Endpoint 7 starts playing tone, send Basic Set 0xFF. When Endpoint 7 stops playing tone, don’t send Basic Set. |
| 2 | 2 | When Endpoint 7 starts playing tone, send Basic Set 0x00. When Endpoint 7 stops playing tone, don’t send Basic Set. |
| 3 | 3 | When Endpoint 7 starts playing tone, send Basic Set 0xFF. When Endpoint 7 stops playing tone, send Basic Set 0x00. |
| 4 | 4 | When Endpoint 7 starts playing tone, send Basic Set 0x00. When Endpoint 7 stops playing tone, send Basic Set 0xFF. |
39 - Configure how to send Basic Set to nodes in Group 9.
Size: 1 byte
Default: 3
Minimum: 0
Maximum: 0
Possible values
| From | To | Desription |
|---|---|---|
| 0 | 0 | Don’t send Basic Set. |
| 1 | 1 | When Endpoint 8 starts playing tone, send Basic Set 0xFF. When Endpoint 8 stops playing tone, don’t send Basic Set. |
| 2 | 2 | When Endpoint 8 starts playing tone, send Basic Set 0x00. When Endpoint 8 stops playing tone, don’t send Basic Set. |
| 3 | 3 | When Endpoint 8 starts playing tone, send Basic Set 0xFF. When Endpoint 8 stops playing tone, send Basic Set 0x00. |
| 4 | 4 | When Endpoint 8 starts playing tone, send Basic Set 0x00. When Endpoint 8 stops playing tone, send Basic Set 0xFF. |
48 - Tigger Unpairing Button Mode (Write Only)
(1) Can trigger unpairing multiple Buttons at one time. (2) User does not need to do anything to Button. (3) Indicator Light will quickly flash white light 3 times when Unpairing Button Mode finishes.Size: 1 byte
Default: 0
Minimum: 0
Maximum: 0
Possible values
| From | To | Desription |
|---|---|---|
| 1 | 1 | Tigger Unpairing #1 Button Mode. |
| 2 | 2 | Tigger Unpairing #2 Button Mode. |
| 3 | 3 | Tigger Unpairing #2 and #1 Button Mode. |
| 4 | 4 | Tigger Unpairing #3 Button Mode. |
| 5 | 5 | Tigger Unpairing #3 and #1 Button Mode. |
| 6 | 6 | Tigger Unpairing #3 and #2 Button Mode. |
| 7 | 7 | Tigger Unpairing #3, #2 and #1 Button Mode. |
49 - Tigger Pairing Button Mode (Write Only)
(1) Can NOT trigger pairing multiple Buttons at one time. (2) Pairing time is up to 10 seconds. In this time period, user MUST manually click Ring Button 3 times quickly. Otherwise it cannot be paired successfully. (3) Each successful pairing will overwrite the previous paired Button which has the same Button Number.Size: 1 byte
Default: 0
Minimum: 0
Maximum: 0
Possible values
| From | To | Desription |
|---|---|---|
| 0 | 0 | Exit Pairing Button Mode. |
| 1 | 1 | Tigger Pairing #1 Button Mode. |
| 2 | 2 | Tigger Pairing #2 Button Mode. |
| 4 | 4 | Tigger Pairing #3 Button Mode. |
50 - Report which Pairing Button Mode is triggered (Read Only)
Once Pairing Button Mode is triggered, node will automatically send this configuration report via Lifeline to inform which Button is waiting for being paired.Size: 1 byte
Default: 0
Minimum: 0
Maximum: 0
Possible values
| From | To | Desription |
|---|---|---|
| 0 | 0 | There is no Pairing Button Mode being triggered. |
| 1 | 1 | Pairing #1 Button Mode is triggered. |
| 2 | 2 | Pairing #2 Button Mode is triggered. |
| 4 | 4 | Pairing #3 Button Mode is triggered. |
51 - Report which Buttons had been paired (Read Only)
Once Unpairing or Pairing Button Mode finishes, node will automatically send this configuration report via Lifeline to inform which Buttons had been paired. This parameter does not restore to the default value when Chime is removed from the network or reset the factory settings.Size: 1 byte
Default: 0
Minimum: 0
Maximum: 0
Possible values
| From | To | Desription |
|---|---|---|
| 0 | 0 | There is no paired Button. |
| 1 | 1 | #1 Button had been paired. |
| 2 | 2 | #2 Button had been paired. |
| 3 | 3 | #2 and #1 Button had been paired. |
| 4 | 4 | #3 Button had been paired. |
| 5 | 5 | #3 and #1 Button had been paired. |
| 6 | 6 | #3 and #2 Button had been paired. |
| 7 | 7 | #3, #2 and #1 Button had been paired. |
52 - Get the information of #1 Button (Read Only)
This parameter does not restore to the default value when Chime is removed from the network or reset the factory settings.Size: 4 bytes
Default: 0
Minimum: 0
Maximum: 0
Possible values
| From | To | Desription |
|---|---|---|
| 0 | 0 | #1 Button is unpaired. |
| 1 | 2147483647 | Information about #1 Button, including battery voltage (unit is mV) and software version. |
53 - Get the information of #2 Button (Read Only)
This parameter does not restore to the default value when Chime is removed from the network or reset the factory settings.Size: 4 bytes
Default: 0
Minimum: 0
Maximum: 0
Possible values
| From | To | Desription |
|---|---|---|
| 0 | 0 | #2 Button is unpaired. |
| 1 | 134217727 | Information about #2 Button, including battery voltage (unit is mV) and software version. |
54 - Get the information of #3 Button (Read Only)
This parameter does not restore to the default value when Chime is removed from the network or reset the factory settings.Size: 4 bytes
Default: 0
Minimum: 0
Maximum: 0
Possible values
| From | To | Desription |
|---|---|---|
| 0 | 0 | #3 Button is unpaired. |
| 1 | 2147483647 | Information about #3 Button, including battery voltage (unit is mV) and software version. |
96 - Enable or Disable the ability that click the Action Button to stop a playing tone.
Size: 1 byte
Default: 0
Minimum: 0
Maximum: 0
Possible values
| From | To | Desription |
|---|---|---|
| 0 | 0 | Disable |
| 1 | 1 | Enable |
255 - Factory Reset or Initialization (Write Only)
Parameter 51/52/53/54 will not restore the configuration settings to the default when Factory Reset or Initialization is performed.Size: 4 bytes
Default: 0
Minimum: 0
Maximum: 0
Possible values
| From | To | Desription |
|---|---|---|
| 0 | 0 | Initialization: Initialize all configuration parameters to default values. |
| 1431655765 | 1431655765 | Factory Reset: Restore the product to factory settings and remove from the network. |
This product supports Security 2 Command Class. While a Security S2 enabled Controller is needed in order to fully use the security feature. This product can be included and operated in any Z-Wave network with other Z-Wave certified devices from other manufacturers and/or other applications. All non-battery operated nodes within the network will act as repeaters regardless of vendor to increase reliability of the network. 1. Set your Z-Wave Controller into its 'Add Device' mode in order to add Chime into your Z-Wave system. Refer to the Controller's manual if you are unsure of how to perform this step. 2. Power on Chime via the provided power adapter; its LED will be breathing white light all the time. 3. Click Chime Action Button once, it will quickly flash white light for 30 seconds until Chime is added into the network. It will become constantly bright white light after being assigned a NodeID. 4. If your Z-Wave Controller supports S2 encryption, enter the first 5 digits of DSK into your Controller's interface if/when requested. The DSK is printed on Chime's housing. 5. If Adding fails, it will slowly flash white light 3 times and then become breathing white light; repeat steps 1 to 4. Contact us for further support if needed. 6. If Adding succeeds, it will quickly flash white light 3 times and then become off. Now, Chime is a part of your Z-Wave home control system. You can configure it and its automations via your Z-Wave system; please refer to your software's user guide for precise instructions. Note: If Action Button is clicked again during the Learn Mode, the Learn Mode will exit. At the same time, Indicator Light will extinguish immediately, and then become breathing white light.
1. Set your Z-Wave Controller into its ' Remove Device' mode in order to remove Chime from your Z-Wave system. Refer to the Controller's manual if you are unsure of how to perform this step. 2. Power on Chime via the provided power adapter; its LED will be off. 3. Click Chime Action Button 6 times quickly; it will bright white light, up to 2s. 4. If Removing fails, it will keep off; repeat steps 1 to 3. Contact us for further support if needed. 5. If Removing succeeds, it will quickly flash white light 3 times and then become breathing white light. Now, Chime is removed from Z-Wave network successfully.
If the primary controller is missing or inoperable, you may need to reset the device to factory settings. Make sure the Chime is powered. To complete the reset process manually, press and hold the Action Button for at least 20s. The LED indicator will quickly flash white light 3 times and then become breathing white light, which indicates the reset operation is successful. Otherwise, please try again. Contact us for further support if needed. Note: 1. This procedure should only be used when the primary controller is missing or inoperable. 2. Factory Reset Chime will: (a) Remove Chime from Z-Wave network; (b) Delete the Association setting; (c) Restore the configuration settings to the default.(Except configuration parameter 51/52/53/54)
| Type | Value(s) |
|---|
| Group | Type |
|---|---|
| Home Security | (Refer to parameters): State idle |
| Power Management | (Refer to parameters): State idle |
| Siren |
|
| Sensor type |
|---|
| General Purpose |