Bezeq
xDSL / GFAST GW
HT-138S
Central Controller
HW: 176 FW: 6.04:03.27
ZM5101
6.81.04
0x0094 (148)
0x0012 (18)
0x0112 (274)
ZC10-19096737
2019-09-05 17:14:58.058455
N/A
Static Controller
Central Static Controller
Bezeq BeHome Gateway HT-138S
Bezeq BeHome Gateway HT-138S with Alarm.com Z-Wave Home Automation Capabilities
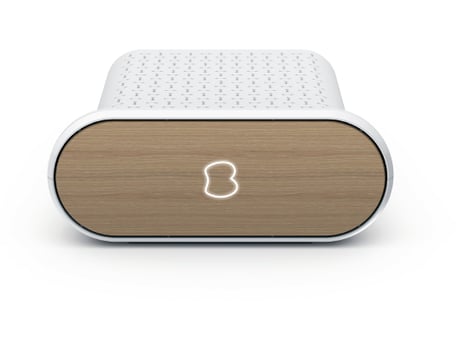
Product Image Published
NOTE: This process leverages Network Wide Inclusion. In addition, any controllers added to the Alarm.com GATEWAY will have network information replicated over to them. 1. Using Mobiletech a. Install the MobileTech App (if not already done) and select the customer of interest. b. Move all Z-Wave devices to their final location on the property. c. Navigate to the Equipment List page. d. Select emPower Management. e. Select Add Z-Wave Devices f. Wait for the bolded message: Checking for new devices on the network g. Trigger a device to add it to the network. h. When a device is added successfully, it will show up on this screen following a 30 second delay. i. Continue triggering devices. You may add many devices to the network without reentering Add Mode. 2. Using the Dealer Website a. Navigate to the Equipment page. b. Click the emPower Devices tab. c. Open the Advanced Z-Wave Commands menu below the Equipment List. d. Click Add Z-Wave Devices. e. Wait for the bolded message: Checking for new devices on the network. f. Trigger a device to add it to the network. g. When a device is added successfully, it will show up on this screen following a 30 second delay. h. Continue triggering devices. You may add many devices to the network without reentering Add Mode.
1. Using Mobiletech a. Install the MobileTech App (if not already done) and select the customer of interest. b. Move all Z-Wave devices you plan to remove close to the Alarm.com GATEWAY. c. Navigate to the Equipment List page. d. Select emPower Management. e. Select Remove Z-Wave Devices f. Wait for the bolded message: Checking for removed devices on the network g. Trigger a device to remove it from the network. h. When a device is removed successfully and its network information is erased, it will show up on this screen following a 30 second delay. i. Continue triggering devices. You may remove many devices to the network without reentering Remove Mode. 2. Using the Dealer Website a. Move all Z-Wave devices you plan to remove close to the Alarm.com GATEWAY. b. Navigate to the Equipment page. c. Click the emPower Devices tab. d. Open the Advanced Z-Wave Commands menu below the Equipment List. e. Click Remove Z-Wave Devices. f. Wait for the bolded message: Checking for removed devices on the network. g. Trigger a device to remove it from the network. h. When a device is removed successfully and its network information is erased, it will show up on this screen following a 30 second delay. i. Continue triggering devices. You may remove many devices to the network without reentering Remove Mode.
2.5 Learning the Alarm.com Z-WAVE DEVICE into another Z-Wave network To learn the Alarm.com Z-WAVE DEVICE into another Z-Wave network, follow these steps: 1. Log into the Partner Portal at https://alarmadmin.alarm.com/default.aspx and select a customer. 2. Navigate to the “Equipment” page. 3. Click the “emPower Devices” tab. 4. If there are any nodes currently in the Alarm.com Z-WAVE DEVICE’s network, remove them by following the instructions at Removing devices from the Alarm.com Z-WAVE DEVICE’s Z-Wave network. 5. Put the primary Z-Wave controller in add mode. 6. Click the “Replicate Z-Wave Controller” button. The DSK will be displayed with the first five digits bolded. 7. When the Alarm.com Z-WAVE DEVICE learns into another network successfully, that network’s information will show up on the screen. This information may be delayed up to two minutes as the Alarm.com Z-WAVE DEVICE queries the nodes
Support for the Wake Up command class is enabled using Alarm.com’s rules engine. This requires a series of rules pushed from the cloud when Alarm.com detects that a Wake Up device has been added to the Alarm.com Module. For this reason Wake Up notifications will only be handled properly by the Alarm.com module after any locally added Wake Up devices have been reported to the backend. This can take up to 15 minutes, but can be accelerated by using Remote Add or by requesting a Z-Wave Equipment List from the Alarm.com backend.
2.4 Reset Alarm.com Z-WAVE DEVICE to default state This process will clear all nodes from the Alarm.com Z-WAVE DEVICE’s network, change the Alarm.com Z-WAVE DEVICE’s home ID, and reset all Z-Wave settings to their default values. To perform a Z-Wave reset, follow these steps: 1. Log into the Partner Portal at https://alarmadmin.alarm.com/default.aspx and select a customer. 2. Navigate to the “Equipment” page. 3. Click the “emPower Devices” tab. 4. Expand the “Advanced Z-Wave Commands” box. 5. Click the “Remove All Z-Wave Devices” button. 6. Allow 3 minutes for the associated commands to go through and for the Z-WAVE DEVICE to act on them
2.5 Learning the Alarm.com Z-WAVE DEVICE into another Z-Wave network To learn the Alarm.com Z-WAVE DEVICE into another Z-Wave network, follow these steps: 1. Log into the Partner Portal at https://alarmadmin.alarm.com/default.aspx and select a customer. 2. Navigate to the “Equipment” page. 3. Click the “emPower Devices” tab. 4. If there are any nodes currently in the Alarm.com Z-WAVE DEVICE’s network, remove them by following the instructions at Removing devices from the Alarm.com Z-WAVE DEVICE’s Z-Wave network. 5. Put the primary Z-Wave controller in add mode. 6. Click the “Replicate Z-Wave Controller” button. The DSK will be displayed with the first five digits bolded. 7. When the Alarm.com Z-WAVE DEVICE learns into another network successfully, that network’s information will show up on the screen. This information may be delayed up to two minutes as the Alarm.com Z-WAVE DEVICE queries the nodes.
2.5 Learning the Alarm.com Z-WAVE DEVICE into another Z-Wave network To learn the Alarm.com Z-WAVE DEVICE into another Z-Wave network, follow these steps: 1. Log into the Partner Portal at https://alarmadmin.alarm.com/default.aspx and select a customer. 2. Navigate to the “Equipment” page. 3. Click the “emPower Devices” tab. 4. If there are any nodes currently in the Alarm.com Z-WAVE DEVICE’s network, remove them by following the instructions at Removing devices from the Alarm.com Z-WAVE DEVICE’s Z-Wave network. 5. Put the primary Z-Wave controller in add mode. 6. Click the “Replicate Z-Wave Controller” button. The DSK will be displayed with the first five digits bolded. 7. When the Alarm.com Z-WAVE DEVICE learns into another network successfully, that network’s information will show up on the screen. This information may be delayed up to two minutes as the Alarm.com Z-WAVE DEVICE queries the nodes
2.1 Adding devices to the Alarm.com Z-WAVE DEVICE’s Z-Wave Network This process leverages Network Wide Inclusion. In addition, any controllers added to the Alarm.com Z-WAVE DEVICE will have network information replicated over to them. 2.1.1 No Security, S0 Security, and S2 Unauthenticated Security To add a device to the network using no security, S0 security, or S2 unauthenticated security, follow these steps: 1. Log into the Partner Portal at https://alarmadmin.alarm.com/default.aspx and select a customer. 2. Navigate to the “Equipment” page. 3. Click the “emPower Devices” tab. 4. Click “Add Z-Wave Devices.” 5. Wait for the bolded message “Checking for new devices on the network.” The Alarm.com Z-Wave Device’s DSK is also displayed with the first five digits bolded. 6. Trigger a device to add it to the network. 7. When a device is added successfully, it will show up on this screen following a 30 second delay. 8. Continue triggering devices. You may add many devices to the network without reentering Add Mode. 2.1.2 S2 Authenticated and Access Security 2.1.2.1 Adding Devices Without Client-Side Authentication Adding a device to the network using the S2 Security Command Class with either authenticated or access security requires that the device’s DSK (Device Specific Key) is pre-cached in the Alarm.com system. To do this, follow these steps: 1. Log into the Partner Portal at https://alarmadmin.alarm.com/default.aspx and select a customer. 2. Navigate to the “Equipment” page. 3. Click the “emPower Devices” tab. 4. Expand the “Advanced Z-Wave Commands” box. 5. Click “View Device Keys.” 6. Enter a name for the new node and the first 15 characters of the device’s DSK in the table. To add more devices, click “Add Device.” 7. Click “Save” when all keys have been added. 8. Continue to add the device as described in No Security, S0 Security, and S2 Unauthenticated Security 2.1.2.2 Adding Devices with Client-Side Authentication To add a device to the network with Client-Side Authentication (CSA), follow these steps: 1. Add the device as described in No Security, S0 Security, and S2 Unauthenticated Security. 2. When the device requests CSA, a popup will appear on the screen asking if you would like to continue with CSA. Click “Continue.” 3. Enter the ten large digits displayed on the screen at the device. 4. CSA will finish executing automatically. Click “Save and Exit” once all nodes have been added.
2.2.1 Removing Communicating Devices This process leverages Network Wide Exclusion. To remove devices from the network, follow these steps: 1. Log into the Partner Portal at https://alarmadmin.alarm.com/default.aspx and select a customer. 2. Navigate to the “Equipment” page. 3. Click the “emPower Devices” tab. 4. Click “Remove Z-Wave Devices.” 5. Wait for the bolded message “Checking for removed devices on the network.” 6. Trigger a device to remove it from the network. 7. When a device is removed successfully and its network information is erased, it will show up on this screen following a 30 second delay. 8. Continue triggering devices. You may remove many devices to the network without reentering Remove Mode.
| Type | Value(s) |
|---|
| Meter type |
|---|
| Water Meter Consumption |