DSC
Wireless Alarm System with Integrated Home Automation
WS912-28
Gateway
HW: 1 FW: 0.02
ZM5101
6.51.09
0x0167 (359)
0x0001 (1)
0x0001 (1)
ZC10-19046429
2019-04-17 19:51:54.918811
N/A
Static Controller
Central Static Controller
Self-Contained Wireless Security System with integrated Z-Wave home automation support.
The DSC IoTega WS912-28 Self-Contained Wireless Security System provides an integrated solution for fire and security monitoring and home automation in a small footprint but reach in features and benefits. The IoTega is an easy to use, all-in-one wireless security panel optimized for use with home automation systems. The alarm panel supports a range of wireless devices via PowerG or Z-Wave. Installers set up and configure the panel through a smartphone app and cloud-based portal. End users also interact with the IoTega using an intuitive smartphone app or optional touchscreen keypad.
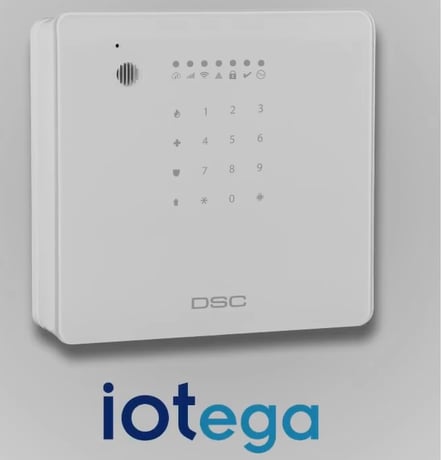
Product Picture
You can set the panel to receive network information from another Z-Wave controller using the Learn Mode. Press the button on the controller to put it into Learn Mode. Some applications include adding the panel to or removing it from another network and changing primary controllers.
To remove all the Z-Wave devices and restore the Z-Wave controller to factory defaults, complete the following steps: 1. In the Smartlink web portal, under Home Control , click Device Control. 2. Under Setup, click Tools, then click Reset Z-Wave. Note: Please use this procedure only when the network primary controller is missing or otherwise inoperable. If this controller is the primary controller for your network, resetting it will result in the nodes in your network being orphaned and it will be necessary after the reset to exclude and re-include all of the nodes in the network. If this controller is being used as a secondary controller in the network, use this procedure to reset this controller only in the event that the network primary controller is missing or otherwise inoperable.
To add the panel as a secondary controller to another Z-Wave network, complete the following steps: 1. Put the primary controller into Inclusion mode. Refer to the controller manual for more information. 2. In the Smartlink web portal, under Home Control , click Device Control. 3. Under Setup , click Tools , then click Add/Remove Z-Wave Controller. Adding a Device The Smartlink user app main screen has different options to add and control Z-Wave devices. To add a device on the app, tap the applicable option and complete the following steps: 1. Power up your device per the manufacturer's instructions. 2. From the Settings screen, tap Add Z-Wave Device to initialize learn mode. 3. Follow the instructions onscreen to bind your device. Refer to the device instructions, if necessary. 4. When enrollment completes, enter a device name and tap OK. Your device is ready to use. If using a Z-Wave smart switch to control power to a light or appliance, such as a fan, simply, plug it into an AC power outlet. Note: Only use the dimmer function on supported devices to prevent damage to the device.
To remove the panel as a secondary controller and re-establish it as primary, repeat the steps, changing the primary controller in step 1 to Exclusion mode. Editing or Removing a Device To edit or remove a device, complete the following steps: 1. From the Settings screen, tap Edit Device , then select the device you want to edit or remove. 2. Update the device name and tap Done to save your changes. Alternatively, tap Remove Device to remove it from your system.
| Type | Value(s) |
|---|