JR Automation Technology
4 CHANNEL RELAY
JR-4C01
On/Off Power Switch
HW: 1 FW: 4.01
ZM5101
6.81.03
0x0426 (1062)
0x0003 (3)
0x0001 (1)
ZC10-19066559
2019-06-14 00:36:08.024113
N/A
Enhanced 232 Slave
Always On Slave
JR automation 4 channel relay is designed for wireless home automation solution with Z-Wave technology to turn on-off load.
JR automation 4 channel relay is designed for wireless home automation solution with Z-Wave technology. It communicates with all the Z- wave based controller with 2-way feedback with wireless communication. For the Indian market, it installs in all the 4 or more-module back box. It works for all type of load to turn ON and OFF like Fan, Lights, LED, Bulb and heavy-duty load (like AC, Geyser by using intermediate relays) by each of 6A load current capacity. It also works to increase the range of Z-Wave mess network as Z-Wave repeater. Due to 4 channel relays together it’s very perfect for Indian market requirement with lower cost and without any changes in the normal switchboard. The encryption mode that the switch supports is S2 Unauthenticated.
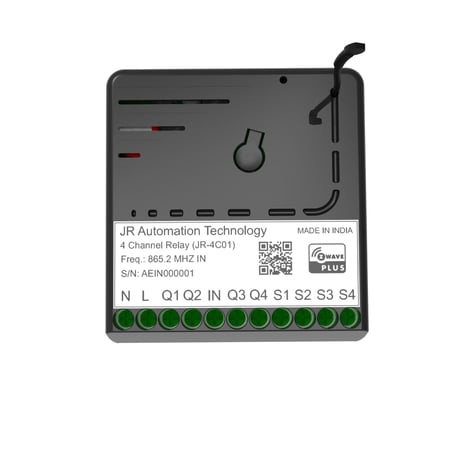
Product Picture
To add the device to the Z-Wave network: 1. Keep the device in Z-Wave range. 2. Power the device. 3. Set the main controller in (Security/non-Security Mode) add mode (see the controller’s manual). 4. Quickly, three times press the Config Button, LED color will change from Red to Blue. 5. Wait for the adding process to end. 6. Successful adding will be confirmed by the Z-Wave controller’s Message and LED Colour will change to Green.
To remove the device from the Z-Wave network: 1. Power the device. 2. Set the main controller into remove mode (see the controller’s manual). 3. Quickly, three times click the Config button LED color will change to Blue. 4. Wait for the removing process to end. 5. Successful removing will be confirmed by the Z-Wave controller’s message and Red LED color.
JR-4C01 is powered using an AC power supply unit so it is always awake.
Reset procedure allows restoring the device back to its factory settings, which means all information about the Z-Wave controller will be deleted. 1. Press and Hold Config Button for 10 sec until White LED Indication to start blinking. 2. Release Config button. Now you have 5sec to Reset Device otherwise it back to Normal Mode. 3. Single Click Config Button. 4. After a few seconds, the device will be restarted, which is signaled with the red LED indicator color. NOTE:- Please use this procedure only when the network primary controller is missing or otherwise inoperable.
| Type | Value(s) |
|---|