Ger-IoTx
Z-Wave Smart Motor Actuator
IoTx-z-actmotor001
Window Covering - Pos/End Aware
HW: 1 FW: 1.05
ZM5101
6.71.03
0x0363 (867)
0x0005 (5)
0x0005 (5)
ZC10-19096736
2019-09-05 18:11:22.278948
N/A
Enhanced 232 Slave
Always On Slave
IoTx-z-actmotor001 is to control and supervise window covering device via Z-Wave remotely.
ITx-z-actmotor001 is to control and supervise window covering device via Z-Wave remotely. The mounting process will be simplified by intelligent mounting design. The actuator will have special software features which will be innovative and useful for the use cases of the consumers too. The actuator can control window covering devices like roller shutters, awnings, roller blinds and motorized curtains.
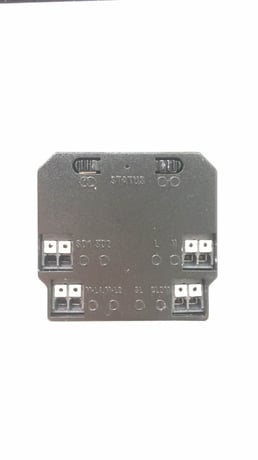
Product Image Published


2 - smart configuration
The change value of shutter position to report, default is always reporting shutter position. 0: Forbid Reporting Actively 1-10:PercentSize: 1 byte
Default: 1
Minimum: 0
Maximum: 10
Possible values
| From | To | Desription |
|---|---|---|
| 1 | 10 | Percent |
3 - smart configuration
Turn on/off Stop by Block Function 0: Turn Off 1: Turn OnSize: 1 byte
Default: 1
Minimum: 0
Maximum: 1
Possible values
| From | To | Desription |
|---|---|---|
| 0 | 1 | turn off and turn on |
4 - smart configuration
Lear mode: 0. No operation 1. Proceed the motor’s initial setting for Limit Head to Limit Bottom first, our moter controller could learn the total distance between Up and Down (or Left and Right). 2: Switch Direction Reverse: Two switches, one is for motor up operation and another is motor down operation. Via the command to correct the misconnection of switches. 3: App Direction Reverse:When APP control the motor and find the direction is wrong, then correct it via this command.Size: 1 byte
Default: 0
Minimum: 0
Maximum: 3
Possible values
| From | To | Desription |
|---|---|---|
| 0 | 3 | actuactor function |
5 - smart configuration
Turn on/off Ventilation Function 0: Turn Off 1: Turn OnSize: 1 byte
Default: 0
Minimum: 0
Maximum: 1
Possible values
| From | To | Desription |
|---|---|---|
| 0 | 1 | turn off and turn on |
Make sure connecting module to power supply and module has not joined Z-Wave network (if module joined any other Z-Wave network, please refer to the clauses “Exclude device from a Z-Wave network”). First, set primary controller/gateway into inclusion mode. And press 'Button L' 3 times, LED starts to flash slowly for 10 seconds, during the flash, don’t press 'Button L' 3 times again, because it will cancel your last operation. Until LED is on for 3 seconds, means success. If module does not find a Z-Wave network within 10 seconds after join network function trigger, please try again. After joined Z-Wave network, please wait for a while until the app showing device is included. Then you can start enjoying with our module.
Method 1: Factory Reset. Method 2: First, set primary controller/gateway into exclusion mode. And press 'Button L' 3 times, LED started to flash slowly for 10 seconds, during the flash, don’t press 'Button L' 3 times again, because it will cancel your last operation. Until LED is on for 3 seconds, means success.
Module is learning motor running position automatically each time when it’s pot on power supply.Tap Button R two times, learning function start, motor is running automatically to the up/down limit. During learning, LED light is flash slowly, until LED blink 2 seconds means success. During learning, press Button R to quit learning.
Please use this procedure only when the network primary controller is missing or otherwise inoperable. Hold Button L for 10 seconds, LED will flash slowly until flash fast for 2 seconds means success. After reset, module is exclude of Z-Wave network, please include again and learn motor again.
Module is learning motor running position automatically each time when it’s pot on power supply.Tap Button R two times, learning function start, motor is running automatically to the up/down limit. During learning, LED light is flash slowly, until LED blink 2 seconds means success. During learning, press Button R to quit learning.
page 1:The encryption modes that the in-wall shutter module supports are S0, S2 authenticated. page 7: SUPPORTED COMMAND CLASS
Make sure connecting module to power supply and module has not joined Z-Wave network (if module joined any other Z-Wave network, please refer to the clauses “Exclude device from a Z-Wave network”). First, set primary controller/gateway into inclusion mode. And press 'Button L' 3 times, LED starts to flash slowly for 10 seconds, during the flash, don’t press 'Button L' 3 times again, because it will cancel your last operation. Until LED is on for 3 seconds, means success. If module does not find a Z-Wave network within 10 seconds after join network function trigger, please try again. After joined Z-Wave network, please wait for a while until the app showing device is included. Then you can start enjoying with our module.
Method 1: Factory Reset. Method 2: First, set primary controller/gateway into exclusion mode. And press 'Button L' 3 times, LED started to flash slowly for 10 seconds, during the flash, don’t press 'Button L' 3 times again, because it will cancel your last operation. Until LED is on for 3 seconds, means success.
| Type | Value(s) |
|---|
| Group | Type |
|---|---|
| Appliance | (Refer to parameters): State idle |