Philio Technology
Z-Wave 3 in 1 Multi Sensor
PST07
Notification Sensor
HW: 1 FW: 1.02:01.02
SD3502
6.81.03
0x013C (316)
0x0002 (2)
0x0070 (112)
ZC10-19106767
2019-10-03 18:21:59.164385
N/A
Enhanced 232 Slave
Reporting Sleeping Slave
The multi sensor is a Z-WaveTM enabled device which is fully compatible with any Z-WaveTM enabled network.
The multi sensor is a Z-WaveTM enabled device which is fully compatible with any Z-WaveTM enabled network. This device is a security enabled Z-Wave Plus product that is able to use encrypted Z-Wave Plus messages to communicate to other security enabled Z-Wave Plus products. Z-WaveTM enabled devices displaying the Z-WaveTM logo can also be used with it regardless of the manufacturer, and ours can also be used in other manufacturer’s Z-WaveTM enabled networks. The product supports Over The Air(OTA) feature for the products firmware upgrade. This product can be included and operated in any Z-Wave TM network with other Z-Wave TM certified devices from other manufacturers and/or other applications. All non-battery operated nodes within the network will act as repeaters regardless of vendor to increase reliability of the network. The device adopt the Z-Wave TM 500 series chip, when your Z-Wave TM network system is all made by Z-Wave TM 500 series devices. The network system will have the advantages as below.
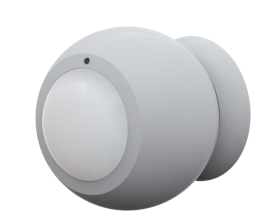
Product Image


1 - Basic Set Level
Setting the BASIC command value to turn on the light. The 0x63means turn on the light. For dimmer equipment 1 to 99 means the light strength. 0 means turn off the light.Size: 1 byte
Default: 99
Minimum: 0
Maximum: 99
Possible values
| From | To | Desription |
|---|---|---|
| 0 | 99 |
3 - PIR Sensitivity
PIR sensitivity settings. 0 means disable the PIR motion. 1 means the lowest sensitivity, 99 means the highest sensitivity. High sensitivity means can detected long distance, but if there is more noise signal in the environment, it will re-trigger too frequency.Size: 1 byte
Default: 80
Minimum: 0
Maximum: 99
Possible values
| From | To | Desription |
|---|---|---|
| 0 | 99 |
4 - Operation Mode
Operation mode. Using bit to control.Size: 1 byte
Default: 1
Minimum: 0
Maximum: 127
Possible values
| From | To | Desription |
|---|---|---|
| 0 | 127 |
5 - Customer Function
Customer function switch, using bit control.Size: 1 byte
Default: 3
Minimum: 0
Maximum: 127
Possible values
| From | To | Desription |
|---|---|---|
| 0 | 127 |
6 - PIR Re-Detect Interval Time
In the normal mode, after the PIR motion detected, setting the re-detect time. 10 seconds per tick, default tick is 6 (60 seconds). Setting the suitable value to prevent received the trigger signal too frequently. Also can save the battery energy. Notice: If this value bigger than the configuration setting NO. 7 There is a period after the light turned off and the PIR not start detecting.Size: 1 byte
Default: 6
Minimum: 1
Maximum: 60
Possible values
| From | To | Desription |
|---|---|---|
| 1 | 60 |
7 - Turn Off Light Time
After turn on the lighting, setting the delay time to turn off the lighting when the PIR motion is not detected. 10 seconds per tick, default tick is 7 (70 seconds). 0 means never send turn off light command.Size: 1 byte
Default: 7
Minimum: 1
Maximum: 60
Possible values
| From | To | Desription |
|---|---|---|
| 1 | 60 |
8 - Auto Report Battery Time
The interval time for auto report the battery level. 0 means turn off auto report battery. The default value is 12. The tick time can setting by the configuration No.11.Size: 1 byte
Default: 12
Minimum: 0
Maximum: 127
Possible values
| From | To | Desription |
|---|---|---|
| 0 | 127 |
9 - Auto Report LightSensor Time
The interval time for auto report the illumination. The default value is 12. The tick time can setting by the configuration No.11.Size: 1 byte
Default: 0
Minimum: 1
Maximum: 127
Possible values
| From | To | Desription |
|---|---|---|
| 1 | 127 |
10 - Auto Report Temperature Time
The interval time for auto report the temperature. The default value is 12. The tick time can setting by the configuration No.11.Size: 1 byte
Default: 12
Minimum: 1
Maximum: 127
Possible values
| From | To | Desription |
|---|---|---|
| 1 | 127 |
11 - Parameter 2
The interval time for auto report each tick. Setting this configuration will effect configuration No.8, No.9 and No.10. The unit is 1 minute.Size: 1 byte
Default: 30
Minimum: 1
Maximum: 127
Possible values
| From | To | Desription |
|---|---|---|
| 1 | 127 |
12 - Temperature Differential Report
The temperature differential to report. 0 means turn off this function. The unit is Fahrenheit. Enable this function the device will detect every minutes. And when the temperature is over 140 degree Fahrenheit, it will continue report. Enable this functionality will cause some issue please see the detail in the “Temperature Report” section.Size: 1 byte
Default: 10
Minimum: 0
Maximum: 100
Possible values
| From | To | Desription |
|---|---|---|
| 0 | 100 |
13 - LightSensor Differential Report
The LightSensor Differential to report. 0 means turn off this function. The unit is percentage. Enable this function the device will detect every percentage. And when the lightSensor is over 20 percentage, it will continue report.Size: 1 byte
Default: 20
Minimum: 0
Maximum: 100
Possible values
| From | To | Desription |
|---|---|---|
| 0 | 100 |
14 - PIR Trigger Mode
PIR Trigger Mode: Mode1: Normal Mode2: DayTime Mode3: AtNightSize: 1 byte
Default: 1
Minimum: 1
Maximum: 3
Possible values
| From | To | Desription |
|---|---|---|
| 1 | 3 |
15 - PIR NightLine
PIR night line Lux conditions: LightSensor determines whether the level is night. (Unit 1Lux)Size: 2 bytes
Default: 2
Minimum: 1
Maximum: 10000
Possible values
| From | To | Desription |
|---|---|---|
| 1 | 10000 |
1. Have Z-WaveTM Controller entered inclusion mode. 2. Pressing tamper key three times within 2 seconds to enter the inclusion mode.
1. Have Z-WaveTM Controller entered exclusion mode. 2. Pressing tamper key three times within 2 seconds to enter the exclusion mode. 3. Node ID has been excluded.
If the user want to wake-up the device immediately, please remove the front cover, and press the tamper key once. The device will wake-up 10 seconds.
Notice: Use this procedure only in the event that the primary controller is lost or otherwise inoperable. 1. Pressing button four times and keep about 5 seconds. 2. IDs are excluded and all settings will reset to factory default.
The DSK can be found on the your product.
| Type | Value(s) |
|---|
| Group | Type |
|---|---|
| Home Security |
|
| Sensor type |
|---|
| Air Temperature |
| Illuminance |