Aeotec
AutoPilot
ZWA020
Gateway
HW: 1 FW: 7.11:07.11:02.03
ZGM130
7.11.0
0x0371 (881)
0x0001 (1)
0x0014 (20)
ZC12-20020032
2020-02-07 14:12:32.115576
N/A
Bridge Controller
Central Static Controller
Z-Wave Smart Home gateway to automate your home and put in autopilot.
• Z-Wave gateway to put your home on autopilot • Set rooms, scenes, rules and automations with no limits except your imagination • Based on the official Z/IP Framework from SiLabs • SmartStart and latest S2 Security Standard • Web based Installer user interface for complex setups and better costumer care • All settings and automations can run locally without internet connection to provide max. speed
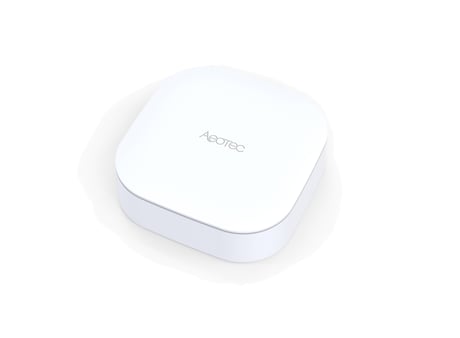
Product Image
Role in Network Gives you information about the role of the controller, its Home ID and the assigned node ID. Usually a controller has the Primary role as master device in the Z-Wave network. But it is possible to add it to another Z-Wave network by activating the Learn Mode button Start Network Learn Mode. After the controller was successfully added to the other network, the controller role will become Secondary. Note a controller with secondary role has limited configuration possibilities in the network.
This menu under Menu > Management > Factory Default offers you two different ways to reset your AutoPilotTM: • Controller Factory Default This turns just the controller back into factory reset. All connections to added devices, their configurations and all Z-Wave specific settings are lost. This function must be handled with extreme care. An additional dialog requires to explicitly confirm the function. All other settings which are not depending on the Controller or its Z-Wave configuration are not influenced. If this controller is the primary controller for your network, resetting it will result in the nodes in your network being orphaned and it will be necessary after the reset to exclude and re- include all of the nodes in the network. If this controller is being used as a secondary controller in the network, use this procedure to reset this controller only in the event that the network primary controller is missing or otherwise inoperable. • Reset to Factory Default This function resets the AutoPilotTM back to its factory state, which means: o Controllerwillberesettoitsfactorydefault→Allconnectionstoaddeddevices, their configurations and all Z-Wave specific settings are lost. o Alluploadedimages/iconswillbedeleted o Allcustominstalledappsandallotherappconfigurationswillberemoved o Allothersettingswillbesetbacktodefault Note: After the controller of the AutoPilotTM was reset in both cases the Z-Wave devices which were added to this controller before will NOT be removed automatically. They still try to communicate with the known controller. To make them ready for a new network insertion just remove them before the add process first or do a manually factory reset of the device (please refer to its manual). influenced. • Reset to Factory Default This function resets the AutoPilot™ back to its factory state, which means: o Controller will be reset to its factory default → All connections to added devices, their configurations and all Z-Wave specific settings are lost. o All uploaded images/icons will be deleted o All custom installed apps and all other app configurations will be removed o All other settings will be set back to default
To be conform with the Z-Wave Security S2 standard, the AutoPilot™ has a label with DSK code, DSK pin and QR code printed on the rear side.
The Force Interview button below allows you to reset incomplete device interviews. The controller will then try to repeat the whole interview. This action only makes sense if the device was already added with successful interviewed security command class (it doesn’t matter if S0 or S2). If not, it is recommended to remove and add the device again. The Call for NIF button gives you the possibility to send a Note Information Frame to the device which is similar to a simple status request. Note that battery driven devices need to be woken up manually if a quick response is desired. Otherwise the device will react on this NIF on its next wakeup (depending on the controller configuration 1h - 24h).
Copy Network Information: In order to initiate a Z-Wave controller replication (copy Z-Wave network information and transfer them from the main controller to a secondary controller), start the Add Mode on your main controller and then initiate the Learn Mode of the already included secondary controller. This will transfer the network relevant information manually.
SmartStart is a new way to add devices into Z-Wave using a QR Code provided with S2 authentication. The user scans the QR code whose information goes directly in a provisioning list. When powered up, the SmartStart Device will announce to be ready to be added. In case the S2 key is in the provisioning list the controller will automatically add this new device without any further user interaction. Clicking on the tab Scan QR code will open a form (Figure 4.5.3) where you can manually add a 40-digit Z-Wave device DSK or download the mobile APP instead to Scan Z-Wave SmartStart QR-Codes directly.
Clicking on the tab: Add new Z-Wave Device and identify automatically (Figure 4.5.2) will directly guide you to the Z-Wave Add / Remove section (Figure 4.5.4) but offers you no user guidance how to add or remove the device. For that way it is recommended to have a look at the device manual too. Since most Z-Wave devices have one Z-Wave action button where a single or triple click will do the add process, the additional information shown in the Z-Wave device specific Add / Remove view (Figure 4.5.6) is only needed for some devices with exotic add mode options. Whether you decide to choose this way or to add a device by automatically identification (Figure 4.5.4), the procedure will be the same. Please refer to the devices manual on how to do an add process. In the case the device cannot be added as expected, please remove the device first. More than 90 % of all add process problems are caused by devices which still belong to a network. In that case they cannot being added again. Skip this step, if you are sure that the device is new and in factory default state. To start the Add process click on the green Start button (Figure 4.5.7).
Remove Mode This function is used to remove an available and functioning device from the network. After removing the device, it can be added in another Z-Wave network again. To remove a device, it is not necessary that the device is part of the network. Start Remove process It doesn’t matter if you navigate through the tab Add new Z-Wave Device and identify it automatically Menu (Figure 4.5.2) or the vendor-device-specific way (Figure 4.5.6), in both cases a press on the button Remove Device will start the remove process (Figure 4.5.17)
If a device was registered by the SmartStart functionality e.g. Scan QR Code (Section 4.5.1), it is listed in this view. The Reload button can be used to refresh the list manually. Figure 4.5.31 for example shows the list of device keys which are already registered in the system. One of them is only registered and the other one is registered and in use ( added). Used means in this context that the corresponding device was added by scanning its QR Code or entering its DSK and then powered up in proximity of the controller and got added automatically. Or in other words: It was added via Z-Wave SmartStart. A click on opens a popup (Figure 4.5.32) that gives you more information about the device. Furthermore, you can change the device name and assign it to a room although it is not added to the network yet. Some information will only be available after the device was successfully added. will forward you to the manual node configuration (Section 4.5.1). Clicking on will remove the Figure 4.5.29: Network status Figure 4.5.30: Learn mode progress • AIP-CDS-007-ZIP_GWA.docx CONFIDENTIAL AIP-CDS-007-ZIP_GWA.docx Page 46 of 60 registration entry of the device but will not automatically remove it from the network. Therefore, the device also needs to be removed from the network directly via the Devices menu (Section 4.5.1).
| Type | Value(s) |
|---|
| Group | Type |
|---|---|
| Smoke Alarm |
|
| CO Alarm |
|
| CO2 Alarm |
|
| Heat Alarm |
|
| Water Alarm |
|
| Access Control |
|
| Home Security |
|
| Power Management |
|
| System |
|
| Emergency Alarm |
|
| Clock |
|
| Appliance |
|
| Home Health |
|
| Siren |
|
| Water Valve |
|
| Weather Alarm |
|
| Irrigation |
|
| Gas alarm |
|
| Pest Control |
|
| Light sensor |
|
| Water Quality Monitoring |
|
| Home monitoring |
|
| Request pending notification | State idle |
| Sensor type |
|---|
| Air Temperature |
| General Purpose |
| Illuminance |
| Power |
| Humidity |
| Velocity |
| Direction |
| Atmospheric Pressure |
| Barometric Pressure |
| Solar Radiation |
| Dew Point |
| Rain Rate |
| Tide Level |
| Weight |
| Voltage |
| Current |
| Carbon Dioxide (CO2) Level |
| Air Flow |
| Tank Capacity |
| Distance |
| Angle Position |
| Rotation |
| Water Temperature |
| Soil Temperature |
| Seismic Intensity |
| Seismic Magnitude |
| Ultraviolet |
| Electrical Resistivity |
| Electrical Conductivity |
| Loudness |
| Moisture |
| Frequency |
| Time |
| Target Temperature |
| Particulate Matter 2.5 |
| Formaldehyde (CH2O) Level |
| Radon Concentration |
| Methane (CH4) Density |
| Volatile Organic Compound Level |
| Carbon Monoxide (CO) Level |
| Soil Humidity |
| Soil Reactivity |
| Soil Salinity |
| Heart Rate |
| Blood Pressure |
| Muscle Mass |
| Fat Mass |
| Bone Mass |
| Total Body Water (TBW) |
| Basis Metabolic Rate (BMR) |
| Body Mass Index (BMI) |
| Acceleration X-Axis |
| Acceleration Y-Axis |
| Acceleration Z-Axis |
| Smoke Density |
| Water Flow |
| Water Pressure |
| RF Signal Strength |
| Particulate Matter 10 |
| Respiratory Rate |
| Relative Modulation Level |
| Boiler Water Temperature |
| Domestic Hot Water (DHW) Temperature |
| Outside Temperature |
| Exhaust Temperature |
| Water Chlorine Level |
| Water Acidity |
| Water Oxidation Reduction Potential |
| Heart Rate LF/HF Ratio |
| Motion Direction |
| Applied Force on Sensor |
| Return Air Temperature |
| Supply Air Temperature |
| Condenser Coil Temperature |
| Evaporator Coil Temperature |
| Liquid Line Temperature |
| Discharge Line Temperature |
| Suction (Input) Pressure |
| Discharge (Output) Pressure |
| Defrost Temperature (Sensor Defrost) |
| Ozone (O3) |
| Sulfur Dioxide (SO2) |
| Nitrogen Dioxide (NO2) |
| Ammonia (NH3) |
| Lead (Pb) |
| Particulate Matter 1 |
| Meter type |
|---|
| Cooling Meter Consumption |
| Cooling Meter Production |
| Electric Meter Consumption |
| Electric Meter Production |
| Gas Meter Consumption |
| Gas Meter Production |
| Heating Meter Consumption |
| Heating Meter Production |
| Water Meter Consumption |
| Water Meter Production |