Aeotec
Nano Shutter
ZW141-C
Window Covering - Pos/End Aware
HW: 141 FW: 3.01:01.03
ZM5101
6.81.03
0x0371 (881)
0x0003 (3)
0x008D (141)
ZC10-19126810
2019-12-18 23:22:18.461836
N/A
Enhanced 232 Slave
Always On Slave
Aeotec New Generation motor controller
Aeotec New Generation Nano Shutter 1. Used to control the motor of Curtain, support Shutter Mode and Venetian Mode . 2. Can be calibrated according to diff e rent curtains 3. Used to control other Z-Wave device directly. 4. Support S2, more safe and more re liable 5. Support SmartStart, faster inclusion
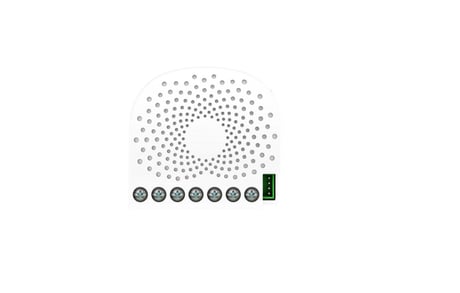
Product Image


20 - Motor Behavior After Power ON
Setting the Motor Behavior After Power ON.Size: 1 byte
Default: 0
Minimum: 0
Maximum: 2
Possible values
| From | To | Desription |
|---|---|---|
| 0 | 0 | Stay the same position before power off last time |
| 1 | 1 | Moves to 99% |
| 2 | 2 | Moves to 0% |
22 - Determine motor run direction
Note: 1.Motor will stop when receiving this command in moving; 2.This configuration will not change after network exclusion or Configuration Reset.Size: 1 byte
Default: 0
Minimum: 0
Maximum: 3
Possible values
| From | To | Desription |
|---|---|---|
| 0 | 0 | Shutter mode / Venetian mode :Out 1= Up moving/ Multilevel switch = 99%, Out 2= Down moving/ Multilevel switch = 0% |
| 1 | 1 | Shutter mode : Out 1= Down moving/ Multilevel switch = 0%, Out 2= Up moving/ Multilevel switch = 99%. Venetian mode :Out 1= Up moving/ Multilevel switch = 99%, Out 2= Down moving/ Multilevel switch = 0% |
| 2 | 2 | Shutter mode : Out 1= Up moving/ Multilevel switch = 99%, Out 2= Down moving/ Multilevel switch = 0% Venetian mode: Out 1= Down moving/ Multilevel switch = 0%, Out 2= Up moving/ Multilevel switch = 99%. |
| 3 | 3 | Shutter mode / Venetian mode : Out 1= Down moving/ Multilevel switch = 0%, Out 2= Up moving/ Multilevel switch = 99%. |
34 - Set the Blade Turn Time
This parameter is to config the blade turn time(unit = 0.01s),which works only for venetian mode.Details can be found in section 4.2 of Advanced information Product Manual. Note: For Venetian, if this value is set too large for blade turning, curtain may move upwards or downwards. Calibration need to work correctly.Or this setting will force the curtain to move up or down. This configuration will not change after network exclusion or Configuration Reset.Size: 2 bytes
Default: 150
Minimum: 10
Maximum: 32767
Possible values
| From | To | Desription |
|---|---|---|
| 10 | 32767 | 0.1 - 327.67seconds |
35 - Curtain Trip Time
Curtain Trip Time is about the run time of the curtain (unit = 0.01s). Details can be found in section 4.2 of Advanced information Product Manual. Note: For Venetian, if this value is set too large for blade turning, curtain may move upwards or downwards. Calibration need to work correctly.Or this setting will force the curtain to move up or down. This configuration will not change after network exclusion or Configuration Reset.Size: 2 bytes
Default: 15000
Minimum: 500
Maximum: 32767
Possible values
| From | To | Desription |
|---|---|---|
| 500 | 32767 | 5 - 327.67 seconds |
36 - Enter/Exit Calibration
Note: Product will enter the right Curtain Mode after calibration, see Configuration 0x27(39)Size: 1 byte
Default: 0
Minimum: 0
Maximum: 2
Possible values
| From | To | Desription |
|---|---|---|
| 0 | 0 | Set:Exit Calibration Report: Not in Calibration |
| 1 | 1 | Set:Enter Shutter Mode Calibration Report: In Shutter Mode Calibration |
| 2 | 2 | Set:Enter Venetian Mode Calibration Report: In Venetian Mode Calibration |
37 - User confirmation for Calibration
User confirmation for Calibration(set only)Size: 1 byte
Default: 0
Minimum: 0
Maximum: 0
Possible values
| From | To | Desription |
|---|---|---|
| 0 | 0 | Go to next step of calibration |
38 - Calibration Status Report
Return Calibration Status(Get or Report)Size: 1 byte
Default: 0
Minimum: 0
Maximum: 5
Possible values
| From | To | Desription |
|---|---|---|
| 0 | 0 | Calibration Complete |
| 1 | 1 | Calibration start, going to Reference Point A |
| 2 | 2 | Reach Reference Point A, going to Reference Point B |
| 3 | 3 | Reach Reference Point B, waiting for Blade turn Calibraion(Only for Venetian Mode) |
| 4 | 4 | Going to Reference Point C(Only for Venetian Mode) |
| 5 | 5 | Calibration terminated |
39 - Cutain Mode Setting
Set the Curtain Mode. Note: 1. This Operation will enter repositioning automatically; 2. This configuration will not change after network exclusion or Configuration Reset.Size: 1 byte
Default: 0
Minimum: 0
Maximum: 1
Possible values
| From | To | Desription |
|---|---|---|
| 0 | 0 | Shutter Mode |
| 1 | 1 | Venetian Mode |
40 - Repositioning
Set to begin repositioning.Size: 1 byte
Default: 1
Minimum: 1
Maximum: 1
Possible values
| From | To | Desription |
|---|---|---|
| 1 | 1 | Repositioning begins |
41 - Repositioning Status Report
Used to Get repositioning Status.Size: 1 byte
Default: 0
Minimum: 0
Maximum: 1
Possible values
| From | To | Desription |
|---|---|---|
| 0 | 0 | Repositioning complete |
| 1 | 1 | in repositioning |
42 - Calibration Lock
Used to enable/disable calibration lock from different ways.Size: 1 byte
Default: 1
Minimum: 0
Maximum: 2
Possible values
| From | To | Desription |
|---|---|---|
| 0 | 0 | Disable calibration |
| 1 | 1 | Enable Action Button/ Command Calibration |
| 2 | 2 | Enable Action Button/ Command/S1/S2 Calibration |
80 - Switch Status Report Selection
Choose which report to send when switch status changeSize: 1 byte
Default: 2
Minimum: 0
Maximum: 2
Possible values
| From | To | Desription |
|---|---|---|
| 0 | 0 | No Report |
| 1 | 1 | Basic Report |
| 2 | 2 | Switch Multilevel Report |
85 - Extern Button Mode Setting
Extern Button Mode Setting Note: when setting value to 2, we advice not to set only one external switch to push button, do remember to change the controller channel before operating push button, or the curtain level will be wrong.Size: 1 byte
Default: 0
Minimum: 0
Maximum: 2
Possible values
| From | To | Desription |
|---|---|---|
| 0 | 0 | S1/S2 map to Z-Wave Button |
| 1 | 1 | S1 = Open or Stop, S2 = Close or Stop Note:Operation will not change the curtain mode, including press and hold ,short press. |
| 2 | 2 | 1) When configuration 0x78/79 = 03: Press and hold S1 :blade folds to 180° Press and hold S2: Blade folds to 0° Short press S1: Blinds go downwards Short press S2: Blinds go upwards Note: The device will change its curtain mode if it does not match the current mode. 2) When Configuration 0x78/79 = others: S1 = Open or Stop,S2 = Close or Stop ,operation will not change the curtain mode. |
120 - Switch Type of External Switch 1
Used to set Switch type of External Switch 1,and reports will return automatically during identify.Size: 1 byte
Default: 0
Minimum: 0
Maximum: 4
Possible values
| From | To | Desription |
|---|---|---|
| 0 | 0 | Unidentified mode when no identify is set, and indicate identify fails when in identify. |
| 1 | 1 | 2-state switch mode |
| 2 | 2 | 3 way switch mode |
| 3 | 3 | Push Button mode |
| 4 | 4 | Enter automatic identification mode(The blue led will fast blink) |
121 - Switch Type of External Switch 1
Used to set Switch type of External Switch 1,and reports will return automatically during identify.Size: 1 byte
Default: 0
Minimum: 0
Maximum: 4
Possible values
| From | To | Desription |
|---|---|---|
| 0 | 0 | Unidentified mode when no identify is set, and indicate identify fails when in identify. |
| 1 | 1 | 2-state switch mode |
| 2 | 2 | 3 way switch mode |
| 3 | 3 | Push Button mode |
| 4 | 4 | Enter automatic identification mode(The blue led will fast blink) |
248 - Function Setting of External Switch S1&S2
Used to Enable/Disable function of External Switch S1&S2. Note : This value can be combine, e.g. set to 3(1+2=3),means networking function and Reset function are both enable.Size: 1 byte
Default: 1
Minimum: 1
Maximum: 2
Possible values
| From | To | Desription |
|---|---|---|
| 1 | 1 | Enable network function, inclusion/exclusion |
| 2 | 2 | Enable reset to factory default function |
255 - Reset Function
Used to reset configuration parameter value to default value or reset to factory default settings. Note: Parameter 0x16, 0x22, 0x23, 0x24, 0x25, 0x27, 0x28 will not reset to default value by this command.Size: 4 bytes
Default: 0
Minimum: 0
Maximum: 1431655765
Possible values
| From | To | Desription |
|---|---|---|
| 0 | 0 | Reset all configuration parameters to default settings |
| 1431655765 | 1431655765 | reset to factory default settings and removed from the z-wave network |
3.5.2 Classic inclusion Learn Mode 1. Set your Z-Wave Controller into its 'Add Device' mode in order to add the product into your Z-Wave system. Refer to the Controller's manual if you are unsure of how to perform this step. 2. Make sure the product is powered. After powered up, Its LED will alternate through a rainbow of colors all the time. 3. Click Action Button once, it will quickly flash blue light for 30 seconds until it is added into the network. 4. If your Z-Wave Controller supports S2 encryption, enter the first 5 digits of DSK into your Controller's interface if /when requested. The DSK is printed on its housing. 5. If Adding fails, it will bright red light for 2s and then alternate through a rainbow of colors; repeat steps 1 to 4. Contact us for further support if needed. 6. If Adding succeeds, it will bright blue light for 2s and then turn to Motor Mode(green for runing, off for stop). Now, this product is a part of your Z-Wave home control system. You can configure it and its automations via your Z-Wave system; please refer to your software's user guide for precise instructions.
3.6 How to Remove the device from Z-Wave network 1. Set your Z-Wave Controller into its 'Remove Device' mode in order to remove the product from your Z-Wave system. Refer to the Controller's manual if you are unsure of how to perform this step. 2. Click Action Button/S1/S2(external switch need to be identified first) 6 times will enter exclusion mode. 3. If Removing fails, it will bright red light for 2s then turn back to Regular Light Mode, repeat steps 1-2. Contact us for further support if needed. 4. If Removing succeeds, it will alternate through a rainbow of colors. Now, it is removed from Z-Wave network successfully.
3.7 How to Factory Reset Manually, press and hold the Action Button for at least 20s and then release. The LED indicator will alternate through a rainbow of colors, which indicates the reset operation is successful. Otherwise, please try again. Contact us for further support if needed. Note: 1. This procedure should only be used when the primary controller is missing or inoperable. 2. Factory Reset will: a) Remove the product from Z-Wave network; b) Delete the Association setting;
Calibration for Shutter have 2 modes: Shutter Mode for Standard roller blind, and Venetian Mode for Venetian Blind. Shutter will record the Curtain Trip Time for Shutter mode and Curtain Trip Time + Blade Turn Time for Venetain Mode. The detail can be found in section 4.2 Calibration in Advanced information Product Manual.
There is no DSK on the product.QR code used for SmartStart inclusion. DSK code can be found on packaging.
| Type | Value(s) |
|---|