Schlage
Schlage Z-Wave Mortise Lock
S-6500F
Door Lock - Keypad
HW: 1 FW: 1.05:02.00
ZM5202
6.81.03
0x003B (59)
0x0003 (3)
0x6500 (25856)
ZC10-20036886
2020-03-12 11:44:19.833876
N/A
Routing Slave
Listening Sleeping Slave
Yes
Schlage Z-Wave Mortise Locks are electronic Mortise locks with Z-Wave Plus Communication.
Schlage Z-Wave Mortise Locks are electronic Mortise locks with Z-Wave Plus Communication. S-6500F lock must be used in conjunction with a Security Enabled Z-Wave Controller to fully utilize all implemented functions. S-6500F lock supports the original Z-Wave Security Standard S0 and the new Security Standard S2 with SmartStart enabled and can be part of any Z-Wave network with other Certified Z-Wave or Z-Wave Plus products.
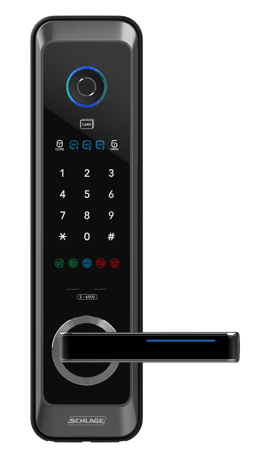
Product Image
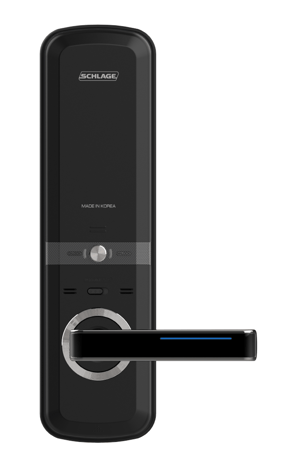


3 - Beeper
Read and Write 0: Disable Beeper -1: Enable BeeperSize: 1 byte
Default: -1
Minimum: -1
Maximum: 0
Possible values
| From | To | Desription |
|---|---|---|
| -1 | -1 | Enable Beeper |
| 0 | 0 | Disable Beeper |
5 - Auto Lock
Read-only 0: Disable Auto Lock -1: Enable Auto LockSize: 1 byte
Default: 0
Minimum: -1
Maximum: 0
Possible values
| From | To | Desription |
|---|---|---|
| -1 | -1 | Enable Auto Lock |
| 0 | 0 | Disable Auto Lock |
6 - User Slot Bit Field
Read-only <1st Byte> User Slot 8-1 (MSB-LSB) 8,7,6,5,4,3,2,1 <2nd Byte> User Slot 10-9 (MSB-LSB) N/A,N/A,N/A,N/A,N/A,N/A,10,9Size: 2 bytes
Default: 3
Minimum: 0
Maximum: 1023
Possible values
| From | To | Desription |
|---|---|---|
| 0 | 1023 | Each bit represent user slot |
18 - Get Bootloader Version
Read-only Get the version of the bootloaderSize: 1 byte
Default: 1
Minimum: 0
Maximum: 127
Possible values
| From | To | Desription |
|---|---|---|
| 0 | 127 | Version of the bootloader |
1. Place your Z-Wave Controller into the “Add” or Inclusion Mode (Refer the respective documentation for that specific home automation system or panel device for details). 2. Slide the battery cover upward. 3. Press the wireless button more than 3 seconds. 4. Press “1” on the keypad. 5. Press “6” on the keypad. 6. Press User Code on the keypad. 7. Press “#” on the keypad. 8. If RF LED flickers, inclusion has completed successfully. 9. If battery replace LED flickers(fail), try repeating steps 1-7.
1. Place your Z-Wave Controller into the “Remove” or Exclusion Mode (Refer the respective documentation for that specific home automation system or panel device for details). 2. Slide the battery cover upward. 3. Press the wireless button more than 3 seconds. 4. Press “2” on the keypad. 5. Press “6” on the keypad. 6. Press User Code on the keypad. 7. Press “#” on the keypad. 8. If RF LED flickers, exclusion has completed successfully. 9. If battery replace LED flickers, try repeating steps 1-7.
Not Applicable. This Lock is FLiRS device.
Please use this procedure only when the network primary controller is missing or otherwise inoperable When Master code was already registered 1. Remove batteries (power off). 2. Press “N” and “S” buttons at the same time and hold. 3. Insert batteries (power on). 4. Release “N” and “S” buttons. 5. Press 3-digit Master code. 6. Press “#” on the keypad. 7. Press “8” on the keypad. When Master code was not registered yet 1. Remove batteries (power off). 2. Press “N” button and “S” button at the same time and hold. 3. Insert batteries (power on). 4. Release “N” and “S” buttons. 5. Press 3-digit Master code to register. 6. Press “#” on the keypad. 7. Press previous 3-digit Master code. 8. Press “#” on the keypad.
N/A
The QR code will be printed on the plug-in Z-Wave module
| Type | Value(s) |
|---|
| Group | Type |
|---|---|
| Access Control | (Refer to parameters): State idle |