Quby
Display QB3
QB3.X
Gateway
HW: 2 FW: 6.07:07.11:02.03
SD3502
6.81.06
0x0130 (304)
0x0001 (1)
0x0003 (3)
ZC10-20036871
2020-03-04 12:52:23.981123
N/A
Bridge Controller
Central Static Controller
Quby‘s latest generation display goes beyond controlling domotics and home temperature. The high-resolution display connects to Z-Wave enabled energy and gas meters for efficiency insights. It also has built-in light, proximity, air quality and humidity sensors.
Quby’s latest generation display and app serve as the ultimate remote for the home: controlling the heating system, various home domotics (smart plugs, smoke detectors, connected lights and more) and providing insights into the home’s energy efficiency and environment. Behind the high-resolution (1024x600) glass screen with capacitive touch, a fast processor and 512 MB RAM memory enable fast operational speed and information processing. With the Z-Wave 500 chip, Quby’s display solution can cooperate perfectly with all kinds of domotics, tablets and phones. The humidity sensor easily detects too dry or too moist air. Together with the air quality sensor (VOC), Quby’s display can guarantee healthy air quality in homes. Presence and light sensors help the display’s screen to adapt to someone approaching the display, or light changes in the room. The bedrock of Quby’s display solution remains insight and control. Insight into energy, water and gas usage, into the usage of individual appliances and into air quality. Z-Wave enables the display to connect to smart meters and smart plugs, so energy insights can be provided to the user. To sum it up; Quby’s latest generation display gives users full control over their efficiency, lights, smart plugs, security and various domotics. Now, that’s smart.
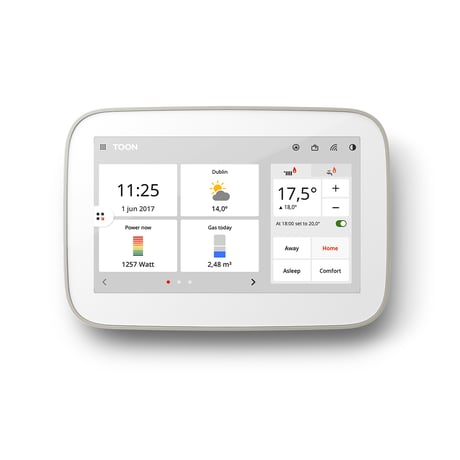
Product Image
To start learn mode, go to the 'Network functionality' tab and press either the 'Classic' or 'NWI' button, under the 'Learn Mode' header. This will open up a learn mode popup. Press the 'Start' button to start the learn mode. The dialog will show this device's DSK, which can be used to include the device securely into an existing Z-Wave network. Enter the first 5 digits of the DSK on the including node. Learn mode can be used to add this device into another Z-Wave network. It can also be used to receive network information from another controller When learn mode has completed, the dialog will be updated to show the status. Press the 'Close' button to close the dialog.
To exclude a device from the network, go to the 'Network functionality' tab and press the 'Exclude' button. This will open up the 'Exclude Device' popup. Press the 'Start' button to start the exclusion process. Next press the exclusion button (or use another way to start the learn mode) on the to-be-excluded node. When the exclusion process has completed successfully, the dialog will show which node has been excluded. Press the 'Close' button to close the dialog.
The Z-Wave functionality of the device can be reset to factory defaults by using the 'Factory Reset' button on the 'Network functionality' tab. Pressing this button will open the Factory Reset dialog. If you press the 'Reset' button in the dialog, all Z-Wave functionality will be reset to factory defaults. All information about included devices will be lost. A new HomeID will be generated following a successful factory reset. Please use this procedure only when the network primary controller is missing or otherwise inoperable.
On the graphical user interface only.
| Group | Type |
|---|---|
| Smoke Alarm | State Idle |
| Sensor type |
|---|
| Air Temperature |
| Meter type |
|---|
| Electric Meter Consumption |
| Electric Meter Production |
| Gas Meter Consumption |
| Gas Meter Production |
| Heating Meter Consumption |
| Heating Meter Production |
| Water Meter Consumption |
| Water Meter Production |