Heatit controls
Heatit Z-Push Button 4
Heatit Z-Push Button 4
Wall Controller
HW: 1 FW: 1.26
ZM5101
6.71.03
0x019B (411)
0x0300 (768)
0xa305 (41733)
ZC10-20036898
2020-03-24 12:52:34.757635
N/A
Enhanced 232 Slave
Portable Slave
The Heatit Push Button is a Z-Wave device that can both control other Z-Wave devices and activate scenes in Gateways. Although it is controlling other devices, the device cannot act as Z-Wave network controller (primary or secondary) and will always need a Z-Wave network controller to be added into a Z-Wave network.
The Heatit Push Button is a Z-Wave device that can both control other Z-Wave devices and activate scenes in Gateways. Although it is controlling other devices, the device cannot act as Z-Wave network controller (primary or secondary) and will always need a Z-Wave network controller to be added into a Z-Wave network. The remote control has following functions: 1. Control of groups of other Z-Wave devices using ON, OFF and Dim commands. 2. Activation of scenes in Gateway mode.
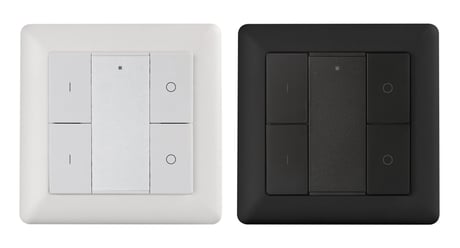
Product Image
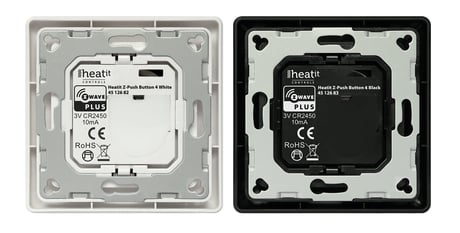


1 - factory reset
Value=0x55AA, other values are invalid, factory reset the Remote ControlSize: 2 bytes
Default: 21930
Minimum: 21930
Maximum: 21930
Possible values
| From | To | Desription |
|---|---|---|
| 21930 | 21930 | factory reset |
Step 1. Make sure the device does not belong to any Z-Wave network by pressing any button once. If the LED indicator does not turn on, the Push Button does not belong to any network,and you may continue to step 2. If the LED indicator turns on, it means that the Push Button has already been added to a network. You must then run the removal process (see ”Removing from a Z-Wave network” in this guide) before moving on to step 2. Step 2. Set primary controller/gateway to adding mode (Please refer to your primary controller manual on how to set your controller to adding mode). Step 3. Press and hold down both buttons I and O of Group 2 for 3 seconds. The LED indicator turns on, the Push Button will be set to adding mode, and stand by to be added to the network. After 10s the LED indicator blinks 6 times quickly to indicate that the addition has been successful. The Heatit Push Button is a sleeping device. After adding it to the network, it will not enter into sleep mode immediately, but will maintain activation status for 30s while completing the addition process. The LED indicator will stay on for this time, so please be patient and wait for the LED indicator to turn off.
There are two removing methods: Method 1: Removing from the primary controller/gateway: 1. Set the primary controller/gateway to removing mode. (Please refer to your primary controller manual on how to set your controller to removing mode). 2. Press and hold down both buttons I and O of Group 2 for 3 seconds, LED indicator turns on, the Push Button will be set to removing mode, and stand by to be removed. After 7s the LED indicator blinks 4 times quickly to indicate successful removal. Method 2: A factory reset of the Push Button will force the Push Button to be removed from a network. (Please refer to the part “Factory Reset” of this manual). Note: Factory reset is not recommended for removing devices. Please use this procedure only if the primary controller/gateway is missing or otherwise inoperable.
press and hold down both the I- and O-buttons of Group 2 for 1 second to activate the Push Button for 7s.
Press and hold down both buttons I and O of Group 2 for a minimum of 10 seconds until the LED indicator turns on and then blinks 4 times quickly to indicate successful factory reset. Please use this procedure only when the network primary controller is missing or otherwise inoperable.
Step 1. Make sure the remote control does not belong to any Z-Wave network, short press any button, if LED indicator does not turn on, the remote control does not belong to any network, then continue step 2,if LED indicator turns on, it means the remote control has already been included to a network, please first set the remote control to exclusion mode (refer to the part Exclusion"" of this manual),then continue step 2. Step 2. Set primary controller/gateway into inclusion mode (Please refer to your primary controllers manual on how to turn your controller into inclusion). Step 3. Press and hold down both buttons I and O of Group 2 over 3 seconds, LED indicator turns on, the remote control will be set to inclusion mode, and waiting to be included, after 10s LED indicator blinks 6 times quickly to indicate successful inclusion. The remote control is a sleepy device, after inclusion it will not enter into sleepy mode immediately, and will continue activation status for 30s and wait data interaction from the gateway, the LED indicator will stay solid on, please be patient to wait LED indicator to turn off.
There are two exclusion methods: Method 1: Exclusion from the primary controller/gateway as follows: 1. Set the primary controller/gateway into exclusion mode (Please refer to your primary controllers manual on how to set your controller into exclusion). 2. Press and hold down both buttons I and O of Group 2 over 3 seconds, LED indicator turns on, the remote control will be set to exclusion mode, and waiting to be excluded, after 7s LED indicator blinks 4 times quickly to indicate successful exclusion.
| Type | Value(s) |
|---|