Enbrighten
Plug-in Smart Switch (Dual Plug with Simultaneous Control)
55249/ZW4106
On/Off Power Switch
HW: 255 FW: 5.51
ZM5202
6.82.00
0x0063 (99)
0x5052 (20562)
0x3133 (12595)
ZC10-20076953
2020-07-23 15:56:13.453044
N/A
Enhanced 232 Slave
Always On Slave
The lighting control enables wireless control of on/off functions for standard table and floor lamps and is compatible with incandescent, LED, Xenon, Halogen, fluorescent and compact fluorescent bulbs.
Transform any home into a smart home with the Enbrighten Z-Wave Smart Lighting Control and Appliance Module. The lighting control enables wireless control of on/off functions for standard table and floor lamps and is compatible with incandescent, LED, Xenon, Halogen, fluorescent and compact fluorescent bulbs. Easily controlled by your mobile device or computer using any Z-Wave certified gateway, the space-saving horizontal module plugs into a standard wall receptacle without blocking the second outlet or obstructing placement of furniture. It provides dual Z-Wave enabled outlets for the lamp or appliance that you would like to control and a regular pass-through AC outlet for other electrical appliances. Perfect for plug-in fans, heaters, lamps and more! Take control of your home lighting with Enbrighten Z-Wave Smart Lighting Controls!
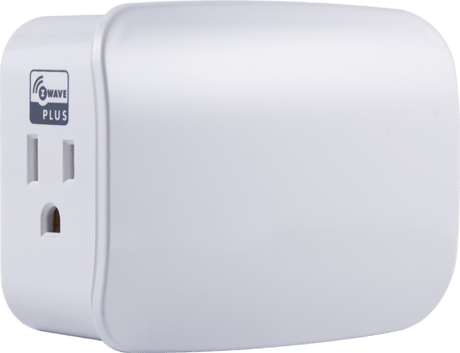
Product Image


3 - LED Light
LED Indicator lightSize: 1 byte
Default: 0
Minimum: 0
Maximum: 3
Possible values
| From | To | Desription |
|---|---|---|
| 1 | 1 | LED On when load is On, LED Off when load is Off |
| 0 | 0 | LED ON/device ON (Default) |
| 2 | 2 | LED always ON |
| 3 | 3 | LED always off |
1. Follow the instructions for your Z-Wave certified controller to add the sensor in the Z-Wave network. 2. Once the controller is ready to add your sensor, ensure battery is installed with the correct polarity in the sensor and the battery tab has been removed. 3. Press and release the programming button (see Figure 2). This starts the manual add process. The red LED (see Figure 2) will begin to flash quickly as it begins the add process. 4. The red LED will activate for 3 seconds to confirm the sensor has been added in the network. 5. The controller’s app will indicate if it has discovered the sensor. If prompted by the controller to enter the S2 security code, refer to the QR code/security number on the back of the box, or the QR code label on the product (see Figure 3). Enter the 5-digit code. Note: Your controller may need to be within 10ft. of the sensor to be added. Using the controller, you can activate interactive automations when the sensor detects when a door or window is opened or closed. Functions may vary depending on gateway or controller.
To remove the sensor from the Z-Wave network 1. Follow the instructions for your Z-Wave certified controller to remove the sensor from the Z-Wave network. 2. Once the controller is ready to remove your sensor, press and release the programming button on the sensor 1 time to remove it from the network (see Figure 4). 3. The red LED will blink 5 times to indicate it has been removed.
1. Press the programming button 10 times within 6 seconds (interval between presses of the button cannot be longer than 1 second). 2. The red LED will activate for 2 seconds, followed by 3 quick flashes.
If prompted by the controller to enter the S2 security code, refer to the QR code/security number on the back of the box, or the QR code label on the product (see Figure 3).
| Type | Value(s) |
|---|