HomeSeer
Floodlight Sensor
HS-FLS100-G2
Notification Sensor
HW: 1 FW: 1.00:00.07
SD3502
6.82.00
0x000C (12)
0x0201 (513)
0x000C (12)
ZC10-20096976
2020-09-16 10:00:53.53762
N/A
Enhanced 232 Slave
Always On Slave
HS-FLS100+ is a Z-Wave enabled outdoor motion sensor that's designed to control floodlights when motion is sensed.
HS-FLS100+ is a Z-Wave enabled outdoor motion sensor that may be used for a variety of applications. • Use as a stand alone outdoor motion sensor and/or LUX sensor. • Use as a replacement sensor for a motion-activated floodlight unit. In this configuration, it can control floodlight loads when motion is sensed or when commands are received from the central controller.
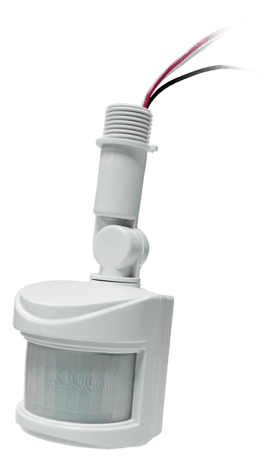
Product Image


1 - TIME settings
PIR Trigger Off period: Period to send Trigger Off command after PIR is triggered. Before this period expires, the PIR will not be able to detect any subsequent motion. Parameter Size Range Default 1 2 8~720 secs 15Size: 2 bytes
Default: 180
Minimum: 8
Maximum: 720
Possible values
| From | To | Desription |
|---|---|---|
| 8 | 720 | unit is second |
2 - LUX settings
Lux sensor threshold: Lux level to activate the PIR. When the lux level falls below this threshold and the PIR gets triggered, the unit emits a Basic Set Command (Value=0xFF) and turns on its floodlight. This overwrites the Lux level set by the Lux knob. If the level is set to 0, the unit will not turn on its floodlight. The PIR will still send a notification report to the controller; if the level is set to 255, when motion is sensed, the sensor ignore the ambient brightness but just turn on the light.Size: 2 bytes
Default: 50
Minimum: 10
Maximum: 900
Possible values
| From | To | Desription |
|---|---|---|
| 10 | 900 | unit is ambient lux level |
3 - Sensor Report Interval
Multilevel sensors auto report interval: set the interval of periodic lux level report and temperature report to the controller.Size: 2 bytes
Default: 10
Minimum: 1
Maximum: 1400
Possible values
| From | To | Desription |
|---|---|---|
| 1 | 1400 |
4 - PIR Alerts
Enable/Disables PIR alerts sent from the unit through Notification report or Basic Report commandsSize: 1 byte
Default: 1
Minimum: 0
Maximum: 1
Possible values
| From | To | Desription |
|---|---|---|
| 0 | 1 |
5 - Load Control
Floodlight Control Mode. 1 - floodlight is controlled by PIR trigger and LUX level, or by Z-wave controller 0 - floodlight is controlled by Z-wave controller directly, regardless of PIR trigger or LUX levelSize: 1 byte
Default: 1
Minimum: 0
Maximum: 1
Possible values
| From | To | Desription |
|---|---|---|
| 0 | 1 |
6 - Sensor Load Control
0 : floodlight is controlled by LUX Level and PIR trigger 1: lighting control via LUX level only, regardless of PIR triggerSize: 1 byte
Default: 0
Minimum: 0
Maximum: 1
Possible values
| From | To | Desription |
|---|---|---|
| 0 | 1 |
7 - Temperature Sensor Offset
0x9C - 0x64 (offset range : -10.0°C ~ +10.0°C)Size: 1 byte
Default: 0
Minimum: 0
Maximum: 127
Possible values
| From | To | Desription |
|---|---|---|
| 0 | 127 |
8 - PIR Sensitivity
0/1/2 0: low level, approx. 6m distance 1: mid level, approx. 10m distance 2: high level, approx. 20m distance Distance measured at ambient temperature 68°FSize: 1 byte
Default: 2
Minimum: 0
Maximum: 2
Possible values
| From | To | Desription |
|---|---|---|
| 0 | 2 |
1. Put the Z-Wave controller into inclusion mode. 2. Press the Link button 3 times within 1.5 seconds to put the unit into inclusion mode.
1. Put the Z-Wave Controller into exclusion mode. 2. Press the Link button 3 times within 1.5 seconds to put the unit into exclusion mode.
The product reset is to operate only when the primary controller is missing or inoperable. Press the Link button 3 times within 1.5 seconds to put the unit into exclusion mode.Within 1 second of step 1, press the Link button again and hold until LED is off (about 5 seconds).
If you are connecting this unit to a Z-Wave controller that utilizes the S2 security protocol, you may be asked by your controller to read 5-digit Device Specific Key (DSK) PIN Code that is unique to each unit. This can be found in one of two places: - on the QR code label on the back of the unit - on the insert card inside the packaging.
| Type | Value(s) |
|---|
| Group | Type |
|---|---|
| Home Security |
|
| Light sensor |
|
| Sensor type |
|---|
| Air Temperature |
| General Purpose |
| Illuminance |