GE/Enbrighten
Enbrighten Z-Wave Plus In-Wall Smart Dimmer, No Neutral, LED-CFL, White and Light Almond Paddles, 700S
52252/52253/ZW3012
Multilevel Switch
HW: 1 FW: 7.04
ZGM130
7.13.6
0x0063 (99)
0x4944 (18756)
0x3333 (13107)
ZC12-20090124
2020-09-18 10:45:04.877012
N/A
Enhanced 232 Slave
Always On Slave
In-Wall No-Neutral Smart Dimmer with QuickFit and SimpleWire enhancements. No neutral wire required for installation! All of this is coupled with Z-Wave S2 and Smart Start allows for effortless installation while being safer than ever!
In-Wall No-Neutral Smart Dimmer with QuickFit and SimpleWire enhancements. No neutral wire required for installation! In addition, revolutionary QuickFit design features a housing depth that is up to 20 percent smaller than the previous Z-Wave models. This reduced size coupled with the elimination of heat taps provides a better fit in older style boxes and multi-gang configurations. SimpleWire technology allows line and load to automatically be configured with auto sensing line-load terminals. All of this is coupled with Z-Wave S2 and Smart Start allows for effortless installation while being safer than ever!
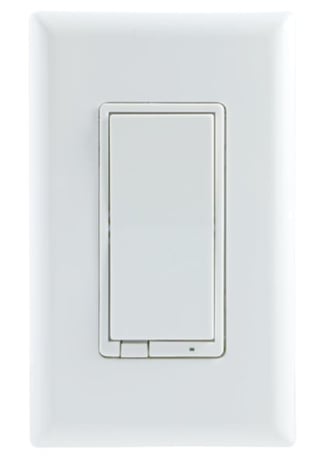
Product Image


3 - LED Light
Set the LED light statusSize: 1 byte
Default: 0
Minimum: 0
Maximum: 3
Possible values
| From | To | Desription |
|---|---|---|
| 0 | 0 | LED On when load is On, LED Off when load is Off (Default) |
| 1 | 1 | LED ON when load is Off, LED Off when Load is On |
| 2 | 2 | LED always ON |
| 3 | 3 | LED always OFF |
4 - Invert Switch
Reverse the default On/Off rocker settingSize: 1 byte
Default: 0
Minimum: 0
Maximum: 1
Possible values
| From | To | Desription |
|---|---|---|
| 0 | 0 | Disabled- Normal Operation |
| 1 | 1 | Enabled- Invert Switch |
6 - Dim up/down rate
Enable/Disable slow dim rateSize: 1 byte
Default: 0
Minimum: 0
Maximum: 1
Possible values
| From | To | Desription |
|---|---|---|
| 0 | 0 | Disable- Normal Operation |
| 1 | 1 | Enabled Slow Dim Rate |
16 - Switch Mode
Set control mode:0 dim mode,1 switch modeSize: 1 byte
Default: 0
Minimum: 0
Maximum: 1
Possible values
| From | To | Desription |
|---|---|---|
| 0 | 0 | Disable- Normal Operation |
| 1 | 1 | Enabled- Switch Mode |
19 - Alternate Exclusion
Alternative way to perform ExclusionSize: 1 byte
Default: 0
Minimum: 0
Maximum: 1
Possible values
| From | To | Desription |
|---|---|---|
| 0 | 0 | Disable- Normal Operation |
| 1 | 1 | Enabled- Alternate exclusion |
30 - Minimum Dim Threshold
Minimum Dim ThresholdSize: 1 byte
Default: 1
Minimum: 1
Maximum: 99
Possible values
| From | To | Desription |
|---|---|---|
| 1 | 99 | Set the minimum dimmer threshold when manually or remotely controlled |
31 - Maximum Dim Threshold
Maximum Dim ThresholdSize: 1 byte
Default: 99
Minimum: 1
Maximum: 99
Possible values
| From | To | Desription |
|---|---|---|
| 1 | 99 | Set the maximum dim threshold when manually or remotely controlled |
32 - Brightness Level
Dimmer will turn ON to this levelSize: 1 byte
Default: 0
Minimum: 0
Maximum: 99
Possible values
| From | To | Desription |
|---|---|---|
| 0 | 0 | Default |
| 1 | 99 | Set the maximum brightness threshold when manually or remotely controlled |
84 - Reset factory default
Reset Switch to Factory DefaultsSize: 1 byte
Default: 0
Minimum: 0
Maximum: 1
Possible values
| From | To | Desription |
|---|---|---|
| 0 | 0 | Disable- Normal Operation |
| 1 | 1 | Enabled Reset |
1. Follow the instructions for your Z-Wave certified controller to add a device to the Z-Wave network. 2. Once the controller is ready to add your device, press and release the top or bottom of the smart dimmer (rocker).
1. Follow the instructions for your Z-Wave certified controller to remove a device from the Z-Wave network. 2. Once the controller is ready to remove your device, press and release the top or bottom of the smart dimmer (rocker).
1. Quickly press ON (top) button three times, then immediately press the OFF (bottom) button three times. The LED will flash ON/OFF five times when completed successfully.
If prompted by the controller to enter the S2 security code, refer to the QR code/security number on the side of the box or the QR code label on the product (see Figure 1).
| Type | Value(s) |
|---|