Thinka
Thinka for Z-Wave
HKV1.2.Z
Gateway
HW: 1 FW: 7.14:07.14:02.03
ZGM130
7.14.1
0x043C (1084)
0x0009 (9)
0x0001 (1)
ZC12-21080304
2021-08-26 10:03:55.730374
N/A
Bridge Controller
Central Static Controller
Thinka is the first officially Apple HomeKit certified Z-Wave™ Controller, adding over 3000 Z-Wave devices to the HomeKit ecosystem. Thinka opens up all HomeKit functionalities to your Z-Wave home, and let you control your home via Apple Home.
Thinka is the first officially Apple HomeKit certified Z-Wave™ Controller, adding over 3000 Z-Wave devices to the HomeKit ecosystem overnight. Thinka controls the state of your home and opens up HomeKit smart home functionality to your Z-Wave devices. Thinka allows you to take control of your home with the Home App of Apple. Powerful and simple. Thinka is officially certified by Apple. Thinka does not allow for work-arounds. Apple certification demands that the Thinka is equipped with an authentication chip (MFI). This chip makes communication between Thinka and your iPhone totally safe. Also when you leave the house, and control your home remotely or install geofencing, Thinka makes sure your home stays secure and private. Thinka features a strong Rasberry Pi CM4 module and totally works onsite. It does not need the cloud for computing power. In this way all user data stays in your home on your Thinka. We believe that no one should have access to the user data but the homeowner. Not us, and it should certainly not live in the cloud. Thinka brings all Z-Wave products and Apple HomeKit certified products together, and offers you full control of your smart home with ONE APP – one interface on all your iPhones, iPads and Smartwatches, from the couch or remote, via touch or voice or fully automated based on the scenes you define. Next to Apple HomeKit and Siri, Thinka works with Amazon Alexa, Google Home, IFTTT and Olisto.
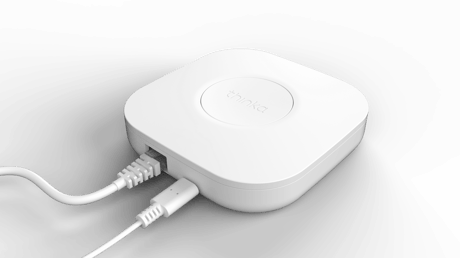
Product Image
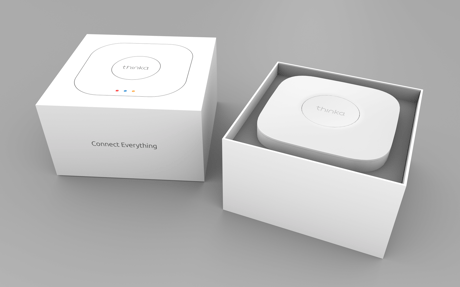
Thinka | HomeKit for Z-Wave packaging
Thinka | HomeKit for Z-Wave with Apple Home App
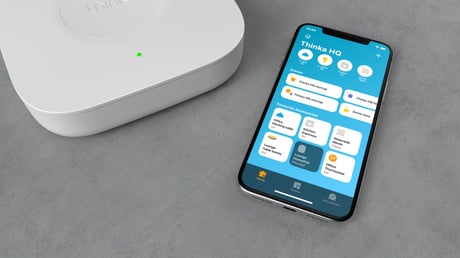
Thinka | HomeKit for Z-Wave front view
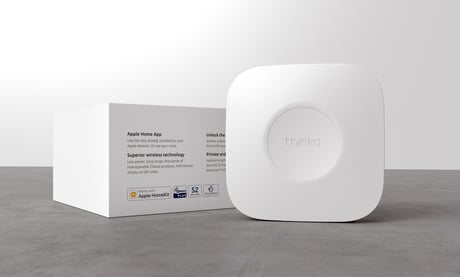
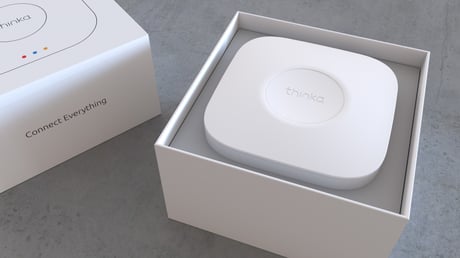
Thinka | HomeKit for Z-Wave
Make sure you know how to include your (new) device. Read the product manual. Most often it requires triple clicking a button on the device you are going to include to put it in inclusion mode. Your device will be included securely if it is supported.
Reset Thinka to Factory Settings Make sure you have a backup and you are certain that you want to reset the Thinka, as this is an action that can not be undone. Resetting to factory settings is typically done when moving or selling your Thinka. In order to reset a Thinka to its factory settings, press the button on the Thinka for about ten seconds until the LEDs start flashing orange. Release the button and press it again for about ten seconds until the LEDs turn off. The Thinka will reboot and reset to factory settings. If this controller is the primary controller for your network, resetting it will result in the nodes in your network being orphaned and it will be necessary after the reset to exclude and re-include all of the nodes in the network.
Pair with Apple HomeKit To pair your Thinka with Apple Homekit download the Thinka Setup app, open it on your smartphone, select your Thinka, tap choose a home then select the home you'd like to add the Thinka to and you're all set. A device or instance will not show up in homekit unless both name and location are set. Device/instance name and location can be set either during inclusion, under the information tab or using the Thinka setup app if adding your device with SmartStart. Pair with Alexa Go to the webclient of your Thinka (setup.thinka.eu and enable Thinka Cloud. Thinka Cloud allows you to securely connect to Amazon. It is necessary if you want to use Amazon as smart home assistants. Click the enable button below and wait until the indicator above goes green and says "enabled". Now Thinka has set up a connection to Amazon via the secured Thinka cloud you can click the "pair" button and copy the generated token. Next find the Thinka skill on the Alexa site. We advise you to use the web page instead of the app. That way you can easily paste the pairing token that your Thinka generated. When this is done you can add your Thinka devices via "DISCOVER DEVICES". Pair with Google Go to the webclient of your Thinka (setup.thinka.eu and enable Thinka Cloud. Thinka Cloud allows you to securely connect to Google. It is necessary if you want to use Google as smart home assistants. Click the enable button below and wait until the indicator above goes green and says "enabled". Now Thinka has set up a connection to Google via the secured Thinka cloud you can click the "pair" button and copy the generated token. On your smartphone, start the Google Home app, create a Home, and click on add. Next choose "Set up device" and choose "Works with Google ''. Find "Thinka '' in the list of devices and select it. Then use the generated token to pair with Google Home.
Location S2 DSK: Product UI = setup.thinka.eu Pincode, DSK string and QR code are provided In order to join as secundary controller, put the primary controller of the existing network in inclusion (add device) mode first. In order to become primary controller, put the primary controller of the existing network in "migrate" mode first. Then click the button <Join an existing Z-Wave network> and use PIN 12345 when asked for it. Check that the remainder of the DSK presented is -12345-12345-12345-12345-12345-12345-12345 and verify the grants. If the primary controller is a Thinka you can use SmartStart and scan this QR code with the Thinka Setup app. You can only join when there are no devices on the Thinka yet.
Rediscover a troubled device When a device is showing incorrect or incomplete information, you can ask Thinka to interview the device again and rediscover its capabilities. Rediscover takes a while and your device needs to be awake. When your device works on batteries you need to wake it up manually. Interviewing will try to rediscover the product information, such as manufacturer and product name, as well as its capabilities and instances. In case this does not work, you may try to 'Add' this device again, without 'Removing' it. You can perform the rediscovery process, by clicking 'Update device' on the 'Z-Wave' tab of the details page of the device.
Copying network information to another controller Controller Replication is the process of updating (copying) network information from a primary controller to secondary controllers, such as node list and routing information. These steps are usually not required unless you have a multiple controller network. To initiate this process, start the ‘Add device’ on this Thinka and the Learn Mode on the secondary controller. All Z-Wave network relevant information will be copied to the secondary controller. If your secondary controller is a Thinka, please refer to ‘Join an existing Z-Wave network’ on the settings page of that Thinka for further instructions. If your secondary controller is not a Thinka, please refer to the documentation of the secondary controller on how to initiate its ‘Learn Mode’.
SmartStart QR code If you have bought a device that supports SmartStart, you'll find a QR code on the box and/or device. Download Thinka Setup app available from the AppStore. Open it on your iPhone or iPad, select your Thinka, and choose Add a SmartStart device. Scan the QR code on the box and/or device by the application. Thinka will recognise your device and add it automatically within 10 minutes after it is turned on. New device will then appear on Thinka Web Client UI. Besides being recognised by the app, the device scanned is put in the 'Provisioning list'. This is list available on the 'Manage Provisioning List' section under the Z-Wave settings. Here the entry can be edited or deleted.
Manually Alternatively you can add the device yourself from the Overview page of this Thinka. Click <Add Device> at the top of the page, and follow the instructions. You can see the screenshots of the instructions for a sample device as follows. These steps might differ from device to device. Depending on the device you may have to provide a 5 number pin code and choose to grant security levels. The device has been added successfully. After setting you the name and the room, the device is ready to use.
Remove a device You remove a device from the Overview page of this Thinka. Click the Remove device at the top of the page, and follow the instructions. The manual that is available for this device will have instructions on how to exclude this device. Most of the time you will have to triple click the "B" button. Remove a failed device When a device is not working properly anymore you can remove it from the network. When removing normally (see Remove a device) above does not work, please go to the details page of the device and go to the 'Z-Wave' tab. Click the Remove failed device.
SmartStart Provisioning Instead of scanning the QR code, you can enter the same information manually. Besides the SmartStart QR code, you'll find a 40 digit number (the DSK) on the box and/or device. This number can be added to the provisioning list on the 'Manage Provisioning List' section under Z-Wave settings. Provide the DSK and select the grants that you want supported. You can provide a Name and Room for the device. Thinka will recognise your device and add it automatically within 10 minutes after it is turned on.
| Type | Value(s) |
|---|
| Group | Type |
|---|---|
| Smoke Alarm |
|
| CO Alarm |
|
| CO2 Alarm |
|
| Heat Alarm |
|
| Water Alarm |
|
| Access Control |
|
| Home Security |
|
| Power Management |
|
| System |
|
| Emergency Alarm |
|
| Clock |
|
| Appliance |
|
| Home Health |
|
| Siren |
|
| Water Valve |
|
| Weather Alarm |
|
| Irrigation |
|
| Gas alarm |
|
| Pest Control |
|
| Light sensor |
|
| Water Quality Monitoring |
|
| Home monitoring |
|
| Request pending notification | State idle |
| Sensor type |
|---|
| Air Temperature |
| General Purpose |
| Illuminance |
| Power |
| Humidity |
| Velocity |
| Direction |
| Atmospheric Pressure |
| Barometric Pressure |
| Solar Radiation |
| Dew Point |
| Rain Rate |
| Tide Level |
| Weight |
| Voltage |
| Current |
| Carbon Dioxide (CO2) Level |
| Air Flow |
| Tank Capacity |
| Distance |
| Angle Position |
| Rotation |
| Water Temperature |
| Soil Temperature |
| Seismic Intensity |
| Seismic Magnitude |
| Ultraviolet |
| Electrical Resistivity |
| Electrical Conductivity |
| Loudness |
| Moisture |
| Frequency |
| Time |
| Target Temperature |
| Particulate Matter 2.5 |
| Formaldehyde (CH2O) Level |
| Radon Concentration |
| Methane (CH4) Density |
| Volatile Organic Compound Level |
| Carbon Monoxide (CO) Level |
| Soil Humidity |
| Soil Reactivity |
| Soil Salinity |
| Heart Rate |
| Blood Pressure |
| Muscle Mass |
| Fat Mass |
| Bone Mass |
| Total Body Water (TBW) |
| Basis Metabolic Rate (BMR) |
| Body Mass Index (BMI) |
| Acceleration X-Axis |
| Acceleration Y-Axis |
| Acceleration Z-Axis |
| Smoke Density |
| Water Flow |
| Water Pressure |
| RF Signal Strength |
| Particulate Matter 10 |
| Respiratory Rate |
| Relative Modulation Level |
| Boiler Water Temperature |
| Domestic Hot Water (DHW) Temperature |
| Outside Temperature |
| Exhaust Temperature |
| Water Chlorine Level |
| Water Acidity |
| Water Oxidation Reduction Potential |
| Heart Rate LF/HF Ratio |
| Motion Direction |
| Applied Force on Sensor |
| Return Air Temperature |
| Supply Air Temperature |
| Condenser Coil Temperature |
| Evaporator Coil Temperature |
| Liquid Line Temperature |
| Discharge Line Temperature |
| Suction (Input) Pressure |
| Discharge (Output) Pressure |
| Defrost Temperature (Sensor Defrost) |
| Ozone (O3) |
| Sulfur Dioxide (SO2) |
| Nitrogen Dioxide (NO2) |
| Ammonia (NH3) |
| Lead (Pb) |
| Particulate Matter 1 |
| Meter type |
|---|
| Cooling Meter Consumption |
| Cooling Meter Production |
| Electric Meter Consumption |
| Electric Meter Production |
| Gas Meter Consumption |
| Gas Meter Production |
| Heating Meter Consumption |
| Heating Meter Production |
| Water Meter Consumption |
| Water Meter Production |