Eaton
Z-Wave Universal Dimmer
RF9643-N
Light Dimmer Switch
HW: 255 FW: 3.01
ZM5101
6.82.01
0x001A (26)
0x4449 (17481)
0x0501 (1281)
ZC10-21037013
2021-03-25 10:57:37.763846
N/A
Enhanced 232 Slave
Always On Slave
Z-Wave Plus Universal Dimmer
Eaton’s Z-Wave plus Universal dimmer replaces regular switches (where a neutral is present) to provide local and remote ON/OFF and Dim UP/Down control for most common residential lighting loads including LEDs and certain motor loads. Each dimmer can be manually and remotely controlled by commands sent from your compatible Z-Wave certified controller. Features & Benefits: • Replaces standard switch to add local and wireless control • Compatible with most common residential lighting loads including LED, CFLs, INC, MLVs, ELVs, HAL. • Single pole and 3-Way control: Use with Z-Wave Plus Accessory dimmer RF9642-Z • Neutral is required for installation *3-Way Wired installation • Features 7 step blue load indicating LED light that can be dimmed in ON or OFF state • Supports Z-Wave Plus technology including S2 Security certification for advanced encryption & cybersecurity • Voice and app based control when used with compatible Z-Wave controller
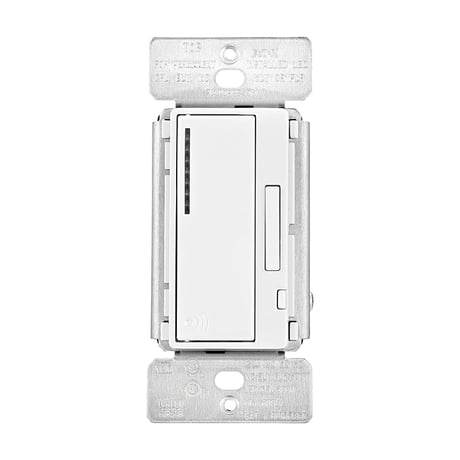
Product Image
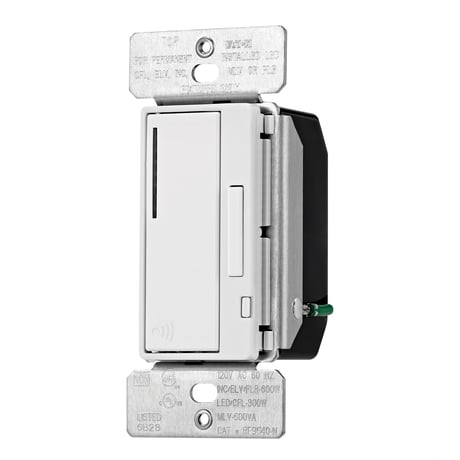
Eaton's Z-Wave Plus Universal Dimmer


1 - Delayed OFF time
When the user holds the button for 2 seconds while the dimmer is on -the dimmer will turn off after delayed off time.Size: 1 byte
Default: 10
Minimum: 0
Maximum: 127
Possible values
| From | To | Desription |
|---|---|---|
| 0 | 127 | Delayed Off Time |
2 - Panic ON Time
How long the device will stay on in Panic modeSize: 1 byte
Default: 1
Minimum: 0
Maximum: 127
Possible values
| From | To | Desription |
|---|---|---|
| 0 | 127 | Panic ON Time |
3 - Panic OFF Time
How long before the device shuts off panic modeSize: 1 byte
Default: 1
Minimum: 0
Maximum: 127
Possible values
| From | To | Desription |
|---|---|---|
| 0 | 127 | Panic ON Time |
4 - Not Used
N/ASize: 1 byte
Default: 0
Minimum: 0
Maximum: 0
Possible values
| From | To | Desription |
|---|---|---|
| 0 | 0 | Not Used |
5 - Power Up State
1=OFF, 2=ON, 3=Last StateSize: 1 byte
Default: 1
Minimum: 1
Maximum: 3
Possible values
| From | To | Desription |
|---|---|---|
| 1 | 3 | Power Up State |
6 - Panic Mode Enable
Set the device panic mode to on or offSize: 1 byte
Default: 0
Minimum: 0
Maximum: 1
Possible values
| From | To | Desription |
|---|---|---|
| 0 | 1 | Panic Mode Enable |
7 - Dimmer Ramp Time
Sets the value of how long it takes to ramp up the dimmerSize: 1 byte
Default: 3
Minimum: 0
Maximum: 127
Possible values
| From | To | Desription |
|---|---|---|
| 0 | 127 | Dimmer Ramp Time |
8 - Kickstart Enable/Disable
This feature ensures that LED/CFL lights turn on when the dimmer preset level is low. With this setting enabled, the lights may momentarily come ON brighter than the preset level (less than one second) and then dim down to the preset level. Depending on the type of light used, this feature may not be needed. To enable/disable the feature, turn lights ON. Press and hold the ON/OFF button for 10 seconds until the blue indicator LEDs flash for the third time, then release the button. This feature is disabled by default.Size: 1 byte
Default: 0
Minimum: 0
Maximum: 1
Possible values
| From | To | Desription |
|---|---|---|
| 0 | 1 | Kickstart Enable/Disable |
9 - Reset Max/Min Levels to factory default
Before leaving the network the dimmer will send a notification to the controller indicating its departure from the Z-Wave network. • Turn the device ON. • Press and hold ON/OFF button for 20 second till the LED flashes for the fifth time. (third time for RF9642-Z) • Release the ON/OFF button. • LED will start flashing rapidly. Once the LED starts blinking slowly, that indicates the device is not part of the network.Size: 1 byte
Default: 0
Minimum: 0
Maximum: 0
Possible values
| From | To | Desription |
|---|---|---|
| 0 | 0 | Reset Max/Min Levels to factory default |
10 - Not Used
N/ASize: 1 byte
Default: 0
Minimum: 0
Maximum: 0
Possible values
| From | To | Desription |
|---|---|---|
| 0 | 0 | Not Used |
11 - Set Minimum Dimming Level
For maximum compatibility with different load types, RF9643-N allows the user to set the minimum dim level or low end trim. Also to save on power consumption RF9643-N allows the user to set the maximum dim level or high end trim. • After adding the dimmer to a network, press ON/OFF button to turn ON the overhead light. • Press and hold ON/OFF button for five seconds until the blue indicator LEDs begin to cycle rapidly (Notice - After two seconds blue indicator LEDs will start to flash indicating activation of the ‘delayed OFF’ feature. Continue to hold the ON/OFF button for three additional seconds until the blue indicator LEDs begin to cycle rapidly.) • Once the indicator LEDs start cycling, release the ON/OFF button. Dimmer will set the light to the previously saved minimum level. During initial setup, the light will set to the factory minimum default. • Press either the BRIGHTEN or DIM buttons to change the minimum level until the light output is acceptable. • Once light output is acceptable, press ON/OFF button once. Blue indicator LEDs will start to cycle rapidly again and the dimmer light will go to previously saved maximum level. • Press either the BRIGHTEN or DIM buttons to change the maximum level until the light output is acceptable. • Press ON/OFF button once, LED will flash indicating completion of programming.Size: 1 byte
Default: 1
Minimum: 1
Maximum: 99
Possible values
| From | To | Desription |
|---|---|---|
| 1 | 99 | Set Minimum Dimming Level |
12 - Set Maximum Dimming Level
For maximum compatibility with different load types, RF9643-N allows the user to set the minimum dim level or low end trim. Also to save on power consumption RF9643-N allows the user to set the maximum dim level or high end trim. • After adding the dimmer to a network, press ON/OFF button to turn ON the overhead light. • Press and hold ON/OFF button for five seconds until the blue indicator LEDs begin to cycle rapidly (Notice - After two seconds blue indicator LEDs will start to flash indicating activation of the ‘delayed OFF’ feature. Continue to hold the ON/OFF button for three additional seconds until the blue indicator LEDs begin to cycle rapidly.) • Once the indicator LEDs start cycling, release the ON/OFF button. Dimmer will set the light to the previously saved minimum level. During initial setup, the light will set to the factory minimum default. • Press either the BRIGHTEN or DIM buttons to change the minimum level until the light output is acceptable. • Once light output is acceptable, press ON/OFF button once. Blue indicator LEDs will start to cycle rapidly again and the dimmer light will go to previously saved maximum level. • Press either the BRIGHTEN or DIM buttons to change the maximum level until the light output is acceptable. • Press ON/OFF button once, LED will flash indicating completion of programming.Size: 1 byte
Default: 99
Minimum: 1
Maximum: 99
Possible values
| From | To | Desription |
|---|---|---|
| 1 | 99 | Set Maximum Dimming Level |
13 - Blue LED Brightness Level while the dimmer is ON
This feature allows the change of the brightness of the blue LED indicators on the device. There are 5 levels (including fully OFF and full brightness) to change the LED indicator brightness level either while the device is ON or OFF state. Changing the LED indicator brightness when the device is an ON state: • Turn the overhead light ON. • Press and hold the ON/OFF button for 15 seconds till the LED indicator flashes for the fourth time. (second time for RF9642-Z) • Release the ON/OFF button. • Use the BRIGHTEN or DIM button to change the LED indicator level (it will cycle between the five levels). • Once the brightness level is selected, double tap on the ON/OFF button and this value will be saved. Changing the LED indicator brightness when the device is an OFF state: • Turn the overhead light OFF. • Press and hold the ON/OFF button for 15 seconds till the LED indicator flashes for the second time. • Release the ON/OFF button. • Use the BRIGHTEN or DIM button to change the LED indicator level (it will cycle between the five levels). • Once the brightness level is selected, double tap on the ON/OFF button and this value will be saved.Size: 1 byte
Default: 3
Minimum: 0
Maximum: 4
Possible values
| From | To | Desription |
|---|---|---|
| 0 | 4 | Blue LED Brightness Level while the dimmer is ON |
14 - Blue LED Brightness Level while the dimmer is OFF
This feature allows the change of the brightness of the blue LED indicators on the device. There are 5 levels (including fully OFF and full brightness) to change the LED indicator brightness level either while the device is ON or OFF state. Changing the LED indicator brightness when the device is an ON state: • Turn the overhead light ON. • Press and hold the ON/OFF button for 15 seconds till the LED indicator flashes for the fourth time. (second time for RF9642-Z) • Release the ON/OFF button. • Use the BRIGHTEN or DIM button to change the LED indicator level (it will cycle between the five levels). • Once the brightness level is selected, double tap on the ON/OFF button and this value will be saved. Changing the LED indicator brightness when the device is an OFF state: • Turn the overhead light OFF. • Press and hold the ON/OFF button for 15 seconds till the LED indicator flashes for the second time. • Release the ON/OFF button. • Use the BRIGHTEN or DIM button to change the LED indicator level (it will cycle between the five levels). • Once the brightness level is selected, double tap on the ON/OFF button and this value will be saved.Size: 1 byte
Default: 2
Minimum: 0
Maximum: 4
Possible values
| From | To | Desription |
|---|---|---|
| 0 | 4 | Blue LED Brightness Level while the dimmer is OFF |
15 - Amber LED Brightness Level while the dimmer is ON
Enables the capability to adjust of the amber LED brightness levelSize: 1 byte
Default: 3
Minimum: 0
Maximum: 4
Possible values
| From | To | Desription |
|---|---|---|
| 0 | 4 | Amber LED Brightness Level while the dimmer is ON |
16 - Amber LED Brightness Level while the dimmer is OFF
Disables the capability to adjust the brightness level of the amber LEDSize: 1 byte
Default: 0
Minimum: 0
Maximum: 4
Possible values
| From | To | Desription |
|---|---|---|
| 0 | 4 | Amber LED Brightness Level while the dimmer is OFF |
This product may be added to a new or existing Z-Wave network. An Eaton Wiring Devices Z-Wave device has a blue LED, which will blink when the device is not included in a Z-Wave network. The LED stops blinking when the device is in a network. • This product works with other Z-Wave products from different vendors and product categories as part of the same network. • This product is a listening node and it will act as a repeater in the Z-Wave network. It will perform the repeater function with Z-Wave products from Eaton and from other Z-Wave vendors. • This secure Z-Wave Plus device will only associate with other secure devices based on the Z-Wave controller it’s being used with. Please refer to instructions provided with the controller for more details. Adding Z-Wave Plus Wireless Universal Dimmer to a Z-Wave Network: 1. To include this device in a Z-Wave network, select the command on your Z-Wave controller for inclusion (Install, Add Device, Add Node, Include Device, etc.). Then press the device ON/OFF switch one time to include it in the network. 2. Based on the controller, the controller may ask you to scan the QR code on the device or manually enter 5 digit code under the QR code to install the device as a secured device. You may find this QR code on the device or included in device packaging. 3. After the Device is added to the network, the LED will stop blinking. This indicates the device is installed in the Z-Wave network.
Removing Z-Wave Plus Wireless Universal Dimmer from a Z-Wave Network: 1. To exclude this device from a Z-Wave network, select the setting on your Z-Wave controller for exclusion (Uninstall, Remove Device, Remove Node, Exclude Device, etc.). 2. Once your controller is in exclusion mode, press the device ON/OFF switch one time to exclude it from the network. The LED will start blinking.
Local Reset (RF9643-N & RF9642-Z) (Please use this procedure only when the network primary controller is missing or otherwise inoperable). The device could be reset locally. This will cause the device to be excluded from its network and restore to factory default Before leaving the network the dimmer will send a notification to the controller indicating its departure from the Z-Wave network. • Turn the device ON. • Press and hold ON/OFF button for 20 second till the LED flashes for the fifth time. (third time for RF9642-Z) • Release the ON/OFF button. • LED will start flashing rapidly. Once the LED starts blinking slowly, that indicates the device is not part of the network..
Rapid start feature (RF9643-N only): This feature ensures that LED/CFL lights turn on when the dimmer preset level is low. With this setting enabled, the lights may momentarily come ON brighter than the preset level (less than one second) and then dim down to the preset level. Depending on the type of light used, this feature may not be needed. To enable/disable the feature, turn lights ON. Press and hold the ON/OFF button for 10 seconds until the blue indicator LEDs flash for the third time, then release the button. This feature is disabled by default.
The Z-Wave Plus Device Specific Key (DSK) is required when adding the Z-Wave Plus Universal Dimmer RF9643-N to a Z-Wave network with a controller supporting Security 2 (S2). The DSK can be located on the card insert in the box.
| Type | Value(s) |
|---|