eZLO
Ezlo Secure
EzloSecure-US
Gateway
HW: 1 FW: 7.15:02.00
EFR32Z
7.15.1
0x025B (603)
0x0005 (5)
0x0001 (1)
ZC12-21090306
2021-08-31 13:43:34.655888
N/A
Bridge Controller
Central Static Controller
Ezlo Secure is a feature-rich control hub that keeps users in control of their home from anywhere, at any time. It offers control for Z-Wave™ devices
An always-on solution that works even in the event of a power or internet outage, the Ezlo Secure (model E550) is a feature-rich control hub that keeps users in control of their home from anywhere, at any time. It offers control for Z-Wave™ devices. It features local control for fast responsiveness, and through the Vera app gives customers remote access, personalized notifications, and scene creation ability A multi-radio platform support the latest technology from Z-Wave Wireless: Z-Wave 700, RF 345/433MHz, Wi-Fi CPU: 1 GHz, Quad-Core Cortex-A7 ARM Memory: 16GB Flash, 512MB RAM Wi-Fi: 2.4/5 GHz 802.11 b/g/n/ac Connectors: 1 USB Port 2.0, USB host,1 WAN Port 10/100 Ethernet Dimensions: 7.65 x 6.48 x 1.8 in (177.8 x 152.4 x 25.4 mm) 4G backup: Internal Battery backup: Internal Speaker: Internal
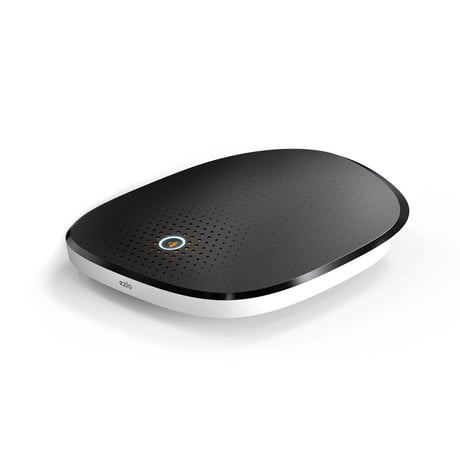
Product Image
Go to the Settings from the side menu. From the Settings, tap on Learning Mode. To add this hub as a secondary controller, tap on Enable Learning mode Once you press Enable Learning mode, you will see the Learning mode process is started. It may take a few minutes
Find the "Reset" button on the controller near the Ethernet cable connector. Push and hold the RESET button for at least 5 sec (on Ezlo Secure LED starts blinking RED), After that your Ezlo controller will be reset to factory defaults. Reset to Factory Settings remove all the information about added devices and reset ZWave chip (new Home ID, new S0/S2 keys, remove all Z-Wave nodes), scenes created, House modes settings, etc. The process is irreversible.
The full DSK can be found on the Ezlo Secure product packaging. The first 5 DSK digits (PIN) is placed on the bottom of the Ezlo Secure product
Go to the Devices screen and tap on the > button to see the device options and tap on the Z-Wave settings option On General settings, select Rediscover device and tap on it. On the rediscovery device screen tap on the Rediscover button. The rediscovery process will start
Once the inclusion is successfully finished you can start the Controller Replication process. Tap on the Start discovery button. The discovery process has been started and you can see how many devices are discovered in the Z-Wave network. Discovered devices will appear on the list of discovered devices. You can rename the discovered devices and assign them to a room. If you don’t want to rename or assign to a room, just tap the Finish button.
With Smart Start, you can add Z-Wave devices automatically by scanning their QR codes. From your Dashboard, go to Devices > tap on the + in the top right corner. Select the Z-Wave Smart Start entry. Tap on the Arrow next to the text. On the box of your device, you should find a QR code, usually labeled with a Smart Start title. When you select "Z-Wave Smart Start" in the iOS app, the camera of your phone will be turned on to scan the QR-code. Once a QR code has been scanned the adding process starts. The device is added to the system and you will see a Set Up Device screen. To continue, choose a name for the new device, edit the name, assign it to a room, and click Continue The device is added to the system and you will see a Set Up Device screen. To continue, choose a name for the new device, edit the name, assign it to a room, and click Continue Select the inclusion type - Smart Start. Tap on the Continue button. In the next step, you will see the confirmation screen that your device is ready. Just turn on your device and it will be added automatically. You can check the Smart Start device state in Settings Turn on your device. You will get a push notification New device is available. Tap on the notification and the VeraMobile app is opened to the list of Smart Start devices.
The Classic Inclusion process can be started via UI. From your Dashboard, go to Devices > tap on the + in the top right corner and select or search the name or type of device that you wish to pair with Ezlo Secure. To add a generic Z-Wave device, select the Generic Z-Wave device from the device categories. To add the device with your Ezlo Secure, if the device requires assembly read the manual, follow the assembly instructions there, power the device, and click Next. Once the blue message at the top of the page says Add new device now, follow the process as described in the user manual. To finish, choose a name for the new device, add the device to favorites (optional), edit the name, assign it to a room, and click I’m done adding devices
The Exclusion process can be started via UI. From the list of devices, tap on the selected device and go to that device's settings On the device settings page press delete device Select unpair if your device is still connected to your network, and delete if the device is no longer connected. Unpair will redirect you through the excluding wizard of the device. You need to have physical access to the device as well
Navigate to Start Devices screen with a list of devices Tap on the Info button and see the device details in an additional screen. On this screen you can change the device name, the encryption connection, and the inclusion type. To change the encryption connection, tap on the > button.
| Type | Value(s) |
|---|
| Group | Type |
|---|---|
| Smoke Alarm |
|
| CO Alarm |
|
| CO2 Alarm |
|
| Heat Alarm |
|
| Water Alarm |
|
| Access Control |
|
| Home Security |
|
| System |
|
| Emergency Alarm |
|
| Home Health |
|
| Siren |
|
| Sensor type |
|---|
| Air Temperature |
| General Purpose |
| Illuminance |
| Power |
| Humidity |
| Velocity |
| Direction |
| Atmospheric Pressure |
| Barometric Pressure |
| Solar Radiation |
| Dew Point |
| Rain Rate |
| Tide Level |
| Weight |
| Voltage |
| Current |
| Carbon Dioxide (CO2) Level |
| Air Flow |
| Tank Capacity |
| Distance |
| Angle Position |
| Rotation |
| Water Temperature |
| Soil Temperature |
| Seismic Intensity |
| Seismic Magnitude |
| Ultraviolet |
| Electrical Resistivity |
| Electrical Conductivity |
| Loudness |
| Moisture |
| Frequency |
| Time |
| Target Temperature |
| Particulate Matter 2.5 |
| Formaldehyde (CH2O) Level |
| Radon Concentration |
| Methane (CH4) Density |
| Volatile Organic Compound Level |
| Carbon Monoxide (CO) Level |
| Soil Humidity |
| Soil Reactivity |
| Soil Salinity |
| Heart Rate |
| Blood Pressure |
| Muscle Mass |
| Fat Mass |
| Bone Mass |
| Total Body Water (TBW) |
| Basis Metabolic Rate (BMR) |
| Body Mass Index (BMI) |
| Acceleration X-Axis |
| Acceleration Y-Axis |
| Acceleration Z-Axis |
| Smoke Density |
| Water Flow |
| Water Pressure |
| RF Signal Strength |
| Particulate Matter 10 |
| Respiratory Rate |
| Relative Modulation Level |
| Boiler Water Temperature |
| Domestic Hot Water (DHW) Temperature |
| Outside Temperature |
| Exhaust Temperature |
| Water Chlorine Level |
| Water Acidity |
| Water Oxidation Reduction Potential |
| Heart Rate LF/HF Ratio |
| Motion Direction |
| Applied Force on Sensor |
| Return Air Temperature |
| Supply Air Temperature |
| Condenser Coil Temperature |
| Evaporator Coil Temperature |
| Liquid Line Temperature |
| Discharge Line Temperature |
| Suction (Input) Pressure |
| Discharge (Output) Pressure |
| Defrost Temperature (Sensor Defrost) |
| Ozone (O3) |
| Sulfur Dioxide (SO2) |
| Nitrogen Dioxide (NO2) |
| Ammonia (NH3) |
| Lead (Pb) |
| Meter type |
|---|
| Cooling Meter Consumption |
| Cooling Meter Production |
| Electric Meter Consumption |
| Electric Meter Production |
| Gas Meter Consumption |
| Gas Meter Production |
| Heating Meter Consumption |
| Heating Meter Production |
| Water Meter Consumption |
| Water Meter Production |