TELUS
Telus Boost IoT-A
TBoost-A.2
Generic Controller DT
HW: 176 FW: 7.13:04.13
ZGM130
7.13.6
0x0094 (148)
0x0013 (19)
0x0113 (275)
ZC12-21060237
2021-06-04 13:54:10.416781
N/A
Bridge Controller
Central Static Controller
Yes
A residential Wi-Fi access point that can use Z-Wave to control compatible home automation devices.
This residential Wi-Fi 6 access point supports whole home automation, with Wi-Fi, Z-Wave, and BTLE. Users can control compatible Z-Wave, and Wi-Fi devices via an app.
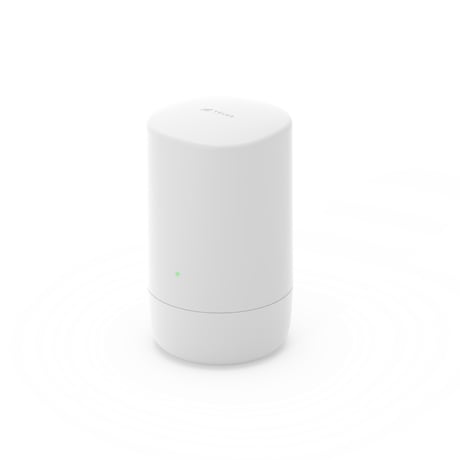
Product Image
1. Log into the Partner Portal at https://alarmadmin.alarm.com/default.aspx and select a customer. 2. Navigate to the “Equipment” page. 3. Click the “Z-Wave Devices” tab. 4. If there are any nodes currently in the Alarm.com Z-Wave device’s network, remove them by following the instructions at Removing devices from the Alarm.com Z-Wave device’s Z-Wave network. 5. Start add mode on the primary Z-Wave controller. 6. Under the “Manage Devices” header, click “Add Replicate Z-Wave.” The DSK will be displayed with the first five digits bolded. 7. When the Alarm.com Z-Wave device learns into another network successfully, that network’s information will show up on the screen. This information may be delayed up to two minutes as the Alarm.com Z-Wave device queries the nodes. All Z-Wave network information will be copied from the primary controller to the Alarm.com Z-Wave device
1. Log into the Partner Portal at https://alarmadmin.alarm.com/default.aspx and select a customer. 2. Navigate to the “Equipment” page. 3. Click the “Z-Wave Devices” tab. 4. Under the “Advanced Z-Wave Commands” header, click “Remove All Z-Wave Devices.” 5. Allow 3 minutes for the associated commands to go through and for the Alarm.com Z-Wave device to act on them.
The DSK is accessible via the web UI
1. Log into the Partner Portal at https://alarmadmin.alarm.com/default.aspx and select a customer. 2. Navigate to the “Equipment” page. 3. Click the “Z-Wave Devices” tab. 4. Under the “Advanced Z-Wave Commands” header, click “Rebuild Equipment List” 5. Check off “All Values,” then click “Request Equipment List”
1. Log into the Partner Portal at https://alarmadmin.alarm.com/default.aspx and select a customer. 2. Navigate to the “Equipment” page. 3. Click the “Z-Wave Devices” tab. 4. If there are any nodes currently in the Alarm.com Z-Wave device’s network, remove them by following the instructions at Removing devices from the Alarm.com Z-Wave device’s Z-Wave network. 5. Start add mode on the primary Z-Wave controller. 6. Under the “Manage Devices” header, click “Add Replicate Z-Wave.” The DSK will be displayed with the first five digits bolded. 7. When the Alarm.com Z-Wave device learns into another network successfully, that network’s information will show up on the screen. This information may be delayed up to two minutes as the Alarm.com Z-Wave device queries the nodes. All Z-Wave network information will be copied from the primary controller to the Alarm.com Z-Wave device
1. Log into the Partner Portal at https://alarmadmin.alarm.com/default.aspx and select a customer. 2. Navigate to the “Equipment” page. 3. Click the “Z-Wave Devices” tab. 4. Under the “Manage Devices” header, click “Manage S2 & SmartStart Keys.” Alternatively, you can go directly to the URL https://alarmadmin.alarm.com/Support/ManageDeviceKeys.aspx 5. Click “Add Device Key” 6. You have two options for adding info for the device you want to add: a. Input the full DSK of the device you want to add, and optionally name it. b. Click the “USB Barcode Scanner” button, then use a standard USB barcode scanner to scan the SmartStart QR code of the device. You may also paste in the text from a QR code. 7. You may optionally add a name for this device as well. 8. Click the “Add Device” button. 9. Power up the new device in range of the Alarm.com device. It will automatically be added to the Alarm.com device’s network, and will show up on the Z-Wave equipment page at https://alarmadmin.alarm.com/Support/DeviceAutomation.aspx
To add a device to the network using no security, S0 security, or S2 unauthenticated security, follow these steps: 1. Log into the Partner Portal at https://alarmadmin.alarm.com/default.aspx and select a customer. 2. Navigate to the “Equipment” page. 3. Click the “Z-Wave Devices” tab. 4. Under the “Manage Devices” header, click “Add a Z-Wave Device.” 5. Wait for the bolded message “Checking for new devices on the network.” The Alarm.com Z-Wave device’s DSK is also displayed with the first five digits bolded. 6. Trigger a device to add it to the network. 7. When a device is added successfully, it will show up on this screen following a 30 second delay. 8. Continue triggering devices. You may add many devices to the network without reentering Add Mode.
1. Log into the Partner Portal at https://alarmadmin.alarm.com/default.aspx and select a customer. 2. Navigate to the “Equipment” page. 3. Click the “Z-Wave Devices” tab. 4. Under the “Manage Devices” header, click “Delete a Z-Wave Device.” 5. Wait for the bolded message “Checking for deleted devices on the network.” 6. Trigger a device to remove it from the network. 7. When a device is deleted successfully and its network information is erased, it will show up on this screen following a 30 second delay. 8. Continue triggering devices. You may delete many devices to the network without reentering Delete Mode.
1. Log into the Partner Portal at https://alarmadmin.alarm.com/default.aspx and select a customer. 2. Navigate to the “Equipment” page. 3. Click the “Z-Wave Devices” tab. 4. Under the “Manage Devices” header, click “Manage S2 & SmartStart Keys.” Alternatively, you can go directly to the URL https://alarmadmin.alarm.com/Support/ManageDeviceKeys.aspx
| Type | Value(s) |
|---|
| Group | Type |
|---|---|
| Access Control |
|
| Sensor type |
|---|
| Air Temperature |
| Meter type |
|---|
| Electric Meter Consumption |