Ness
Ness Z-Wave LUX PIR Sensor
ZU-117001
Notification Sensor
HW: 1 FW: 1.12
ZGM130
7.14.3
0x0189 (393)
0x0104 (260)
0x0301 (769)
ZC12-21070257
2021-07-15 11:20:57.861844
N/A
Enhanced 232 Slave
Listening Sleeping Slave
Yes
The LUX Z-Wave Radio PIR allows you to improve the safety and security of your home and family easily and effectively.
Built with premium components for better performance, these motion sensors provide instant and reliable performance as part of your security system. Ness is a leading developer of low power, highly reliable wireless solutions, including a wide range of intelligent wireless security, sensing and home automation devices.
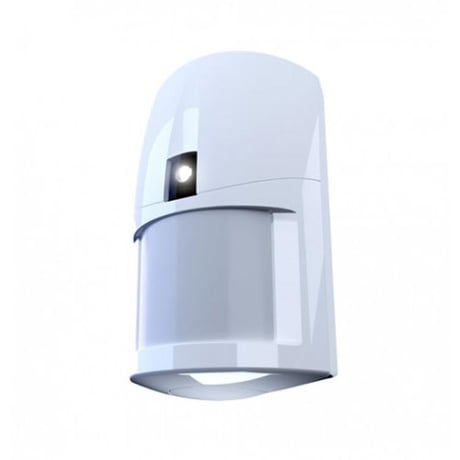
Product Image
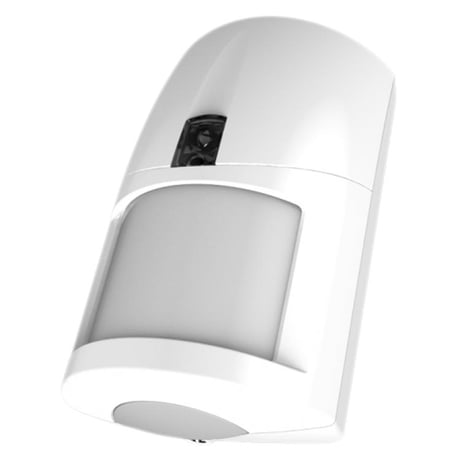
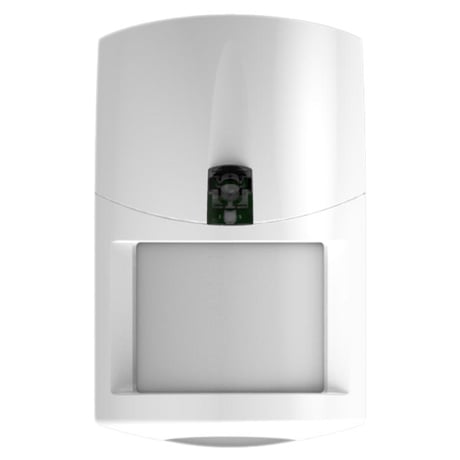


1 - Motion Alarm Retrigger Duration
The duration in seconds that the motion alarm would not be sent since last motion alarm reported. The motion alarm report is enabled only when the duration timer has expired. Range: 10~3600; Default: 240; value = 10 disable motion alarm report. Any valid value that great than 10 enable motion alarm report.Size: 2 bytes
Default: 240
Minimum: 10
Maximum: 3600
Possible values
| From | To | Desription |
|---|---|---|
| 10 | 10 | Disable motion alarm report |
| 11 | 3600 | Enable motion alarm report |
2 - Motion Alarm Retrigger Modes
This option will select how the motion alarm retrigger duration timer (CPN#1) to be reset. Range: 0~1. Value = 0, in this mode, the motion alarm retrigger duration timer (CPN#1) will be reset to zero once the motion event is detected. Hence, the motion alarm retrigger duration timer will start recounting which extends the retrigger duration. This mode will extend the battery life and reduce unnecessary motion alarm reports (default). Value = 1, in this mode, the motion alarm retrigger duration timer (CPN#1) would not be reset once the motion event has detected. The motion alarm reports will be enabled to send once the motion alarm retrigger duration timer has expired. In this mode, it will report the motion alarm event with greater fidelity. This setting might be used where the device will be used for automation tasks.Size: 1 byte
Default: 0
Minimum: 0
Maximum: 1
Possible values
| From | To | Desription |
|---|---|---|
| 0 | 0 | Motion alarm retrigger duration timer (CPN#1) will be reset to zero once the motion event is detected |
| 1 | 1 | Motion alarm retrigger duration timer (CPN#1) would not be reset once the motion event has detected |
3 - Motion Clear Duration
The period of time in seconds to send motion clear report after motion alarm has reported in Security Mode. Range: 0~3600; Default: 10; value = 0 disable motion clear report.Size: 2 bytes
Default: 10
Minimum: 0
Maximum: 3600
Possible values
| From | To | Desription |
|---|---|---|
| 0 | 0 | Disable motion clear report |
| 1 | 3600 | Enable motion clear report |
4 - Low battery setting
Report battery low warning message when battery level reaches this value (percentage). Range: 10~50 (10%~50%)Size: 1 byte
Default: 10
Minimum: 10
Maximum: 50
Possible values
| From | To | Desription |
|---|---|---|
| 10 | 50 | Low warning message when battery level reaches this value |
5 - Battery Scheduled Report Interval
The battery level scheduled report interval time is based on every 30 minutes per kick. The value N related to the time in minutes is N x 30 minutes. Range: 0~120. Default: 12 (12x30 =360 minutes). Value = 0 Disable Battery level scheduled report Battery level scheduled report.Size: 1 byte
Default: 12
Minimum: 0
Maximum: 120
Possible values
| From | To | Desription |
|---|---|---|
| 0 | 0 | Disable Battery level scheduled report |
| 1 | 120 | N x 30 minute battery level scheduled report |
6 - Luminance Change threshold
This parameter determines the change in Lux of light intensity level resulting in sending luminance report. Range: 0~60 (Lux). Default: 50. Value = 0 Disable luminance value scanning, no report. Note: The luminance value is scanned every 5 seconds. A luminance report will be sent if a change over the set threshold value is detected.Size: 1 byte
Default: 50
Minimum: 0
Maximum: 60
Possible values
| From | To | Desription |
|---|---|---|
| 0 | 0 | Disable luminance value scanning, no report |
| 1 | 60 | Lux luminance value |
7 - Temperature Change threshold
This parameter determines the change in temperature value resulting in sending temperature value report. Range: 0~80 (10 = 1.0 °C or °F; 20 = 2.0 °C). Value > 0 and <10 set as 10. Default: 10. Value = 0 Disable temperature value scanning, no report. Note: The temperature value is scanned every 5 minutes. A temperature report will be sent if a change over the set threshold valueis detected.Size: 1 byte
Default: 10
Minimum: 0
Maximum: 80
Possible values
| From | To | Desription |
|---|---|---|
| 0 | 10 | No report sent |
| 11 | 80 | Temperature range from 1-80°C |
8 - Temperature Scheduled report interval
The temperature value report interval time is based on 30 minutes per kick. The value N related to the time in minutes is N x 30 minutes. Range: 0~120. Default: 6 (6x30 =180 minutes). Value = 0 Disable temperature scheduled report.Size: 1 byte
Default: 6
Minimum: 0
Maximum: 120
Possible values
| From | To | Desription |
|---|---|---|
| 0 | 0 | Disable temperature scheduled report |
| 1 | 120 | N x 30 minutes temperature scheduled report |
9 - Temperature Scale Setting
Option to select the temperature scale type reported in Celsius or Fahrenheit. Range: 0~1. Value = 0 Celsius (C): Value = 1 Fahrenheit (F).Size: 1 byte
Default: 0
Minimum: 0
Maximum: 1
Possible values
| From | To | Desription |
|---|---|---|
| 0 | 0 | Celsius |
| 1 | 1 | Fahrenheit |
10 - Night Light ON Duration
Range: 0~1. Value = 0 Night Light ON for 10 seconds (default). Value = 1 Night Light ON for 30 seconds.Size: 1 byte
Default: 0
Minimum: 0
Maximum: 1
Possible values
| From | To | Desription |
|---|---|---|
| 0 | 0 | Night Light ON for 10 seconds |
| 1 | 1 | Night Light ON for 30 seconds |
11 - Night Light ON based on ambient light level meas
Range: 0~1. Value = 0 Night Light ON only when sense detects total darkness (default). Value = 1 Night Light ON only when a small amount of light is detected.Size: 1 byte
Default: 0
Minimum: 0
Maximum: 1
Possible values
| From | To | Desription |
|---|---|---|
| 0 | 0 | Night Light ON only when sense detects total darkness (default) |
| 1 | 1 | Night Light ON only when a small amount of light is detected |
12 - Enable Tamper Alarm Report
This parameter setting is used to enable/disable the device cover removed Tamper Alarm report. Range: 0~1. Value = 0 - disable the Tamper Alarm report. Value = 1 - enable the Tamper Alarm report. (default)Size: 1 byte
Default: 1
Minimum: 0
Maximum: 1
Possible values
| From | To | Desription |
|---|---|---|
| 0 | 0 | Disable the Tamper Alarm report |
| 1 | 1 | Enable the Tamper Alarm report |
13 - Walk Test Mode Duration
This parameter setting is used to set the time out for Walk Test Mode. Range: 0~3. Value = 0 - disable Walk Test Mode; Value = 1 - 10 minutes; Value = 2 = 30 minutes (default); Value = 3 - 60 minutes.Size: 1 byte
Default: 2
Minimum: 0
Maximum: 3
Possible values
| From | To | Desription |
|---|---|---|
| 0 | 0 | Disable Walk Test Mode |
| 1 | 1 | Walk Test Mode 10 minutes |
| 2 | 2 | Walk Test Mode 30 minutes (default) |
| 3 | 3 | Walk Test Mode 60 minutes |
ADDING LUX Z-WAVE SENSOR INTO A Z-WAVE NETWORK Power up the LUX Z-Wave sensor by inserting the batteries (or fit the batteries in the correct polarity). You may need to refer to your Z-Wave controller’s instructions for adding devices. 1. Put your primary Z-Wave gateway into inclusion mode, the gateway should confirm that it is waiting to add a new device, 2. Press the Z-Wave Action button on your LUX Z-Wave sensor for 1 second. 3. The LED on the LUX Z-Wave sensor will blink Red rapidly, followed by a solid Green LED for 1 second for successful inclusion, or a solid red LED for 1 second for a failed inclusion.
REMOVING LUX Z-WAVE SENSOR FROM A Z-WAVE NETWORK You may need to refer to your Z-Wave gateway’s instructions for removing devices. 1. Put your primary Z-Wave gateway into exclude mode, the gateway should confirm that it is waiting to remove a device, 2. Press the Z-Wave Action button on your LUX Z-Wave sensor for 1 second. 3. The LED on the LUX Z-Wave sensor will display a solid Green LED for 1 second after successful exclusion.
LUX will be in wake-up mode for 30 Seconds on power-up (batteries have been inserted). • Event reporting is disabled during wake-up. • LUX Z-Wave sensor also enters wake-up mode for 60 seconds once it has been added into a Z- Wave network - to allow the device to complete a Z-Wave interview. • There is no wake-up Mode after the device has been removed from a Z-Wave network - the unpaired device will function in Walk Test mode.
TO FACTORY DEFAULT LUX Z-WAVE SENSOR To reset all LUX Z-Wave sensor settings to factory default, press and hold the Z-Wave Action button for 20 seconds and release. This will remove any previous Z- Wave network inclusion credentials and reset any user set parameters.
LUX will be in Walk Test mode once it exits wake- up mode. The duration of the Walk Test Mode is configurable by CPN#13. The default is 30 minutes. The Motion Alarm Retrigger Timer CPN#1 and Retrigger Mode CPN#2 are disabled during Walk- Test mode to allow the device to be tested without lockout timers. Motion events report whenever motion has detected. Use Walk-Test Mode to test the sensor’s detection coverage and Z-Wave signal. Please note the Mounting Location and Mounting Height instructions for optimal performance. • To exit Walk-Test mode, press and hold the Z-Wave Action Button for more than 3 seconds then release.
*If your Z-Wave controller supports S2 Security 2 Authenticated encryption and DSK, enter the first 5 digits of the DSK printed at the bottom of the QR image on the rear of the LUX Z-Wave sensor. ADDING WITH SMART START* LUX Z-Wave sensor is a SmartStart enabled device allowing it to be added into a Z-Wave network by scanning the Z-Wave QR Code present on the product with a controller providing SmartStart inclusion. No further action is required and the SmartStart product will be added automatically within 10 minutes of being switched on in the network vicinity. *Requires a SmartStart compatible controller and app. LUX Z-Wave sensor must be within network range. Scan the DSK QR code image on the front of this manual or on the rear of the LUX Z Wave sensor
| Type | Value(s) |
|---|
| Group | Type |
|---|---|
| Home Security |
|
| Sensor type |
|---|
| Air Temperature |
| Illuminance |