Universal Remote Control, Inc.
TRF-ZW10
TRF-ZW10
Gateway
HW: 1 FW: 7.15:07.15
ZGM130
7.15.2
0x0445 (1093)
0x0020 (32)
0x0001 (1)
ZC12-21080300
2021-08-16 13:10:47.034516
N/A
Bridge Controller
Central Static Controller
The TRF-ZW10 Z-Wave™ controller allows for seamless integration of Z-Wave devices into the URC Total Control ecosystem.
The TRF-ZW10 is a Z-Wave™ controller that seamlessly integrate s into URC's premium control system "Total Control". The TRF-ZW10 utilizes the latest Z-Wave chipset (700 Series) to create a reliable, robust, and easy to use system. Combined with the URC Z-Wave lighting solution a user can scale from a few lights to whole house control with ease. Installation requires the URC Accelerator software. The TRF-ZW10 can be powered via a DC input or with Power Over Ethernet for a clean and easy installation.
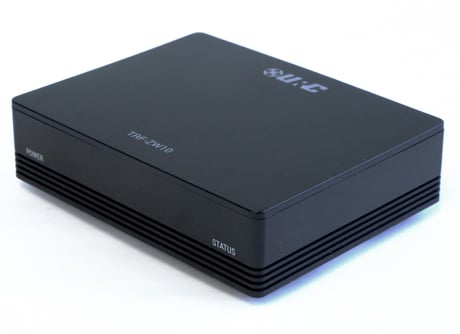
Product Image
Learn Mode: Places the TRF-ZW10 into “learn mode” so a 3rd party controller can include it. After Learn Mode is activated, the TRF's Learn Mode DSK will be advertised in the application log. Enter it on the including controller side.
Resets the memory of the TRF-ZW10 to factory settings. All existing programming is erased. The gateway requires a download from the URC software in order to be programmed again. If this controller is the primary controller for your network, resetting it will result in the nodes in your network being orphaned and it will be necessary after the reset to exclude and re-include all of the nodes in the network. If this controller is being used as a secondary controller in the network, use this procedure to reset this controller only in the event that the network primary controller is missing or otherwise inoperable. To factory default the TRF-ZW10, turn the gateway over and locate the Reset button. Using a thin object, press and hold the button down for fifteen (15) seconds. WARNING! Only use this button when instructed by URC’s Technical Support team
The TRF-ZW10’s DSK can be found on the bottom of the TRF-ZW10 and also on the bottom of the product packaging.
When a node needs to have its capabilities rediscovered, the node must be excluded and then re-included to the network for any new or changed capabilities to be recognized
Controller Replication: Controller Replication is the process of updating network information from a primary controller to secondary controllers, such as the node list and routing information. These steps are usually not required unless you have a multiple controllers on the network. 1. Start Add Mode on the primary controller. 2. Start Learn Mode on the secondary controller. 3. All Z-Wave network relevant information will be updated for the secondary controller
SmartStart Inclusion SmartStart enabled products can be added into a Z-Wave network by entering the DSK labeled on the product. No further action is required and the SmartStart product will be added automatically within 10 minutes of being switched on in the network’s vicinity. This requires a SmartStart compatible Z-Wave device, follow the steps below: 1. Select Step 10: URC Subsystems. 2. Select the TRF-ZW10 sub-step. 3. Click on the Devices tab. 4. Click on Refresh Node Info. This tells Accelerator to connect to the TRF-ZW10 and request all available node information. 5. Select Tools. The Gateway Tools window is displayed. 5. Click on SmartStart Inclusion. 6. Select Include New Z-Wave Device. The New Device window is displayed. URC software does NOT support the use of QR code scanning for SmartStart inclusion. The full DSK must be used. 7. Perform the following: A. Provide the SmartStart device with a custom name, this label is how the device displays on any URC interface. B. Using the available drop-down menu, select the Room where the SmartStart device should be placed. Generally, this is where the device is physically located. C. Select OK. 8. The Enter the DSK window appears, enter the unique DSK value that is physically found on the SmartStart device and click Apply. The devices have been added to the SmartStart Provisioning List. After a device DSK has been entered, the device can be powered up in order to be automatically included by the TRF. The TRF-ZW10’s DSK can be found on the bottom of the TRF-ZW10 and also on the bottom of the product packaging.
TRF-ZW10 Programming - Including Devices Including a device on the TRF-ZW10 enables the gateway and Total Control the ability to control and view the status of that device. Prior to including a Z-Wave device, assure that the device has not been included to another gateway and that the device has been properly installed (if applicable). If the Z-Wave device inclusion fails, try to exclude the device first (instructions on page 36) and then attempt to include the device. Perform the following steps to include a Z-Wave device: 1. Select Step 10: URC Subsystems. 2. Select the TRF-ZW10 sub-step. 3. Click on the Devices tab. 4. Select Include Node. 5. The New Device window displays, perform the following: A. Name: Enter a custom label (Dining Room Lights) for the Z-Wave device, this name is displayed on the user interface. B. Room: Use the available drop-down menu to select an available room (i.e. Dining Room) in the Total Control system. This Z-Wave device is available for control within the interface of the selected room. C. Select OK. 6. The Include a Node window displays indicating the TRF-ZW10 gateway is in Inclusion Mode. Locate the Include Device to Z-Wave Network button the physical Z-Wave device and press it to begin the inclusion process. 7. If supported, the Security 2 Accept window displays. This message only displays if the Z-Wave device supports S2 Security. Below are the types of S2 authentications that are supported: • S2 Unauthenticated: Does not require a pin code. • S2 Authenticated: A pin code is required; however, if one is not provided the gateway includes the device as if it were S2 unauthenticated. • S2 Controlled: Requires a pin code and if one is not provided the device does not get included. Click Yes to configure the device using S2 and enter the security code in the next window that displays. The DSK security code determines if the device is S2 Authenticated or Controlled. 8. Wait till the inclusion process completes. Once done, select Close. 9. Repeat these steps for each Z-Wave device that needs to be included.
TRF-ZW10 Programming - Excluding Devices Excluding a device permanently removes it from the TRF-ZW10. Once a device has been excluded from the gateway, it needs to be re-included in order for the TRF-ZW10 to control it again. In some circumstances, the Z-Wave device must first be excluded prior to being included on the TRF-ZW10. Perform the following steps to exclude a Z-Wave device: 1. Select Step 10: URC Subsystems. 2. Select the TRF-ZW10 sub-step. 3. Click on the Devices tab. 4. Select Exclude Node. When a node needs to have its capabilities rediscovered, the node must be excluded and then re-included to the network for any new or changed capabilities to be recognized. 5. View the Exclude a Node window. This screen informs the programmer when the TRF-ZW10 has entered Exclusion mode. 6. Enable “Exclude Mode” for the device you want to exclude. Each device has its own method entering “Exclude Mode”, so please consult the owner’s manual for each device to be excluded. For excluding SmartStart devices, it is recommended to remove the node from the Provisioning List before removing it from the network, otherwise it may be added back to the network automatically by SmartStart. To remove or edit the SmartStart Provisioning List, refer to page 36.
SmartStart Provisioning List The SmartStart provisioning list provides the status of all SmartStart devices that have been or are ready for inclusion. When excluding a SmartStart device, one must first remove the device from the provisioning list or it may automatically be added back to the network. To access the provisioning list, perform the following: 1. Select Tools from the Devices tab. 2. Select SmartStart Inclusion. 3. Select the device to be removed from the provisioning list and click Delete Selected. Repeat this step for each device to be removed. 4. The device has been removed from the provisioning list and can now be excluded from the network. Select Close to exit the provisioning list.
| Group | Type |
|---|---|
| Smoke Alarm | Sensor status: Smoke detected |
| CO Alarm | Sensor status: Carbon monoxide detected |
| CO2 Alarm | Sensor status: Carbon dioxide detected |
| Water Alarm | Sensor status: Water leak detected |
| Access Control |
|
| Home Security |
|
| Sensor type |
|---|
| Air Temperature |
| General Purpose |
| Illuminance |
| Power |
| Humidity |
| Voltage |
| Current |
| Outside Temperature |
| Meter type |
|---|
| Electric Meter Consumption |