Heatit controls
Heatit ZM Thermostat 16A
ZM Thermostat 16A
Thermostat - HVAC
HW: 1 FW: 1.00
ZGM130
7.15.4
0x019B (411)
0x0004 (4)
0x3502 (13570)
ZC12-21100317
2021-10-01 10:00:07.168828
N/A
Enhanced 232 Slave
Always On Slave
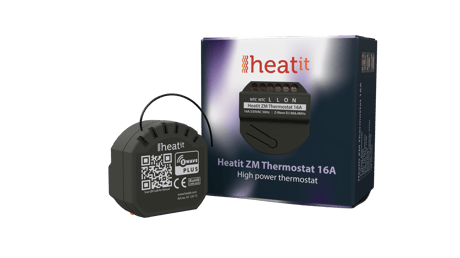
Heatit ZM Thermostat is an electronic thermostat for electrical floor heating designed for in-wall installations.
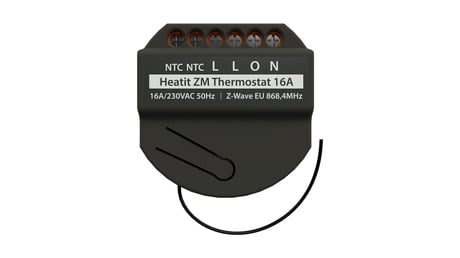
Heatit ZM Thermostat is an electronic thermostat for electrical floor heating designed for in-wall installations. The thermostat allows you to control your electrical heating through your Z-Wave™ network. The module is equipped with a 16A single pole relay. The thermostat requires you to connect an external sensor which is included with the device. The device can withstand a max load of 16A at 230VAC.
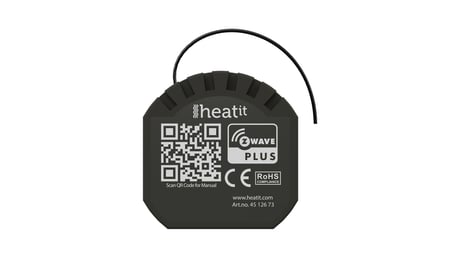
Product Image


1 - Operating mode
Set the thermostat modeSize: 1 byte
Default: 1
Minimum: 0
Maximum: 2
Possible values
| From | To | Desription |
|---|---|---|
| 0 | 0 | Off, Thermostat will not operate |
| 1 | 1 | Heating, Thermostat mode is in heating mode |
| 2 | 2 | Cooling, Thermostat mode is in cooling mode |
2 - Temperature control hysteresis
Choose the hysteresis for the thermostatSize: 1 byte
Default: 5
Minimum: 3
Maximum: 30
Possible values
| From | To | Desription |
|---|---|---|
| 3 | 30 | 0,3°C to 3,0°C, Chose the hysteresis for the thermostat. |
3 - Minimum setpoint temperature
Decide the lowest setpoint temperature allowed by the thermostatSize: 2 bytes
Default: 50
Minimum: 50
Maximum: 400
Possible values
| From | To | Desription |
|---|---|---|
| 50 | 400 | 5,0°C to 40,0°C, Set the minimum setpoint temperature for the thermostat |
4 - Maximum setpoint temperature
Decide the highest setpoint temperature allowed by the thermostatSize: 2 bytes
Default: 400
Minimum: 50
Maximum: 400
Possible values
| From | To | Desription |
|---|---|---|
| 50 | 400 | 5,0°C to 40,0°C, Set the maximum setpoint temperature for the thermostat |
5 - Setpoint
Decide the thermostat setpointSize: 2 bytes
Default: 210
Minimum: 50
Maximum: 400
Possible values
| From | To | Desription |
|---|---|---|
| 50 | 400 | 5,0°C to 40,0°C, Set the setpoint temperature for the thermostat |
6 - Sensor calibration
Manually calibrate the sensor ±6°CSize: 1 byte
Default: 0
Minimum: -60
Maximum: 60
Possible values
| From | To | Desription |
|---|---|---|
| -60 | 60 | -6,0°C to 6,0°C Calibrate the sensor ±6°C NB! To set a negative value, use 256 and subtract the desired value |
7 - Temperature report interval
Time interval between consecutive temperature reportsSize: 2 bytes
Default: 1020
Minimum: 30
Maximum: 65535
Possible values
| From | To | Desription |
|---|---|---|
| 30 | 65535 | 30 seconds – 65 535 Seconds Time interval between consecutive temperature reports. |
8 - Temperature report hysteresis
Temperature reports based on change in temperature from last reportSize: 1 byte
Default: 10
Minimum: 0
Maximum: 100
Possible values
| From | To | Desription |
|---|---|---|
| 0 | 0 | Temperature report based on delta value is disabled. |
| 1 | 100 | 0,1°C to 10°C |
9 - Meter report interval
Time interval between consecutive meter reportsSize: 2 bytes
Default: 1020
Minimum: 30
Maximum: 65535
Possible values
| From | To | Desription |
|---|---|---|
| 30 | 65535 | 30 seconds – 65 535 Seconds Time interval between consecutive meter reports. |
10 - Inverted output
Decides if the relay output should be invertedSize: 1 byte
Default: 0
Minimum: 0
Maximum: 1
Possible values
| From | To | Desription |
|---|---|---|
| 0 | 0 | Standard output |
| 1 | 1 | Inverted output |
11 - Relay state update interval
Set the time interval of how often the device reports Binary Switch Set and thermostat modeSize: 2 bytes
Default: 43200
Minimum: 30
Maximum: 65535
Possible values
| From | To | Desription |
|---|---|---|
| 30 | 65535 | 30 seconds – 65 535 Seconds, Time interval between consecutive temperature reports |
The primary controller/gateway has a mode for adding devices. Please refer to your primary controller manual on how to set the primary controller in add mode. The device may only be added to the network if the primary controller is in add mode. There are two ways to add the device to a Z-Wave network. Method 1: Standard (Manual) Add mode is indicated on the device by a blinking green LED. It indicated this for 90 seconds until a timeout occurs, or until the module has been added to the network. To start the configuration process, press the configuration button 3 times in rapid succession. The LED will light up green for 3 seconds if adding is successful. The device is now ready for use with default settings. Method 2: SmartStart (Automatic) SmartStart enabled products may be added to a Z-Wave network by scanning the Z-Wave QR-Code on the product if your primary controller supports SmartStart inclusion. No further action is required and the SmartStart product will be added automatically after being powered on within range of the primary controller.
The primary controller/gateway has a mode for removing devices. Please refer to your primary controller manual on how to set the primary controller in remove mode. The device may only be removed from the network if the primary controller is in remove mode. Remove mode is indicated on the device by a blinking green LED. It indicated this for 90 seconds until a timeout occurs, or until the module has been removed from the network. To start the configuration process, press the configuration button 3 times in rapid succession. The LED will light up green for 3 seconds if removing is successful.
Press and hold the configuration button. After 3 seconds the LED will start to blink in green. After 20 seconds the LED will start to blink green rapidly for 5 seconds. You may now release the button
Paragraph 11.1 Overload. Paragraph 11.2 Overheating.
The QR-Code is needed when including a device using S2 security or SmartStart. The DSK can be found in the QR-Code and is located; 1. On the product. 2. On the Quick Guide manual. 3. On the F-Pack (gift box).
| Type | Value(s) |
|---|
| Sensor type |
|---|
| Air Temperature |
| Meter type |
|---|
| Electric Meter Consumption |