Alarm.com
Smart Gateway
ADC-SG130ZEU-INT
Central Controller
HW: 171 FW: 6.09:03.53
ZM5202
6.82.01
0x0094 (148)
0x0011 (17)
0x0111 (273)
ZC10-21097052
2021-09-16 17:15:53.761787
N/A
Static Controller
Central Static Controller
The Smart Gateway provides an affordable smart hub to control all of your smart home devices.
The Smart Gateway provides an affordable smart hub to control all of your smart home devices. The Smart Gateway not only manages all of your Z-Wave™ devices, but also provides a secure WiFi network for your WiFi devices.
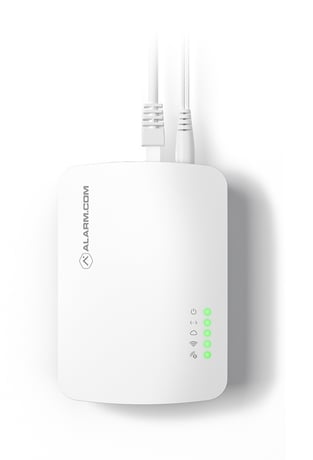
Product Image
2.7 Learning the Alarm.com Z-Wave device into another Z-Wave network To learn the Alarm.com Z-Wave device into another Z-Wave network, follow these steps: 1. Log into the Partner Portal at https://alarmadmin.alarm.com/default.aspx and select a customer. 2. Navigate to the “Equipment” page. 3. Click the “Z-Wave Devices” tab. 4. If there are any nodes currently in the Alarm.com Z-Wave device’s network, remove them by following the instructions at Removing devices from the Alarm.com Z-Wave device’s Z-Wave network. 5. Start add mode on the primary Z-Wave controller. 6. Under the “Manage Devices” header, click “Add Replicate Z-Wave.” The DSK will be displayed with the first five digits bolded. 7. When the Alarm.com Z-Wave device learns into another network successfully, that network’s information will show up on the screen. This information may be delayed up to two minutes as the Alarm.com Z-Wave device queries the nodes. All Z-Wave network information will be copied from the primary controller to the Alarm.com Z-Wave device
Support for the Wake Up command class is enabled using Alarm.com’s rules engine. This requires a series of rules pushed from the cloud when Alarm.com detects that a Wake Up device has been added to the Alarm.com Module. For this reason Wake Up notifications will only be handled properly by the Alarm.com module after any locally added Wake Up devices have been reported to the backend. This can take up to 15 minutes, but can be accelerated by using Remote Add or by requesting a Z-Wave Equipment List from the Alarm.com backend.
2.6 Reset Alarm.com Z-Wave device to default state This process will clear all nodes from the Alarm.com Z-Wave device’s network, change the Alarm.com ZWave device’s home ID, and reset all Z-Wave settings to their default values. To perform a Z-Wave reset, follow these steps: 1. Log into the Partner Portal at https://alarmadmin.alarm.com/default.aspx and select a customer. 2. Navigate to the “Equipment” page. 3. Click the “Z-Wave Devices” tab. 4. Under the “Advanced Z-Wave Commands” header, click “Remove All Z-Wave Devices.” 5. Allow 3 minutes for the associated commands to go through and for the Alarm.com Z-Wave device to act on them. If this controller is the primary controller for your network, resetting it will result in the nodes in your network being orphaned and it will be necessary after the reset to exclude and re-include all the nodes in the network. If this controller is being used as a secondary controller in the network, use this procedure to reset this controller only if the network primary controller is missing or otherwise inoperable.
When learning the Alarm.com Z-Wave device into another Z-Wave network and after hitting the "Add Replicate Z-Wave" button, the DSK will be displayed with the first five digits bolded.
2.7 Learning the Alarm.com Z-Wave device into another Z-Wave network To learn the Alarm.com Z-Wave device into another Z-Wave network, follow these steps: 1. Log into the Partner Portal at https://alarmadmin.alarm.com/default.aspx and select a customer. 2. Navigate to the “Equipment” page. 3. Click the “Z-Wave Devices” tab. 4. If there are any nodes currently in the Alarm.com Z-Wave device’s network, remove them by following the instructions at Removing devices from the Alarm.com Z-Wave device’s Z-Wave network. 5. Start add mode on the primary Z-Wave controller. 6. Under the “Manage Devices” header, click “Add Replicate Z-Wave.” The DSK will be displayed with the first five digits bolded. 7. When the Alarm.com Z-Wave device learns into another network successfully, that network’s information will show up on the screen. This information may be delayed up to two minutes as the Alarm.com Z-Wave device queries the nodes. All Z-Wave network information will be copied from the primary controller to the Alarm.com Z-Wave device
2.1 Adding devices to the Alarm.com Z-Wave device’s network using SmartStart Option 1: Alarm.com Partner Portal 1. Log into the Partner Portal at https://alarmadmin.alarm.com/default.aspx and select a customer. 2. Navigate to the “Equipment” page. 3. Click the “Z-Wave Devices” tab. 4. Under the “Manage Devices” header, click “Manage S2 & SmartStart Keys.” Alternatively, you can go directly to the URL https://alarmadmin.alarm.com/Support/ManageDeviceKeys.aspx 5. Click “Add Device Key” 6. You have two options for adding info for the device you want to add: a. Input the full DSK of the device you want to add, and optionally name it. b. Click the “USB Barcode Scanner” button, then use a standard USB barcode scanner to scan the SmartStart QR code of the device. You may also paste in the text from a QR\ code. 7. You may optionally add a name for this device as well. 8. Click the “Add Device” button. 9. Power up the new device in range of the Alarm.com device. It will automatically be added to the Alarm.com device’s network, and will show up on the Z-Wave equipment page at https://alarmadmin.alarm.com/Support/DeviceAutomation.aspx
2.2.1 No Security, S0 Security, and S2 Unauthenticated Security To add a device to the network using no security, S0 security, or S2 unauthenticated security, follow these steps: 1. Log into the Partner Portal at https://alarmadmin.alarm.com/default.aspx and select a customer. 2. Navigate to the “Equipment” page. 3. Click the “Z-Wave Devices” tab. 4. Under the “Manage Devices” header, click “Add a Z-Wave Device.” 5. Wait for the bolded message “Checking for new devices on the network.” The Alarm.com Z-Wave device’s DSK is also displayed with the first five digits bolded. 6. Trigger a device to add it to the network. 7. When a device is added successfully, it will show up on this screen following a 30 second delay. 8. Continue triggering devices. You may add many devices to the network without reentering Add Mode.
2.3.1 Removing Communicating Devices 1. Log into the Partner Portal at https://alarmadmin.alarm.com/default.aspx and select a customer. 2. Navigate to the “Equipment” page. 3. Click the “Z-Wave Devices” tab. 4. Under the “Manage Devices” header, click “Delete a Z-Wave Device.” 5. Wait for the bolded message “Checking for deleted devices on the network.” 6. Trigger a device to remove it from the network. 7. When a device is deleted successfully and its network information is erased, it will show up on this screen following a 30 second delay. 8. Continue triggering devices. You may delete many devices to the network without reentering Delete Mode.
2.4 Access and edit the Alarm.com device’s SmartStart and S2 provisioning list 1. Log into the Partner Portal at https://alarmadmin.alarm.com/default.aspx and select a customer. 2. Navigate to the “Equipment” page. 3. Click the “Z-Wave Devices” tab. 4. Under the “Manage Devices” header, click “Manage S2 & SmartStart Keys.” Alternatively, you can go directly to the URL https://alarmadmin.alarm.com/Support/ManageDeviceKeys.aspx From that page it’s possible to either “Edit” or “Delete” keys by clicking the relevant links to the right of devices.
| Type | Value(s) |
|---|
| Group | Type |
|---|---|
| Smoke Alarm |
|
| CO Alarm |
|
| Heat Alarm |
|
| Water Alarm |
|
| Access Control |
|
| Home Security | (Refer to parameters): State idle |
| Power Management |
|
| System |
|
| Sensor type |
|---|
| Air Temperature |
| Meter type |
|---|
| Electric Meter Consumption |