Nice
Heat-Control
FGT-001
Thermostat - HVAC
HW: 1 FW: 4.09:02.21
ZM5101
6.71.01
0x010F (271)
0x1301 (4865)
0x1001 (4097)
ZC10-22047082
2022-04-01 13:37:53.907306
N/A
Enhanced 232 Slave
Listening Sleeping Slave
Heat Controller is a remotely controlled thermostatic head to control temperature in your room. It measures the temperature and automatically adjust the heat level.
Heat Controller is a remotely controlled thermostatic head to control temperature in your room. It measures the temperature and automatically adjust the heat level. It can be mounted without tools on three types of thermostatic radiator valves. You can create schedules via app to easily manage temperature throughout the week.
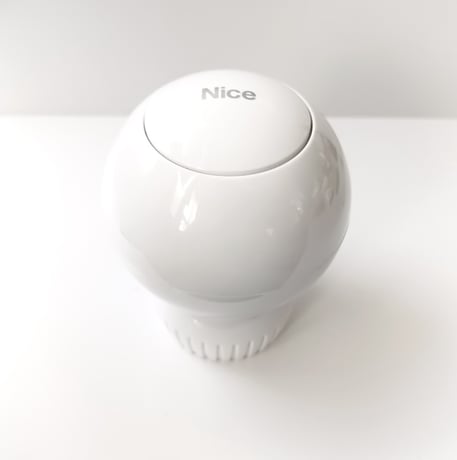
Product Image


1 - Override Schedule duration
This parameter determines duration of Override Schedule after turning the knob while normal schedule is active (set by Schedule CC).Size: 4 bytes
Default: 240
Minimum: 10
Maximum: 10000
Possible values
| From | To | Desription |
|---|---|---|
| 10 | 10000 | Override Schedule duration |
2 - Additional functions
This parameter allows to enable different additional functions of the device.Size: 4 bytes
Default: 1
Minimum: 1
Maximum: 768
Possible values
| From | To | Desription |
|---|---|---|
| 1 | 768 | Additional functions |
3 - Additional functions status (read-only)
This parameter allows to check statuses of different additional functions.Size: 4 bytes
Default: 0
Minimum: 0
Maximum: 12
Possible values
| From | To | Desription |
|---|---|---|
| 0 | 12 | Additional functions status |
To add the device to the Z-Wave network manually: 1. Make sure the device is within the direct range of your Z-Wave controller. 2. Set the main controller in (security/non-security) add mode (see the controller’s manual) 3. Quickly triple click the button on the thermostatic head. 4. The LED ring will start blinking white. 5. If you are adding in S2 authenticated mode, type in the device pin code (underlined part of the public key on the label). 6. Wait for the adding process to end. 7. Successful adding will be confirmed by the Z-Wave controller and green LED colour.
1. Make sure the device is within the direct range of your Z-Wave controller. 2. Set the main controller into remove mode (see the controller’s manual). 3. Quickly triple click the button on the thermostatic head. 4. The LED ring will start blinking white. 5. Wait for the removing process to end. 6. Successful removing will be confirmed by the Z-Wave controller and red LED colour.
f you use one of the adapters, double check that it is mounted properly. It should click when putting on the valve, hold tight after installing and not rotate! • If the device is installed in vertical position, set bit 5 in parameter 2. • Do not cover or veil the thermostatic head. • First charging may take up to 3 hours. 1. Connect the charger to the micro-USB port to charge the device. The LED ring will pulse red if it’s not fully charged; otherwise, it will pulse green. If you have the temperature sensor: • Use a coin to open the battery cover by turning it counter-clockwise. • Remove the sticker underneath the battery. • Use a coin to close the battery cover by turning it clockwise. 2. Disconnect the charger when the LED ring pulses green (device fully charged). 3. Dismount your current thermostatic head. 4. Depending on type of your thermostatic valve: M30 x 1.5 Danfoss RTD-N Danfoss RA-N Proceed normally Use adapter: Use adapter: 5. Mount the device on the valve and tighten it by turning the cap clockwise. 6. Press and hold the button for at least one second. The LED ring will start blinking blue. If you have the temperature sensor: 1) Click the button on the temperature sensor now. 2) The LED ring on the thermostatic valve will blink green 5 times if the connection was successful.
To perform factory reset: 1. Press and hold the button. 2. Release the button when you see yellow LED colour. 3. Click the button to confirm the selection. 4. After finishing resetting the device will be put in Standby Mode. Click the button to activate it again.
Security DSK 2 - you can find on packing label
| Type | Value(s) |
|---|
| Group | Type |
|---|---|
| Power Management |
|
| System | HW status: System hardware failure |
| Sensor type |
|---|
| Air Temperature |