FIBARO
Yubii Home
YH-001
Gateway
HW: 1 FW: 7.14
EFR32Z
7.14.2
0x010F (271)
0x0004 (4)
0x1000 (4096)
ZC12-22060342
2022-06-15 16:48:45.302025
N/A
Bridge Controller
Central Static Controller
Yubii Home is the core element of the Yubii smart mome system. It enables the integration of smart home devices into a single system to provide convenient control and a powerful automation platform. The gateway is now even more secure, reliable, and versatile.
Yubii Home is the core element of the Yubii smart mome system. It enables the integration of smart home devices into a single system to provide convenient control and a powerful automation platform. The gateway is now even more secure, reliable, and versatile. - Provides a reliable foundation for Yubii smart home system, - Capable of controlling compatible devices using the following radio standards: - Nice FLOR, OPERA and PLN2+, - Elero PLN2, - Z-Wave (700 series), - Wi-Fi – 2.4 GHz (802.11 b/g/n). - Allows to add up to: - 40 Nice devices (recommended), - 40 Z-Wave devices (recommended), - 1 IP camera, - 20 scenes, - 10 Quick Apps, - 5 plugins. - No Internet cable required, works on Wi-Fi, - Modern interface designed for ease of use, - Enhanced and convenient scene editor, - Support for more advanced apps and drivers, - May be used with all devices certified with the Z-Wave Plus certificate and should be compatible with such devices produced by other manufacturers.
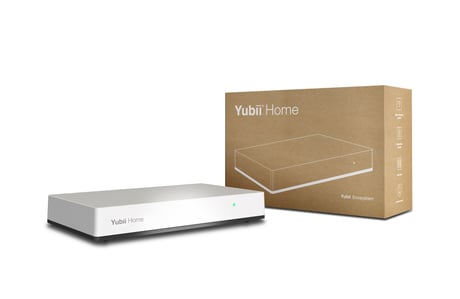
Product Image
9.1: ADDING/REMOVING TO/FROM EXISTING Z-WAVE NETWORK This gateway can be added to an existing Z-Wave network only if no Z-Wave devices are added to it. 1. Start adding/removing procedure on the primary controller (according to its manual). 2. Go to [gearwheel image] > Z-Wave. 3. Under Start Learn Mode click Start 4. If you are prompted for the PIN, you will find it on the bottom of the gateway and on the box.
10: RESETTING TO FACTORY DEFAULTS 10.1: RESETTING SYSTEM TO FACTORY DEFAULTS ! Caution! The whole configuration will be removed and lost if not backed up. This feature allows you to restore the whole system to factory settings. It means the factory software version will be restored and all data from the system A and B will be deleted (users, devices, scenes etc.). If the gateway is set as Z-Wave secondary controller use this procedure only when the primary controller is missing or otherwise inoperable. 1. Open the Configuration Interface. 2. In the top right corner click user name 3. Choose Recovery Mode from the menu. 4. Confirm. 5. Wait for the system to reboot, the LED indicator will be pulsing red. 6. When the LED indicator turns solid red, refresh the browser tab. 7. Click Factory Reset under Network Status section. 8. Check “Yes, I’m sure and I know what I’m doing” checkbox. 9. Confirm. 10.2: RESETTING Z-WAVE TO FACTORY DEFAULTS Resetting the Z-Wave network removes all the Z-Wave devices from the gateway’s memory, but the other data remains unchanged. Scenes that used Z-Wave devices will not work anymore. 1. Open the Configuration Interface. 2. Go to [gearwheel image] > Z-Wave. 3. Under Reset Z-Wave click Reset. 4. Confirm.
In case you need full DSK code of the gateway you will find it on the label under the device.
8: REDISCOVERING Z-WAVE DEVICES Rediscovery – the process of reading the device’s capabilities after altering them. 1. Open the Configuration Interface. 2. Go to [gearwheel image] > Devices. 3. Click the device to expand it. 4. Go to Device configuration tab. 5. Under Device reconfiguration click Reconfigure device. 6. If the device is battery powered, wake it up manually or wait for next automatic wake up.
Copying information from this controller to the secondary controller 1. Start adding procedure according to chapter “Adding using Inclusion Mode” on page 7. 2. Start Learn Mode on the secondary controller (according to its manual). 3. After couple of minutes both controllers will have the same network information.
3.2: ADDING USING SMARTSTART SmartStart enabled devices can be added into a Z-Wave network by entering the Z-Wave DSK Code present on the product. The devices will be automatically added to the Z-Wave network using secure connection encrypted with Z-Wave S2 security framework. To add the device to the Z-Wave network using SmartStart: 1. Open the Configuration Interface. 2. Go to [gearwheel image] > Z-Wave > SmartStart. 3. Click Add DSK. 4. Enter the full DSK string code you have received with your device. 5. For advanced users: In Choose Security levels select which Security keys will be granted to the joining node (available: S2 Unauthenticated, S2 Authenticated, S2 Access Control, S0). 6. Leave the Only S2 classic inclusion unchecked. 7. Power the device and it will be added automatically within 10 minutes.
3.1: ADDING USING INCLUSION MODE To add the device to the Z-Wave network manually: 1. Open the Configuration Interface. 2. Go to [gearwheel image] > Devices. 3. Click ["+" image]. 4. Select Z-Wave Device. 5. There are few available settings: • NWI - Network-Wide Inclusion – enabling allows for adding devices outside the direct range of the gateway, • Add in S2 Security mode if device supports it, • Allow inclusion only in near proximity (less than 2 meters). 6. Click Start adding. 7. Follow adding procedure for the device you want to add (according to its manual). 8. If you are adding in Security S2 Authenticated and the device is not on the Provisioning List (see chapter 5 on page 10): Input the PIN code (the underlined part of the DSK) and click Send. 9. The device will be added within few minutes.
4.1: REMOVING DEVICES USING EXCLUSION MODE To remove the device from the this or other Z-Wave network: 1. Open the Configuration Interface. 2. Go to [gearwheel image] > Devices. 3. Click ["-" image]. 4. Select Z-Wave Device. 5. Follow removing procedure on the device (according to its manual).
5: MANAGING PROVISIONING LIST The Provision List is used to add Z-Wave devices using SmartStart or bootstrap classic S2 inclusion. 5.1: ADDING DEVICES TO PROVISIONING LIST 1. Open the Configuration Interface. 2. Go to [gearwheel image] > Z-Wave > SmartStart. 3. Click Add DSK. 4. Enter the full DSK string code you have received with your device. 5. For advanced users: In Choose Security levels select which Security keys will be granted to the joining node (available: S2 Unauthenticated, S2 Authenticated, S2 Access Control, S0). 6. If the device should not be automatically included when powered, but only after the classic inclusion, check the Only S2 classic inclusion setting. 7. Click Add. 5.2: EDITING DEVICES IN PROVISIONING LIST 1. Open the Configuration Interface. 2. Go to [gearwheel image] > Z-Wave > SmartStart. 3. Click [pen image] next to the device you want to edit. 4. You can change the Security levels. 5. Save. 5.3: REMOVING DEVICES FROM PROVISIONING LIST 1. Open the Configuration Interface. 2. Go to [gearwheel image] > Z-Wave > SmartStart. 3. Click [trash can image] next to the device you want to remove. 4. Click Delete. 5. The device will be removed from the list, but if it was already added to the Z-Wave network, you must perform standard removing procedure or reset the device.
| Type | Value(s) |
|---|
| Group | Type |
|---|---|
| Smoke Alarm |
|
| CO Alarm |
|
| CO2 Alarm |
|
| Heat Alarm |
|
| Water Alarm |
|
| Access Control |
|
| Home Security |
|
| Power Management |
|
| System |
|
| Emergency Alarm |
|
| Clock |
|
| Appliance |
|
| Home Health |
|
| Siren |
|
| Water Valve |
|
| Weather Alarm |
|
| Irrigation |
|
| Gas alarm |
|
| Pest Control |
|
| Light sensor |
|
| Water Quality Monitoring |
|
| Home monitoring |
|
| Request pending notification | State idle |
| Sensor type |
|---|
| Air Temperature |
| General Purpose |
| Illuminance |
| Power |
| Humidity |
| Velocity |
| Direction |
| Atmospheric Pressure |
| Barometric Pressure |
| Solar Radiation |
| Dew Point |
| Rain Rate |
| Tide Level |
| Weight |
| Voltage |
| Current |
| Carbon Dioxide (CO2) Level |
| Air Flow |
| Tank Capacity |
| Distance |
| Angle Position |
| Rotation |
| Water Temperature |
| Soil Temperature |
| Seismic Intensity |
| Seismic Magnitude |
| Ultraviolet |
| Electrical Resistivity |
| Electrical Conductivity |
| Loudness |
| Moisture |
| Frequency |
| Time |
| Target Temperature |
| Particulate Matter 2.5 |
| Formaldehyde (CH2O) Level |
| Radon Concentration |
| Methane (CH4) Density |
| Volatile Organic Compound Level |
| Carbon Monoxide (CO) Level |
| Soil Humidity |
| Soil Reactivity |
| Soil Salinity |
| Heart Rate |
| Blood Pressure |
| Muscle Mass |
| Fat Mass |
| Bone Mass |
| Total Body Water (TBW) |
| Basis Metabolic Rate (BMR) |
| Body Mass Index (BMI) |
| Acceleration X-Axis |
| Acceleration Y-Axis |
| Acceleration Z-Axis |
| Smoke Density |
| Water Flow |
| Water Pressure |
| RF Signal Strength |
| Particulate Matter 10 |
| Respiratory Rate |
| Relative Modulation Level |
| Boiler Water Temperature |
| Domestic Hot Water (DHW) Temperature |
| Outside Temperature |
| Exhaust Temperature |
| Water Chlorine Level |
| Water Acidity |
| Water Oxidation Reduction Potential |
| Heart Rate LF/HF Ratio |
| Motion Direction |
| Applied Force on Sensor |
| Return Air Temperature |
| Supply Air Temperature |
| Condenser Coil Temperature |
| Evaporator Coil Temperature |
| Liquid Line Temperature |
| Discharge Line Temperature |
| Suction (Input) Pressure |
| Discharge (Output) Pressure |
| Defrost Temperature (Sensor Defrost) |
| Ozone (O3) |
| Sulfur Dioxide (SO2) |
| Nitrogen Dioxide (NO2) |
| Ammonia (NH3) |
| Lead (Pb) |
| Particulate Matter 1 |
| Meter type |
|---|
| Cooling Meter Consumption |
| Cooling Meter Production |
| Electric Meter Consumption |
| Electric Meter Production |
| Gas Meter Consumption |
| Gas Meter Production |
| Heating Meter Consumption |
| Heating Meter Production |
| Water Meter Consumption |
| Water Meter Production |