Zooz
700 Series SMART PLUG
ZEN04
On/Off Power Switch
HW: 255 FW: 1.00
ZM5202
6.71.03
0x027A (634)
0x7000 (28672)
0xB002 (45058)
ZC10-22087117
2022-08-08 13:27:50.549451
N/A
Enhanced 232 Slave
Always On Slave
On/off Z-Wave™ control for floor lamps & small appliances with energy monitoring.
FEATURES: - Reliable Z-Wave™ control of lamps and small appliances - Energy monitoring to help you manage power use - Quick set-up: just plug it into a grounded receptacle - Extra small, doesn’t block the other outlet - The latest S2 security and Z-Wave Plus™ technology - Supports OTA firmware updates - ETL listed for safety standards SPECS: - Z-Wave™ Frequency: 908.42 MHz (US) - Power: 120 VAC, 60 Hz - Maximum Loads: 960W incandescent, 150W LED bulbs, 15A resistive, 1/2 HP fan motors - Z-Wave Range: Up to 300 feet line of sight - Dimensions: 1.5" tall, 2.6" wide, 1.14" deep - Operating Temperature: 32-104° F (0-40° C) - Installation: Indoor use only
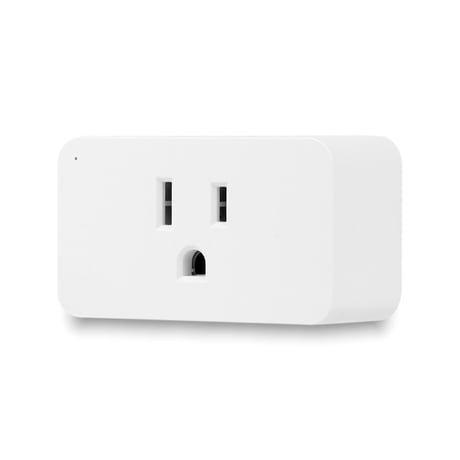
Product Image


1 - LED Indicator
Decide how the LED indicator behaves depending on the on/off status of the plug.Size: 1 byte
Default: 0
Minimum: 0
Maximum: 3
Possible values
| From | To | Desription |
|---|---|---|
| 0 | 0 | LED indicator is on when the plug is on, LED indicator is off when the plug is off (default) |
| 1 | 1 | LED indicator is on when the plug is off, LED indicator is off when the plug is on |
| 2 | 2 | LED indicator is always off |
| 3 | 3 | LED indicator is always on |
2 - Auto-off Timer
Use this parameter to set the auto turn-off timer: the time after which you want the Smart Plug to automatically turn off once it has been turned on. The number entered as value corresponds to the number of minutes.Size: 4 bytes
Default: 0
Minimum: 0
Maximum: 65535
Possible values
| From | To | Desription |
|---|---|---|
| 1 | 65535 | minutes |
3 - Auto-on Timer
Use this parameter to set the auto turn-on timer: the time after which you want the Smart Plug to automatically turn on once it has been turned off. The number entered as value corresponds to the number of minutes.Size: 4 bytes
Default: 0
Minimum: 0
Maximum: 65535
Possible values
| From | To | Desription |
|---|---|---|
| 0 | 65535 | Minutes |
4 - On/Off Status Recovery After Power Failure
Choose the recovery state for your Smart Plug if power outage occurs.Size: 1 byte
Default: 0
Minimum: 0
Maximum: 2
Possible values
| From | To | Desription |
|---|---|---|
| 0 | 0 | Smart Plug remembers the status prior to power outage and turns back to it |
| 1 | 1 | Smart Plug automatically turns OFF once power is restored (it ignores the status prior to power outage) |
| 2 | 2 | Smart Plug automatically turns ON once power is restored (it ignores the status prior to the power outage) |
5 - Power Wattage Reporting Threshold
Size: 1 byte
Default: 5
Minimum: 5
Maximum: 50
Possible values
| From | To | Desription |
|---|---|---|
| 5 | 50 | Watts |
6 - Power Wattage Reporting Frequency
The number entered as value corresponds to the number of minutes. So if 5 is entered by default, the Smart Plug will report power consumption (Wattage) every 5 minutes.Size: 4 bytes
Default: 5
Minimum: 1
Maximum: 65535
Possible values
| From | To | Desription |
|---|---|---|
| 1 | 65535 | minutes |
7 - Electrical Current Reporting Threshold
Choose how you want your Smart Plug to report electrical current (Amps) to your hub. The number entered as value corresponds to the number of Amps the appliance needs to go over for the change to be reported. Value 1 equals 0.1 A and value 10 equals 1 A.Size: 1 byte
Default: 1
Minimum: 1
Maximum: 10
Possible values
| From | To | Desription |
|---|---|---|
| 1 | 10 | 1 = 0.1A and 10 = 1A |
8 - Energy Reporting Threshold
Choose how you want your Smart Plug to report energy use (kWh) to your hub. The number entered as value corresponds to the number of kWh the appliance needs to go over for the change to be reported.Size: 1 byte
Default: 1
Minimum: 1
Maximum: 100
Possible values
| From | To | Desription |
|---|---|---|
| 1 | 100 | 1 = 0.01 kWh ; 100 = 1kWh |
9 - Brightness of LED indicator
Choose which brightness level you want the LED indicator to be at. This setting can also be changed by pressing the Z-Wave button 8 times quickly (it will cycle through the values). You should see the LED flash green two times to confirm a successful brightness change.Size: 1 byte
Default: 2
Minimum: 0
Maximum: 2
Possible values
| From | To | Desription |
|---|---|---|
| 0 | 0 | High |
| 1 | 1 | Medium |
| 2 | 2 | Low |
Initiate inclusion (pairing) in the app (or web interface). While the hub is looking for new devices, click the Z-Wave™ button 3 times as quickly as possible. The LED indicator will start flashing blue to confirm inclusion mode and turn green for 1 second once inclusion is completed.
1. Bring the plug within direct range of your Z-Wave™ hub. 2. Put the Z-Wave™ hub into exclusion mode. 3. Click the Z-Wave™ button 3 times as quickly as possible. 4. Your hub will confirm exclusion and the plug will disappear from your controller's device list
When your network’s primary controller is missing or otherwise inoperable, you may need to reset the device to factory settings manually. In order to complete the process, make sure the plug is powered, then click the Z-Wave™ button twice and hold it the third time for 10 seconds. The LED indicator will flash red 3 times to confirm a successful reset.
| Type | Value(s) |
|---|
| Group | Type |
|---|---|
| Power Management | Over-load status: Over-load detected |
| Meter type |
|---|
| Electric Meter Consumption |