Venture WISE
Venture WISE Heat Controller
FGT-001
Thermostat - HVAC
HW: 1 FW: 4.09:02.21
ZM5101
6.71.01
0x010F (271)
0x1301 (4865)
0x1001 (4097)
ZC10-22127119
2022-12-13 12:28:32.968245
N/A
Enhanced 232 Slave
Listening Sleeping Slave
Venture WISE Heat Controller is a remotely controlled thermostatic head to control the temperature in your room. It measures the temperature and automatically adjusts the heat level.
Venture WISE Heat Controller is a remotely controlled thermostatic head to control the temperature in your room. It measures the temperature and automatically adjusts the heat level. It can be mounted without tools on three types of thermostatic radiator valves. You can create schedules via an app to easily manage temperature throughout the week. Main features of the Device: - to be installed on three types of valves: M30 x 1.5, Danfoss RTD-N and Danfoss RA-N, - compatible with any certified Z-Wave™ Controller, - supports Z-Wave™ network Security Modes: S0 with AES-128 encryption and S2 with PRNG-based encryption, - built-in battery recharged through standard micro-USB port, - easy installation - no tools required, - can use a dedicated temperature sensor, - supports heating schedules, - automatic calibration, - anti-freeze function, - descaling function, - unconstrained rotation spherical knob to set the desired temperature.
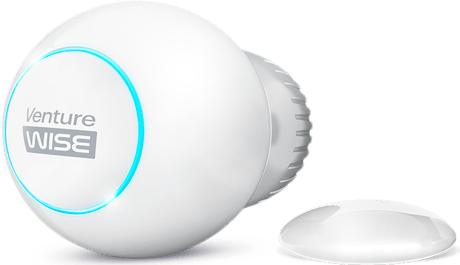
Product Image


1 - Override Schedule duration
This parameter determines duration of Override Schedule after turning the knob while normal schedule is active (set by Schedule CC).Size: 4 bytes
Default: 240
Minimum: 10
Maximum: 10000
Possible values
| From | To | Desription |
|---|---|---|
| 10 | 10000 | in minutes |
2 - Additional functions
This parameter allows to enable different additional functions of the device. NOTE: Parameter 2 values may be combined, e.g. 1+8=9 means that Open Window Detector and LED indications when controlling remotely are enabled.Size: 4 bytes
Default: 1
Minimum: 0
Maximum: 1023
Possible values
| From | To | Desription |
|---|---|---|
| 0 | 0 | no additional function enabled |
| 1 | 1 | (bit 0) - open window detection (normal) |
| 2 | 2 | (bit 1) - open window detection (rapid) |
| 4 | 4 | (bit 2) - increase receiver sensitivity (shortens battery life) |
| 8 | 8 | (bit 3) - LED indications when controlling remotely |
| 16 | 16 | (bit 4) - protect from setting Full ON and Full OFF mode by turning the knob manually |
| 32 | 32 | (bit 5) - device mounted in vertical position |
| 64 | 64 | (bit 6) - Moderate regulator behaviour (instead of Rapid) |
| 128 | 128 | (bit 7) - inverted knob operation |
| 256 | 256 | (bit 8) - heating medium demand reports |
| 512 | 512 | (bit 9) - detecting heating system failures |
| 1023 | 1023 | all additional function enabled |
3 - Additional functions status (READ-ONLY)
This parameter allows to check statuses of different additional functions. NOTE: Parameter 3 values may be combined, e.g. 1+2=3 means optional sensor works properly and open window detection was triggered.Size: 4 bytes
Default: 0
Minimum: 0
Maximum: 15
Possible values
| From | To | Desription |
|---|---|---|
| 0 | 0 | no additional function checked |
| 1 | 1 | (bit 0) - optional temperature sensor connected and operational |
| 2 | 2 | (bit 1) - open window detected |
| 4 | 4 | (bit 2) - provide heat in order to maintain set temperature |
| 8 | 8 | (bit 3) - malfunctioning heating system (cannot reach set temperature) |
| 15 | 15 | all additional function checked |
Adding (Inclusion) - Z-Wave device learning mode, allowing to add the device to existing Z-Wave network. To add the device to the Z-Wave network: 1. Make sure the device is within the direct range of your Z-Wave controller. 2. Set the main controller in (security/non-security) add mode (see the controller’s manual) 3. Quickly triple click the button on the thermostatic head (A) or use the included key (B). 4. The LED ring will start blinking white. 5. If you are adding in S2 authenticated mode, type in the device pin code (underlined part of the public key on the label). 6. Wait for the adding process to end. 7. Successful adding will be confirmed by the Z-Wave controller and green LED colour.
Removing (Exclusion) - Z-Wave device learning mode, allowing to remove the device from existing Z-Wave network. To remove the device from the Z-Wave network: 1. Make sure the device is within the direct range of your Z-Wave controller. 2. Set the main controller into remove mode (see the controller’s manual). 3. Quickly triple click the button on the thermostatic head (A) or use the included key (B). 4. The LED ring will start blinking white. 5. Wait for the removing process to end. 6. Successful removing will be confirmed by the Z-Wave controller and red LED colour.
NOTE: The product manual doesn't contain the following information. This device is a Z-Wave FLiRS device, so it doesn't need to be woken up by the user.
Reset procedure allows to restore the device back to its factory settings, which means all information about the network and user configuration will be deleted. To perform factory reset: 1. Press and hold the button (A) or use the included key (B). 2. Release the button when you see yellow LED colour. 3. Click the button to confirm the selection. 4. After finishing resetting the device will be put in Standby Mode. Click the button to activate it again.
If you are adding in S2 authenticated mode, type in the device pin code (underlined part of the public key on the label).
| Type | Value(s) |
|---|
| Group | Type |
|---|---|
| Power Management |
|
| System | HW status: System hardware failure (manufacturer proprietary failure code provided) |
| Sensor type |
|---|
| Air Temperature |