Heatit
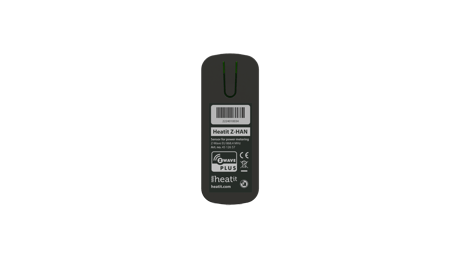
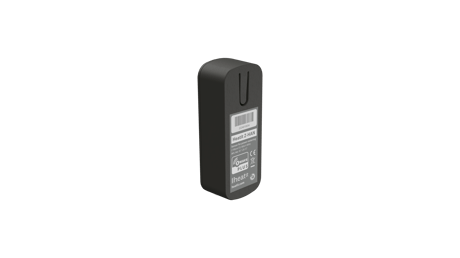
Heatit Z-HAN
Z-HAN
Meter Sensor DT
HW: 01 FW: 01.00
ZGM130S037HGN2 / ZGM130S037HGN1
7.18.2
0x019B (411)
N/A
0x0004 (4)
ZC14-23010186
2023-01-23 11:52:23
N/A
Enhanced 232 Slave
Always On Slave
Heatit Z-HAN is a Z-Wave™ HAN sensor for AMS meters (Smart meters). The Heatit Z-HAN works with Norwegian AMS meters. Heatit Z-HAN is equipped with an RJ45 port for connection to the AMS meter. The Heatit Z-HAN can be powered through the RJ45 port by most AMS meters, but it also has a 5V micro USB port for external power supply.


1 - Meter report hysteresis for W
Set the Meter report hysteresis for WattsSize: 4 bytes
Default: 200
Minimum: 0
Maximum: 100000
Possible values
| From | To | Desription |
|---|---|---|
| 0 | 0 | Disabled |
| 1 | 100000 | Watts |
2 - Meter report hysteresis for V
Set the Meter report hysteresis for VoltsSize: 2 bytes
Default: 5
Minimum: 0
Maximum: 420
Possible values
| From | To | Desription |
|---|---|---|
| 0 | 0 | Disabled |
| 1 | 420 | Volts |
3 - Meter report hysteresis for A
Set the Meter report hysteresis for AmpsSize: 2 bytes
Default: 20
Minimum: 0
Maximum: 65535
Possible values
| From | To | Desription |
|---|---|---|
| 0 | 0 | Disabled |
| 1 | 65535 | N * 0.1 Ampers. Range: 0.1 - 6553.5A |
4 - Report interval for W
Time Interval between consecutive W reports.Size: 2 bytes
Default: 10
Minimum: 10
Maximum: 65535
Possible values
| From | To | Desription |
|---|---|---|
| 10 | 65535 | seconds |
5 - Meter report interval for V and A
Set the meter report intervalSize: 2 bytes
Default: 300
Minimum: 10
Maximum: 65535
Possible values
| From | To | Desription |
|---|---|---|
| 10 | 65535 | seconds |
6 - Temperature report interval
Time interval between consecutive temperature reports.Size: 2 bytes
Default: 300
Minimum: 30
Maximum: 65535
Possible values
| From | To | Desription |
|---|---|---|
| 30 | 65535 | seconds |
7 - Temperature report hysteresis
Temperature reports based on change in temperature from last report.Size: 1 byte
Default: 10
Minimum: 0
Maximum: 100
Possible values
| From | To | Desription |
|---|---|---|
| 0 | 0 | Disabled |
| 1 | 100 | 0.1-10.0°C. Default 10 (1°C). NB! This parameter has 0.5°C increments. |
8 - Sensor calibration
Manually calibrate the sensor ±6°CSize: 1 byte
Default: 0
Minimum: 196
Maximum: 60
Possible values
| From | To | Desription |
|---|---|---|
| 0 | 60 | N * 0.1°C (-6.0°C to 6.0°C.) Calibrates the sensor by ±6°C. NB! To set a negative value, use 256 and subtract the desired value. |
| 196 | 256 | N * 0.1°C (-6.0°C to 6.0°C.) Calibrates the sensor by ±6°C. NB! To set a negative value, use 256 and subtract the desired value. |
9 - Serial
First half of the meter point serial number.Size: 4 bytes
Default: 1718972025
Minimum: 0
Maximum: 4294967295
Possible values
Not available
10 - Number
Last half of the meter point serial number.Size: 4 bytes
Default: 1835363685
Minimum: 0
Maximum: 4294967295
Possible values
Not available
The primary controller/gateway has a mode for adding devices. Please refer to your primary controller manual on how to set the primary controller in add mode. The device may only be added in the network if the primary controller is in add mode. We recommend adding the device within a 2m range from the gateway. Method 1: Standard (Manual) Add mode is indicated on the device by a blinking green LED. It indicates this for 90 seconds until a timeout occurs, or until the module has been added to/removed from the network. To start the configuration process, press the reset button 3 times in rapid succession. The LED will light up in green for 3 seconds if adding is successful. The device is now ready for use with default settings.
The primary controller/gateway has a mode for removing devices. Please refer to your primary controller manual on how to set the primary controller in remove mode. The device may only be removed from the network if the primary controller is in remove mode. When the device is removed from the network, it will NOT revert to factory settings. We recommend removing the device within a 2m range from the gateway. Standard (Manual) Remove mode is indicated on the device by a blinking green LED. It indicates this for 90 seconds until a timeout occurs, or until the module has been removed from the network. To start the configuration process, press the reset button 3 times in rapid succession. The LED will light up in green for 3 seconds if removing is successful. The device is now ready for use with default settings.
Press and hold the reset button. After 3 seconds the LED will start to blink in green. After 20 seconds the LED will shine solid green for 3 seconds. You may now release the button. Please use this procedure only when the network primary controller is missing or otherwise inoperable.
The device connects to your Smart AMS meter through the HAN port and reports your home electricity consumption to your Z-Wave compatible smart home.
Paragraph 9. The QR-Code is needed when including a device using S2 security or SmartStart. The DSK can be found in the QR-Code and is located; • On the product. • On the Quick Guide. • On the gift box.
| Type | Value(s) |
|---|
| Sensor type |
|---|
| Air Temperature |