Leviton
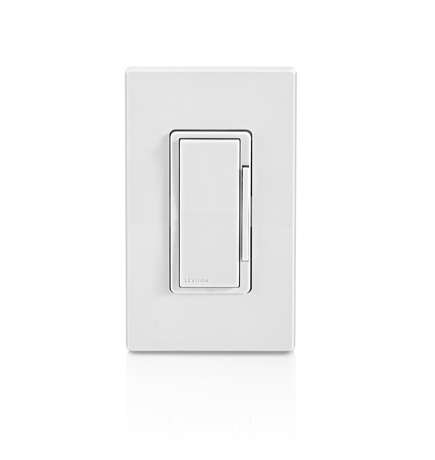
Decora Smart Z-Wave™ 800 Series Dimmer
ZW6HD
Multilevel Switch DT
HW: 01 FW: 01.00:02.01
ZGM230SA
7.18.3
0x001D (29)
N/A
0x0041 (65)
ZC14-23070302
2023-07-31 08:01:53
N/A
Enhanced End Node 232
Always On End Node
Leviton's Decora Smart Z-Wave™ 800 Series Dimmer offers the latest in Z-Wave™ technology with on/off and dim/bright control of incandescent, LED/CFL, and MLV lighting.


1 - Fade On Time
0: instant on, 1-127: 1-127 seconds, 128-253: 1-126 minutesSize: 4 bytes
Default: 2
Minimum: 0
Maximum: 253
Possible values
| From | To | Desription |
|---|---|---|
| 0 | 0 | Instant ON |
| 1 | 127 | Seconds: 1-127 seconds |
| 128 | 253 | Minutes: 1-126 minutes |
2 - Fade Off Time
0: instant off, 1-127: 1-127 seconds, 128-253: 1-126 minutesSize: 4 bytes
Default: 2
Minimum: 0
Maximum: 253
Possible values
| From | To | Desription |
|---|---|---|
| 0 | 0 | Instant ON |
| 1 | 127 | Seconds: 1-127 seconds |
| 128 | 253 | Minutes: 1-126 minutes |
3 - Minimum Dim Light Level
0-99Size: 4 bytes
Default: 10
Minimum: 1
Maximum: 99
Possible values
| From | To | Desription |
|---|---|---|
| 1 | 99 | percent |
4 - Maximum Brightness Light Level
10-99Size: 4 bytes
Default: 99
Minimum: 10
Maximum: 99
Possible values
| From | To | Desription |
|---|---|---|
| 10 | 99 | percent |
5 - Preset light level // Return to last level
0-99. 0 to return to previous levelSize: 4 bytes
Default: 0
Minimum: 0
Maximum: 99
Possible values
| From | To | Desription |
|---|---|---|
| 0 | 0 | Return to last level |
| 1 | 99 | Preset light level |
6 - LED Dim Bar Behavior
0: always off, 1-254: 1-254 seconds, 255: always onSize: 4 bytes
Default: 3
Minimum: 0
Maximum: 255
Possible values
| From | To | Desription |
|---|---|---|
| 0 | 0 | Level Indicators Off |
| 1 | 254 | Level Indicator Timeout (seconds) |
| 255 | 255 | Levels Always ON |
7 - Status LED Configuration
0: always off, 254: Status LED ON when load is ON, 255: Status LED ON when load is OFF (locator mode)Size: 4 bytes
Default: 255
Minimum: 0
Maximum: 255
Possible values
| From | To | Desription |
|---|---|---|
| 0 | 0 | Status LED OFF |
| 254 | 254 | Status LED ON when load is ON |
| 255 | 255 | Status LED ON when load is OFF (locator mode) |
8 - Load Type
0: incandescent, 1: LED, 2: CFL, 3: MLVSize: 4 bytes
Default: 1
Minimum: 0
Maximum: 3
Possible values
| From | To | Desription |
|---|---|---|
| 0 | 0 | Incandescent |
| 1 | 1 | LED |
| 2 | 2 | CFL |
| 3 | 3 | MLV |
9 - Control Timing
0: Normal, 1: Medium, 2: ExtendedSize: 4 bytes
Default: 0
Minimum: 0
Maximum: 2
Possible values
| From | To | Desription |
|---|---|---|
| 0 | 0 | Normal |
| 1 | 1 | Medium |
| 2 | 2 | Extended |
For older controllers, Classic Inclusion is supported. Depending on the age of the controller it may need to be 3 to 35 feet from the device when including. 1. Enter setup mode (see page 10). 2. Follow the Z-Wave controller instructions to enter inclusion mode. 3. Tap the top rocker 1 time, the Status LED will quickly flash GREEN. 4. The Z-Wave controller will confirm successful inclusion to the Z-Wave network.
The Exclusion command found in the Z-Wave controller is used as a best practice for removing devices from a Z-Wave network. 1. Enter setup mode (see page 10). 2. Follow the Z-Wave controller instructions to enter exclusion mode. 3. Tap the top rocker 1 time, the Status LED will quickly flash GREEN. 4. The Z-Wave controller will confirm successful exclusion from the Z-Wave network.
When removing a Z-Wave device from the network, it is best practice to use the exclusion process. In situations where a device needs to be returned to factory default settings, follow the steps below. Please use this procedure only when the network primary controller is missing or otherwise inoperable. 1. Hold the top rocker for 14 seconds: After the first 7 seconds, the Status LED will turn AMBER. Continue holding until the Status LED flashes RED/AMBER then release. 2. The device will reset.
Fade On Time (Dimmer only) 1. Enter Setup Mode 2. Tap the Top Rocker 6 times. The Status LED will quickly flash green/red 3. Tap the Top Rocker 1 time. The Status LED will quickly flash amber/red 4. Use the Dim/Bright Bar to adjust the Fade On time based on the below chart. 5. Hold the top of the rocker to exit. The Status LED will quickly flash amber to confirm. Fade Off Time (Dimmer only) 1. Enter Setup Mode 2. Tap the Top Rocker 6 times. The Status LED will quickly flash green/red 3. Tap the Top Rocker 2 times. The Status LED will quickly flash red 4. Use the Dim/Bright Bar to adjust the Fade off time based on the below chart. 5. Hold the top of the rocker to exit. The Status LED will quickly flash amber to confirm. Minimum Dim Light Level (Dimmer only) 1. Enter Setup Mode 2. Tap the Top Rocker 5 times. The Status LED will quickly flash red/amber 3. Tap the Top Rocker 1 time. The Status LED will quickly flash amber 4. Use the Dim/Bright Bar to adjust the minimum dim level 5. Hold the top of the rocker to exit. The Status LED will quickly flash amber to confirm Maximum Brightness Light Level (Dimmer only) 1. Enter Setup Mode 2. Tap the Top Rocker 5 times. The Status LED will quickly flash red/amber 3. Tap the Top Rocker 2 times. The Status LED will quickly flash red 4. Use the Dim/Bright Bar to adjust the maximum dim level 5. Hold the top of the rocker to exit. The Status LED will quickly flash amber to confirm Preset Light Level vs Return to Last Level (Dimmer only) 1. Enter Setup Mode 2. Tap the Top Rocker 7 times. The Status LED will quickly flash red/amber 3. Use the dim/bright bar to adjust the desired preset light level 4. To set the dimmer to "Return to Last Level", set the dim/bright level to 0% or OFF 5. Hold the top of the rocker to exit. The Status LED will quickly flash amber to confirm LED Dim / Bright Bar Behavior (Dimmer only) 1. Enter Setup Mode 2. Tap the Top Rocker 8 times. The Status LED will quickly flash red 3. Use the Dim/Bright Bar to adjust the amount of time the dim/bright bar LEDs are lit after the dim/bright bar is pressed based on the below chart. 4. Hold the top of the rocker to exit. The Status LED will quickly flash amber to confirm Status LED Configuration Status LED ON when load is ON 1. Enter Setup Mode 2. Tap the Top Rocker 4 times. The Status LED will quickly flash green/amber 3. Tap the Top Rocker 1 time. The Status LED will flash green 4 times to confirm the selection Status LED ON when load is OFF (Default) 1. Enter Setup Mode 2. Tap the Top Rocker 4 times. The Status LED will quickly flash green/amber 3. Tap the Tap Rocker 2 times. The Status LED will flash amber 4 times to confirm the selection Status LED Off 1. Enter Setup Mode 2. Tap the Top Rocker 4 times. The Status LED will quickly flash green/amber 3. Tap the Tap Rocker 3 times. The Status LED will flash red 4 times to confirm the selection Bulb Type (Dimmer only) Incandescent 1. Enter Setup Mode 2. Tap the Top Rocker 4 times. The Status LED will quickly flash green/amber 3. Tap the Tap Rocker 4 times. The Status LED will flash green/amber 4 times to confirm the selection LED (Default) 1. Enter Setup Mode 2. Tap the Top Rocker 4 times. The Status LED will quickly flash green/amber 3. Tap the Top Rocker 5 times. The Status LED will flash green/red 4 times to confirm the selection CFL 1. Enter Setup Mode 2. Tap the Top Rocker 4 times. The Status LED will quickly flash green/amber 3. Tap the Tap Rocker 6 times. The Status LED will flash red/amber 4 times to confirm the selection MLV 1. Enter Setup Mode 2. Tap the Top Rocker 4 times. The Status LED will quickly flash green/amber 3. Tap the Tap Rocker 7 times. The Status LED will flash red/green 4 times to confirm the selection
SmartStart enabled devices can be added to a Z-Wave network by scanning the Z-Wave QR code on the top of the device, on the strap, or on the back of the unit box with a compatible Z-Wave controller that supports SmartStart inclusion. The device should be added automatically within 10 minutes of being switched on and in the network vicinity. The QR code label with DSK is located on the top of the device. If required, the PIN code is underlined on the label. The PIN code is also located on the front strap.
| Type | Value(s) |
|---|