ZOOZ
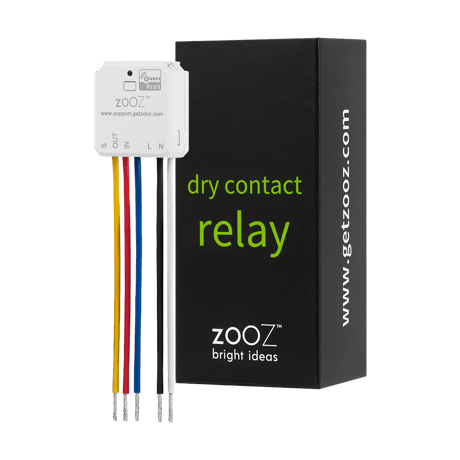
Dry Contact Relay
ZEN51 LR
Binary Switch DT
HW: 01 FW: 01.50
ZGM130S037HGN2 / ZGM130S037HGN1
7.15.4
0x027A (634)
N/A
0x0904 (2308)
ZC14-23090327
2023-09-08 10:59:28
N/A
Enhanced End Node 232
Always On Slave
On/off Z-Wave™ control for 120V and dry contact applications: great for lighting control or 120V load monitoring (sump pumps, motion lights)


1 - Led indicator load status
Led indicator load statusSize: 1 byte
Default: 1
Minimum: 0
Maximum: 1
Possible values
| From | To | Desription |
|---|---|---|
| 0 | 0 | Disable |
| 1 | 1 | Enable |
2 - Auto turn-off timer
Automatically turns the switch off after this many minutes. When the switch is turned on a timer is started that is the duration of this setting. When the timer expires, the switch is turned off.Size: 2 bytes
Default: 0
Minimum: 0
Maximum: 65535
Possible values
| From | To | Desription |
|---|---|---|
| 0 | 0 | timer disabled |
| 1 | 65535 | (minutes) timer enabled |
3 - Auto turn-on timer
Automatically turns the switch on after this many minutes. When the switch is turned off a timer is started that is the duration of this setting. When the timer expires, the switch is turned on.Size: 2 bytes
Default: 0
Minimum: 0
Maximum: 65535
Possible values
| From | To | Desription |
|---|---|---|
| 0 | 0 | timer disabled |
| 1 | 65535 | (minutes) timer enabled |
4 - Restores state after power failure
The state the switch should return to once power is restored after power failure.Size: 1 byte
Default: 2
Minimum: 0
Maximum: 2
Possible values
| From | To | Desription |
|---|---|---|
| 0 | 0 | output off |
| 1 | 1 | output on |
| 2 | 2 | output the state after power |
5 - Enable or Disable Scene
Enable/disable to send scene notification command when the switches external action.Size: 1 byte
Default: 1
Minimum: 0
Maximum: 1
Possible values
| From | To | Desription |
|---|---|---|
| 0 | 0 | disable |
| 1 | 1 | enable |
6 - Enable or Disable Output control
Enable or Disable Output control (disable LOAD ONLY, ON/OFF works ).Size: 1 byte
Default: 1
Minimum: 0
Maximum: 2
Possible values
| From | To | Desription |
|---|---|---|
| 0 | 0 | disable local button and External Switch control enable Z-Wave control (reports on hub ON/OFF ) |
| 1 | 1 | enable local button and External Switch control enable Z-Wave control |
| 2 | 2 | disable local button and External Switch control disable Z-Wave control (reports on hub ON/OFF) |
7 - External switch type
External switch typeSize: 1 byte
Default: 1
Minimum: 0
Maximum: 4
Possible values
| From | To | Desription |
|---|---|---|
| 0 | 0 | toggle switch (device changes status when switch changes status) |
| 1 | 1 | Momentary switch |
| 2 | 2 | Switch ON ->always ON. Switch OFF->always OFF |
| 3 | 3 | 3-way impulse control |
| 4 | 4 | Garage Mode |
8 - Association reports
Association reportsSize: 1 byte
Default: 1
Minimum: 0
Maximum: 1
Possible values
| From | To | Desription |
|---|---|---|
| 0 | 0 | Z-Wave control: Binary switch report Manual control: Basic report |
| 1 | 1 | Z-Wave control: Binary switch report Manual control: Binary switch report |
9 - Relay type behavior
Relay type behaviorSize: 1 byte
Default: 0
Minimum: 0
Maximum: 1
Possible values
| From | To | Desription |
|---|---|---|
| 0 | 0 | NO |
| 1 | 1 | NC |
10 - Timer for relay seconds or minutes
Timer for relay seconds or minutesSize: 1 byte
Default: 1
Minimum: 1
Maximum: 2
Possible values
| From | To | Desription |
|---|---|---|
| 1 | 1 | Minute |
| 2 | 2 | Second |
11 - Impulse time if parameter 7 is set to 3
Impulse time if parameter 7 is set to 3Size: 1 byte
Default: 10
Minimum: 2
Maximum: 200
Possible values
| From | To | Desription |
|---|---|---|
| 1 | 200 | seconds |
1. ADD DEVICE to your hub: Initiate inclusion (pairing) in the app (or web interface). Not sure how? Scan one of the QR codes below for step-by-step instructions or get in touch: www.support.getzooz.com 2. Finalize inclusion at the relay. Tap the Z-Wave™ button 3 times quickly if using traditional Z-Wave™ inclusion. The LED indicator will blink green to signal communication and turn green for 2 seconds if inclusion is successful or turn red for 2 seconds if the pairing attempt fails.
1. Bring your Z-Wave™ gateway (hub) close to the relay if possible 2. Put the Z-Wave hub into exclusion mode (not sure how to do that? [email protected]) 3. Click the Z-Wave button on the relay 3 times quickly (the LED indicator will start blinking green) 4. Your hub will confirm exclusion, the LED indicator on the relay will turn green for 2 seconds, and the device will disappear from your controller''s device list.
If your primary controller is missing or inoperable, you may need to reset the device to factory settings. To reset the relay, click the Z-Wave™ button twice and hold it for 15 seconds. The LED indicator will flash during the process and turn red for 3 seconds to confirm a successful reset.
The SmartStart QRCode is located on the back of the relay, next to the Z-Wave Plus logo.
| Type | Value(s) |
|---|