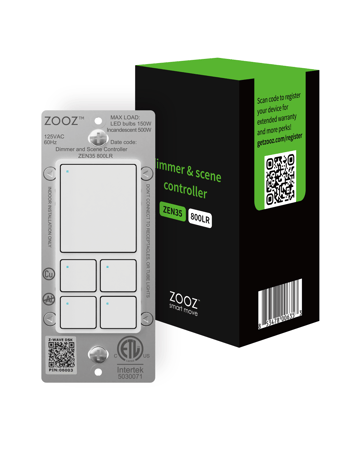
Zooz
Dimmer & Scene Controller
ZEN35 800LR
Multilevel Switch DT
HW: 01 FW: 01.00
EFR32ZG23A
7.19.3
0x027A (634)
0x7000 (28672)
0xA018 (40984)
ZC14-25030510
2025-03-26 11:44:32
N/A
Enhanced End Node 232
Always On End Node
Control a light with the main button and trigger up to 35 scenes or devices through remote control.


1 - LED Indicator Mode For Dimmer Button
Choose if you want the LED indicator to turn on when the dimmer (light) is on or off, or if you want it to remain on or off at all times.Size: 1 byte
Default: 0
Minimum: 0
Maximum: 3
Possible values
| From | To | Desription |
|---|---|---|
| 0 | 0 | LED on when dimmer off, LED off when dimmer on |
| 1 | 1 | LED on when dimmer on, LED off when dimmer off |
| 2 | 2 | LED always off |
| 3 | 3 | LED always on |
2 - LED Indicator Mode For Button 1
Choose if you want the LED indicator to turn on when Button 1 is on or off, or if you want it to remain on or off at all times.Size: 1 byte
Default: 0
Minimum: 0
Maximum: 3
Possible values
| From | To | Desription |
|---|---|---|
| 0 | 0 | LED on when button off, LED off when button on |
| 1 | 1 | LED on when button on, LED off when button off |
| 2 | 2 | LED always off |
| 3 | 3 | LED always on |
3 - LED Indicator Mode For Button 2
Choose if you want the LED indicator to turn on when Button 2 is on or off, or if you want it to remain on or off at all times.Size: 1 byte
Default: 0
Minimum: 0
Maximum: 3
Possible values
| From | To | Desription |
|---|---|---|
| 0 | 0 | LED on when button off, LED off when button on |
| 1 | 1 | LED on when button on, LED off when button off |
| 2 | 2 | LED always off |
| 3 | 3 | LED always on |
4 - LED Indicator Mode For Button 3
Choose if you want the LED indicator to turn on when Button 3 is on or off, or if you want it to remain on or off at all times.Size: 1 byte
Default: 0
Minimum: 0
Maximum: 3
Possible values
| From | To | Desription |
|---|---|---|
| 0 | 0 | LED on when button off, LED off when button on |
| 1 | 1 | LED on when button on, LED off when button off |
| 2 | 2 | LED always off |
| 3 | 3 | LED always on |
5 - LED Indicator Mode For Button 4
Choose if you want the LED indicator to turn on when Button 4 is on or off, or if you want it to remain on or off at all times.Size: 1 byte
Default: 0
Minimum: 0
Maximum: 3
Possible values
| From | To | Desription |
|---|---|---|
| 0 | 0 | LED on when button off, LED off when button on |
| 1 | 1 | LED on when button on, LED off when button off |
| 2 | 2 | LED always off |
| 3 | 3 | LED always on |
6 - LED Indicator Color For Dimmer Button
Choose the color of the dimmer button LED indicator. 0 - white, 1 - blue, 2 - green, 3 - red, 4 - magenta, 5 - yellow, 6 - cyan.Size: 1 byte
Default: 0
Minimum: 0
Maximum: 6
Possible values
| From | To | Desription |
|---|---|---|
| 0 | 0 | white |
| 1 | 1 | blue |
| 2 | 2 | green |
| 3 | 3 | red |
| 4 | 4 | magenta |
| 5 | 5 | yellow |
| 6 | 6 | cyan |
7 - LED Indicator Color For Button 1
Choose the color of button 1 LED indicator. 0 - white, 1 - blue, 2 - green, 3 - red, 4 - magenta, 5 - yellow, 6 - cyan.Size: 1 byte
Default: 0
Minimum: 0
Maximum: 6
Possible values
| From | To | Desription |
|---|---|---|
| 0 | 0 | white |
| 1 | 1 | blue |
| 2 | 2 | green |
| 3 | 3 | red |
| 4 | 4 | magenta |
| 5 | 5 | yellow |
| 6 | 6 | cyan |
8 - LED Indicator Color For Button 2
Choose the color of button 2 LED indicator. 0 - white, 1 - blue, 2 - green, 3 - red, 4 - magenta, 5 - yellow, 6 - cyan.Size: 1 byte
Default: 0
Minimum: 0
Maximum: 6
Possible values
| From | To | Desription |
|---|---|---|
| 0 | 0 | white |
| 1 | 1 | blue |
| 2 | 2 | green |
| 3 | 3 | red |
| 4 | 4 | magenta |
| 5 | 5 | yellow |
| 6 | 6 | cyan |
9 - LED Indicator Color For Button 3
Choose the color of button 3 LED indicator. 0 - white, 1 - blue, 2 - green, 3 - red, 4 - magenta, 5 - yellow, 6 - cyan.Size: 1 byte
Default: 0
Minimum: 0
Maximum: 6
Possible values
| From | To | Desription |
|---|---|---|
| 0 | 0 | white |
| 1 | 1 | blue |
| 2 | 2 | green |
| 3 | 3 | red |
| 4 | 4 | magenta |
| 5 | 5 | yellow |
| 6 | 6 | cyan |
10 - LED Indicator Color For Button 4
Choose the color of button 4 LED indicator. 0 - white, 1 - blue, 2 - green, 3 - red, 4 - magenta, 5 - yellow, 6 - cyan.Size: 1 byte
Default: 0
Minimum: 0
Maximum: 6
Possible values
| From | To | Desription |
|---|---|---|
| 0 | 0 | white |
| 1 | 1 | blue |
| 2 | 2 | green |
| 3 | 3 | red |
| 4 | 4 | magenta |
| 5 | 5 | yellow |
| 6 | 6 | cyan |
11 - LED Indicator Brightness For Dimmer Button
Choose the dimmer button LED indicator's brightness level. 0 - bright (100%); 1 - medium (60%); 2 - low (30%).Size: 1 byte
Default: 1
Minimum: 0
Maximum: 2
Possible values
| From | To | Desription |
|---|---|---|
| 0 | 0 | bright (100%) |
| 1 | 1 | medium (60%) |
| 2 | 2 | low (30%) |
12 - LED Indicator Brightness For Button 1
Choose button 1 LED indicator's brightness level. 0 - bright (100%); 1 - medium (60%); 2 - low (30%).Size: 1 byte
Default: 1
Minimum: 0
Maximum: 2
Possible values
| From | To | Desription |
|---|---|---|
| 0 | 0 | bright (100%) |
| 1 | 1 | medium (60%) |
| 2 | 2 | low (30%) |
13 - LED Indicator Brightness For Button 2
Choose button 2 LED indicator's brightness level. 0 - bright (100%); 1 - medium (60%); 2 - low (30%).Size: 1 byte
Default: 1
Minimum: 0
Maximum: 2
Possible values
| From | To | Desription |
|---|---|---|
| 0 | 0 | bright (100%) |
| 1 | 1 | medium (60%) |
| 2 | 2 | low (30%) |
14 - LED Indicator Brightness For Button 3
Choose button 3 LED indicator's brightness level. 0 - bright (100%); 1 - medium (60%); 2 - low (30%).Size: 1 byte
Default: 1
Minimum: 0
Maximum: 2
Possible values
| From | To | Desription |
|---|---|---|
| 0 | 0 | bright (100%) |
| 1 | 1 | medium (60%) |
| 2 | 2 | low (30%) |
15 - LED Indicator Brightness For Button 4
Choose button 4 LED indicator's brightness level. 0 - bright (100%); 1 - medium (60%); 2 - low (30%).Size: 1 byte
Default: 1
Minimum: 0
Maximum: 2
Possible values
| From | To | Desription |
|---|---|---|
| 0 | 0 | bright (100%) |
| 1 | 1 | medium (60%) |
| 2 | 2 | low (30%) |
16 - Auto Turn-Off Timer For Dimmer
Use this parameter to enable or disable the auto turn-off timer function (the time after which you want the dimmer to automatically turn off once it has been turned on).Size: 4 bytes
Default: 0
Minimum: 0
Maximum: 65535
Possible values
| From | To | Desription |
|---|---|---|
| 0 | 0 | Timer disabled |
| 1 | 65535 | minutes |
17 - Auto Turn-On Timer For Dimmer
Use this parameter to enable or disable the auto turn-on timer function (the time after which you want the dimmer to automatically turn on once it has been turned off).Size: 4 bytes
Default: 0
Minimum: 0
Maximum: 65535
Possible values
| From | To | Desription |
|---|---|---|
| 0 | 0 | Timer disabled |
| 1 | 65535 | minutes |
18 - On/Off Dimmer Status After Power Failure
Set the on off status for the dimmer after power failure.Size: 1 byte
Default: 2
Minimum: 0
Maximum: 2
Possible values
| From | To | Desription |
|---|---|---|
| 0 | 0 | always off once restored |
| 1 | 1 | always on once restored |
| 2 | 2 | remembers and restores status |
19 - Load Control (Smart Bulb Mode)
Enable or disable physical and Z-Wave on/off and dimming control. Disable both physical button and Z-Wave control for smart bulbs (use central scene triggers). Scene control and other functionality will still be available from the button.Size: 1 byte
Default: 1
Minimum: 0
Maximum: 2
Possible values
| From | To | Desription |
|---|---|---|
| 0 | 0 | Enable physical control (relay enabled) |
| 1 | 1 | Enable physical and Z-Wave control (relay enabled) |
| 2 | 2 | Disable physical and Z-Wave control (relay disabled / Smart Bulb Mode) |
20 - Disabled Load Behavior
Set reporting behavior for disabled physical control of the load connected to the dimmer (smart bulb mode). 0-switch reports on/off and brightness level status and change LED indicator state even if physical and Z-Wave control is disabled (default). 1-switch doesn't report on/off or brightness level status or change LED indicator state when physical (and Z-Wave) control is disabled.Size: 1 byte
Default: 0
Minimum: 0
Maximum: 1
Possible values
| From | To | Desription |
|---|---|---|
| 0 | 0 | Reports status / changes LED when control disabled |
| 1 | 1 | Doesn't report status / change LED when control disabled |
21 - Physical Ramp Rate ON
Adjust the ramp rate ON for your dimmer when the button is pressed (physical ramp rate on). Values correspond to the number of seconds it takes for the dimmer to reach full brightness when operated manually.Size: 1 byte
Default: 0
Minimum: 0
Maximum: 99
Possible values
| From | To | Desription |
|---|---|---|
| 0 | 0 | instant on |
| 1 | 99 | seconds |
22 - Physical Ramp Rate OFF
Adjust the ramp rate OFF for your dimmer when the button is pressed (physical ramp rate off). Values correspond to the number of seconds it takes for the dimmer to completely turn off when operated manually.Size: 1 byte
Default: 0
Minimum: 0
Maximum: 99
Possible values
| From | To | Desription |
|---|---|---|
| 0 | 0 | instant off |
| 1 | 99 | seconds |
23 - Physical Dimming Speed
Set the time it takes to get from 0% to 100% brightness when pressing and holding the button (physical dimming). The number entered as value corresponds to the number of seconds.Size: 1 byte
Default: 5
Minimum: 1
Maximum: 99
Possible values
| From | To | Desription |
|---|---|---|
| 1 | 99 | seconds |
24 - Z-Wave Ramp Rate ON
Adjust the ramp rate ON for your dimmer when controlled with Z-Wave for a smooth fade-in effect (in seconds). Values correspond to the number of seconds it takes for the dimmer to reach full brightness when controlled with Z-Wave commands. Use value 255 to match the physical settings in parameter 21.Size: 1 byte
Default: 255
Minimum: 0
Maximum: 255
Possible values
| From | To | Desription |
|---|---|---|
| 0 | 0 | instant on |
| 1 | 99 | seconds |
| 255 | 255 | match physical (param 21) |
25 - Z-Wave Ramp Rate OFF
Adjust the ramp rate OFF for your dimmer when controlled with Z-Wave for a smooth fade-out effect (in seconds). Values correspond to the number of seconds it takes for the dimmer to completely turn off when controlled with Z-Wave commands. Use value 255 to match the physical settings in parameter 22.Size: 1 byte
Default: 255
Minimum: 0
Maximum: 255
Possible values
| From | To | Desription |
|---|---|---|
| 0 | 0 | instant off |
| 1 | 99 | seconds |
| 255 | 255 | match physical (param 22) |
26 - Remote Z-Wave Dimming Duration
Set the time it takes to get from 0% to 100% brightness on dimmers and smart bulbs directly associated with your dimmer in Groups 3 and 4 when pressing and holding the paddle (physical dimming) on your dimmer. The number entered as value corresponds to the number of seconds.Size: 1 byte
Default: 5
Minimum: 1
Maximum: 99
Possible values
| From | To | Desription |
|---|---|---|
| 1 | 99 | seconds |
27 - Minimum Brightness
Set the minimum brightness level (in %) for your dimmer. You won't be able to dim the light below the set value.Size: 1 byte
Default: 1
Minimum: 1
Maximum: 99
Possible values
| From | To | Desription |
|---|---|---|
| 1 | 99 | percent |
28 - Maximum Brightness
Set the maximum brightness level (in %) for your dimmer. You won't be able to add brightness to the light beyond the set value. Note: if Parameter 29 is set to value 0, Parameter 28 is automatically disabled.Size: 1 byte
Default: 99
Minimum: 1
Maximum: 99
Possible values
| From | To | Desription |
|---|---|---|
| 1 | 99 | percent |
29 - Dimmer Button Double Tap
Choose what you'd like the dimmer to do when you double-tap the dimmer button. This is a different setting than scene control so remember to program only one of the settings to avoid logical conflict.Size: 1 byte
Default: 0
Minimum: 0
Maximum: 3
Possible values
| From | To | Desription |
|---|---|---|
| 0 | 0 | on to full brightness |
| 1 | 1 | on to the custom brightness (from param 31) |
| 2 | 2 | on to max brightness (from param 28) |
| 3 | 3 | double tap disabled |
30 - Dimmer Button Single Tap
Choose what you'd like the dimmer to do when you tap the dimmer button once. This is a different setting than scene control so remember to program only one of the settings to avoid logical conflict.Size: 1 byte
Default: 0
Minimum: 0
Maximum: 3
Possible values
| From | To | Desription |
|---|---|---|
| 0 | 0 | on to the last brightness level |
| 1 | 1 | on to the custom brightness (from param 31) |
| 2 | 2 | on to max brightness (from param 28) |
| 3 | 3 | on to full brightness |
31 - Physical Custom Brightness On
Set the custom brightness level (instead of the last set brightness level) you want the dimmer to come on to when you single tap or double tap the dimmer button or connected 3-way switch (see parameters 29 and 30).Size: 1 byte
Default: 0
Minimum: 0
Maximum: 99
Possible values
| From | To | Desription |
|---|---|---|
| 0 | 0 | last brightness level |
| 1 | 99 | % brightness level |
32 - 3-Way Switch Type
Choose the type of 3-way switch you want to use with this dimmer in a 3-way set-up. Values: 0-regular mechanical 3-way on/off switch, use the connected 3-way switch to turn the light off or on to the last brightness level, dimming only available from the Zooz Z-Wave dimmer and from the hub (or through voice control if smart speaker is integrated with your Z-Wave hub). 1-regular mechanical 3-way on/off switch, tap the paddles once to change state (light on or off), tap the paddles twice quickly to turn light on to full brightness, tap the paddles quickly 3 times to enable a dimming sequence (the light will start dimming up and down in a loop) and tap the switch again to set the selected brightness level. 2-momentary switch, click once to change status (light on or off), click twice quickly to turn light on to full brightness, press and hold to adjust brightness (dim up / dim down in sequence). 3-momentary switch, click once to change status (light on or off), click twice quickly to turn light on to full brightness, press and hold to adjust brightness (dim up / dim down in sequence but always reduce brightness after double click).Size: 1 byte
Default: 0
Minimum: 0
Maximum: 3
Possible values
| From | To | Desription |
|---|---|---|
| 0 | 0 | Toggle on/off switch (regular mechanical 3-way, see desc.) |
| 1 | 1 | Toggle switch with dimming mode (regular mechanical 3-way, see desc.) |
| 2 | 2 | Momentary switch (ZAC99) (see desc.) |
| 3 | 3 | Momentary switch (ZAC99) with smart sequence (see desc.) |
33 - Multilevel Dimming Reports
Choose how you'd like the dimmer to report when the dimmer button is tapped and held and physical / Z-Wave control is enabled or disabled. See parameter 19 (smart bulb mode) for details.Size: 1 byte
Default: 2
Minimum: 0
Maximum: 2
Possible values
| From | To | Desription |
|---|---|---|
| 0 | 0 | Reports each brightness level if control disabled (reports final level if enabled) |
| 1 | 1 | Always reports final brightness level only (Z-Wave multilevel reports, physical basic reports) |
| 2 | 2 | Reports each brightness level if control disabled (reports final level if enabled), all multilevel reports |
34 - Disable Button Programming
Enable or disable programming functionality on the dimmer button. If this setting is disabled, then inclusion, exclusion, smart bulb mode no longer work when the dimmer button is activated (factory reset and scene control will still work) - that means you can now use triple-tap triggers on the dimmer for scenes and remote control of other devices.Size: 1 byte
Default: 0
Minimum: 0
Maximum: 1
Possible values
| From | To | Desription |
|---|---|---|
| 0 | 0 | programming enabled |
| 1 | 1 | programming disabled |
35 - Association Reports
Choose which physical and Z-Wave triggers should prompt the dimmer to send a status change report to the associated devices. See values for details.Size: 1 byte
Default: 15
Minimum: 0
Maximum: 15
Possible values
| From | To | Desription |
|---|---|---|
| 0 | 0 | none |
| 1 | 1 | physical tap on button only |
| 2 | 2 | physical tap on connected 3-way switch only |
| 3 | 3 | physical tap on button or connected 3-way switch |
| 4 | 4 | Z-Wave command from hub |
| 5 | 5 | physical tap on button or Z-Wave command from hub |
| 6 | 6 | physical tap on connected 3-way switch or Z-Wave command from hub |
| 7 | 7 | physical tap on button / connected 3-way switch or Z-Wave command from hub |
| 8 | 8 | timer only |
| 9 | 9 | physical tap on button or timer |
| 10 | 10 | physical tap on connected 3-way switch or timer |
| 11 | 11 | physical tap on button / connected 3-way switch or timer |
| 12 | 12 | Z-Wave command from hub or timer |
| 13 | 13 | physical tap on button, Z-Wave command from hub, or timer |
| 14 | 14 | physical tap on button / connected 3-way switch, Z-Wave command from hub, or timer |
| 15 | 15 | all of the above |
36 - Dimmer Button Scene Control
Enable or disable scene control functionality on the dimmer button for quick multi tap triggers.Size: 1 byte
Default: 1
Minimum: 0
Maximum: 1
Possible values
| From | To | Desription |
|---|---|---|
| 0 | 0 | scene control disabled |
| 1 | 1 | scene control enabled |
37 - Scene Control From Remote 3-Way Switch
Enable scene control functionality from the momentary switch connected to ZEN35 in a 3-way installation. If enabled, you will be able to trigger double tap and triple tap scenes from the Zooz smart dimmer AND the momentary switch connected to it in a 3-way set-up.Size: 1 byte
Default: 1
Minimum: 0
Maximum: 1
Possible values
| From | To | Desription |
|---|---|---|
| 0 | 0 | scene control commands from the remote 3-way switch disabled |
| 1 | 1 | scene control commands from the remote 3-way switch enabled |
38 - Disable LED Indicator Flash On Setting Change
Enable/disable LED indicator for setting changes. Choose if you want the LED indicators to flash whenever a parameter (settings) is adjusted on the device to confirm the change. Disable this feature if you're using the LED indicators in automations or prefer no visual confirmation.Size: 1 byte
Default: 0
Minimum: 0
Maximum: 1
Possible values
| From | To | Desription |
|---|---|---|
| 0 | 0 | LED indicator flashes to confirm a setting change |
| 1 | 1 | LED indicator doesn't flash if a setting is changed |
39 - Disable LED Indicator Flash On Button Press
Choose if the LED should flash whenever the corresponding button is pressed (0) or disable this feature (1). Disable this feature if you're using the LED indicators in automations.Size: 1 byte
Default: 0
Minimum: 0
Maximum: 1
Possible values
| From | To | Desription |
|---|---|---|
| 0 | 0 | LED indicator flashes when button is pressed |
| 1 | 1 | LED indicator doesn't flash when button is pressed |
40 - On Off Switch Mode
Convert the dimmer to an on off switch. When enabled, the dimmer will behave as a switch without the ability to dim. All ramp rates will be set to instant ON/OFF and the brightness level will locked at 99%.Size: 1 byte
Default: 0
Minimum: 0
Maximum: 1
Possible values
| From | To | Desription |
|---|---|---|
| 0 | 0 | disabled (Dimmer mode) |
| 1 | 1 | enabled (On/Off Switch mode) |
41 - Basic Set Custom Brightness On
Set the custom brightness level (or leave the last brightness level) for for Basic Set ON commands when the ZEN35 is triggered by another device in direct association.Size: 1 byte
Default: 0
Minimum: 0
Maximum: 99
Possible values
| From | To | Desription |
|---|---|---|
| 0 | 0 | last brightness level |
| 1 | 99 | % brightness level |
1. Initiate inclusion (pairing) in the app (or web interface). 2. TAP THE MAIN SWITCH BUTTON 3 TIMES QUICKLY if using traditional Z-Wave inclusion. 3. The LED indicator will blink blue to signal communication and turn green for 3 seconds if inclusion is successful or turn red for 3 seconds if the pairing attempt fails.
1. Bring your Z-Wave gateway (hub) close to the switch if possible 2. Put the Z-Wave hub into exclusion mode (not sure how to do that? [email protected]) 3. Tap the main switch button 3 times quickly (the LED indicator will start blinking blue) 4. Your hub will confirm exclusion, the LED indicator on the switch will turn green for 3 seconds, and the device will disappear from your controller''s device list reset
If your primary controller is missing or inoperable, you may need to reset the device to factory settings. To reset the switch, press and hold the switch button for 20 seconds until the LED indicator turns solid red. Release the button, and immediately after, tap remote button 1 once to complete the reset. The LED indicators on all buttons will flash red and cycle through colors for a successful reset.
SCAN THE QR CODE / ENTER THE 5-DIGIT DSK if using the new SmartStart method. [a visual arrow pointing to the QR code on the switch]
| Type | Value(s) |
|---|